Today’s the day! The first time I’ve baked this much bread in both variety and volume in a single day.
GOAL:
8 Sourdough Batard and Boule loaves
24 Sourdough Croissants
12 Pain Au Chocolat sourdough croissants
10 sourdough Baguettes
This is going to be quite the undertaking. Not only am I trying to juggle the various logistics of all the bakes (with all my timers going for the many moving parts). I’m also a bit worried about the physical nature. I’m not on my feet as much as I will be today. I’m not sure about how my ankle will hold up (the one with the plates and screws from my motorcycle accident).
Guess there is only one way to find out! Go for it!
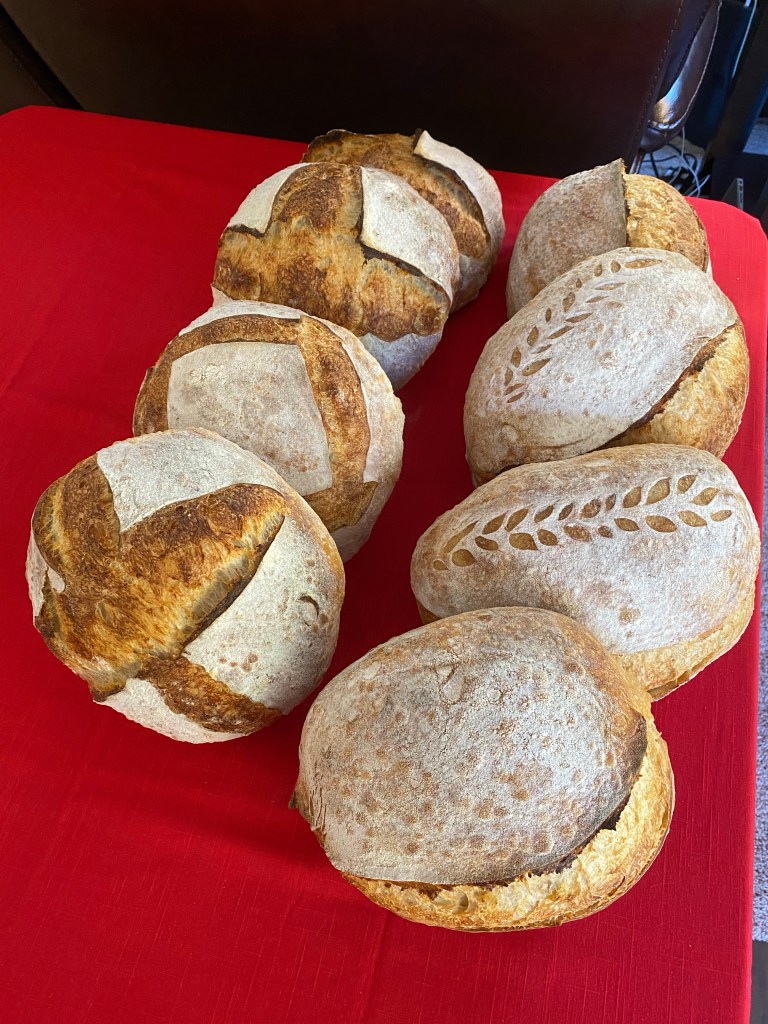
My loaves are baking and coming out nicely. I’ve been pleased so far with how they appear to be coming out.
First two batches of loaves
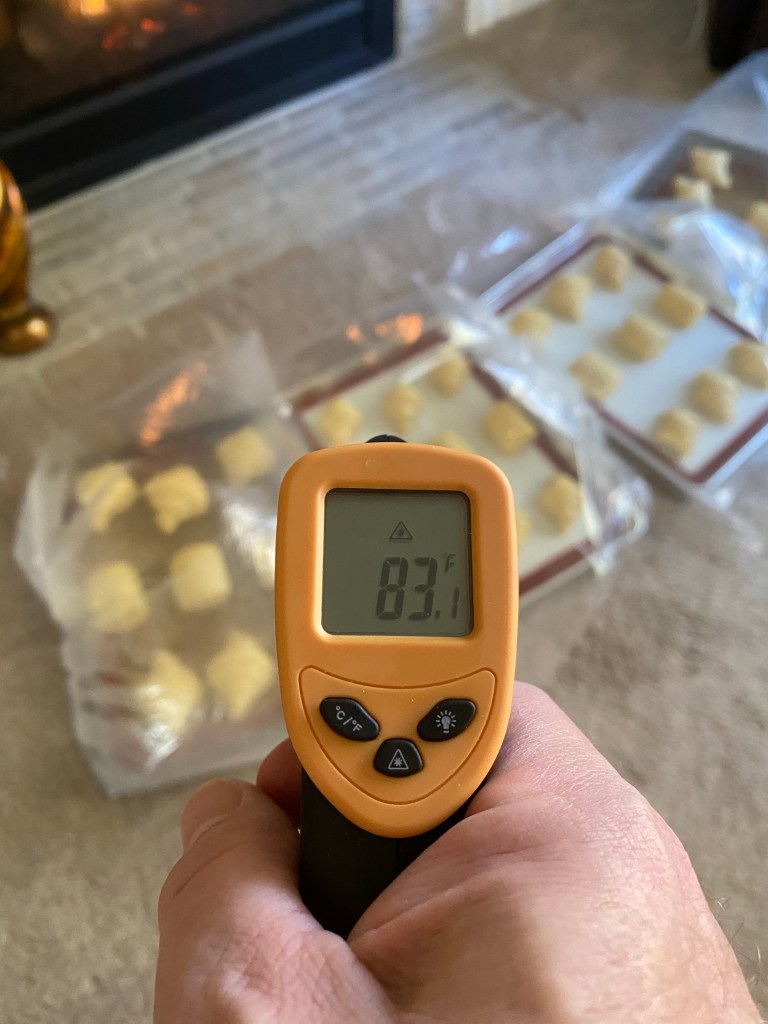
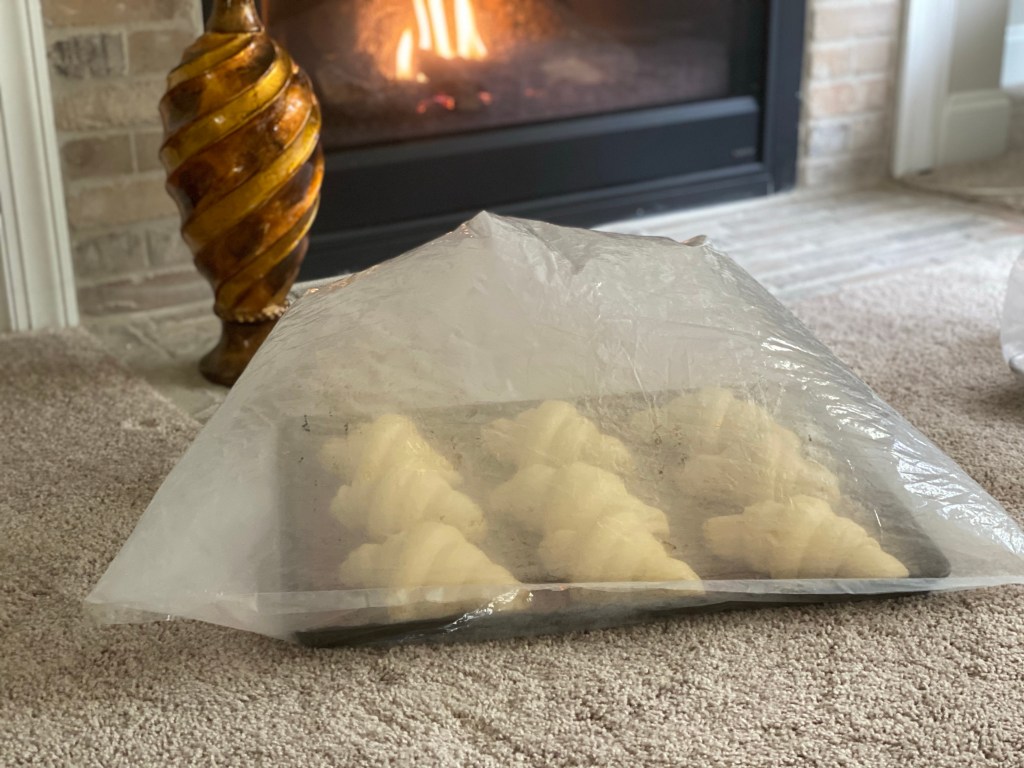
My 36 sourdough croissants and Pain Au Chocolat are proving by the fire. I’m trying to be patient and leave them be…
Proving the croissants by the fire
I’m know that 82°F for a number of hours is ideal. I’ve never been brave enough to go 6+ hours. I’ll most likely go 4.5-5 hours. I rotate them about hourly to maintain temperature.
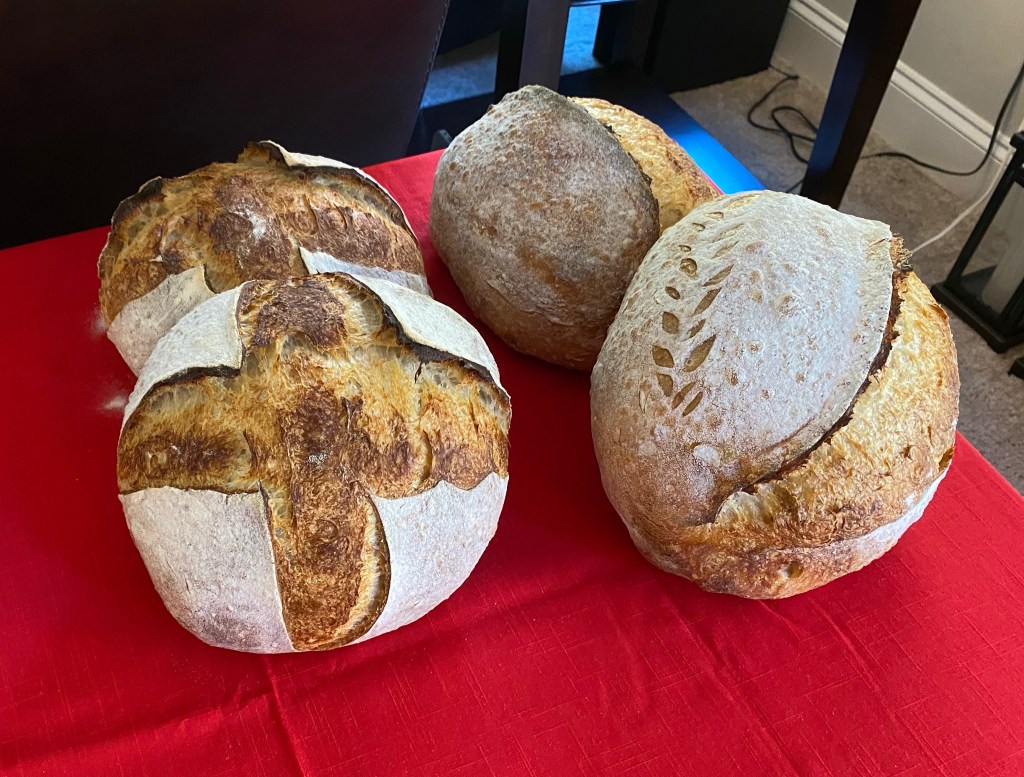
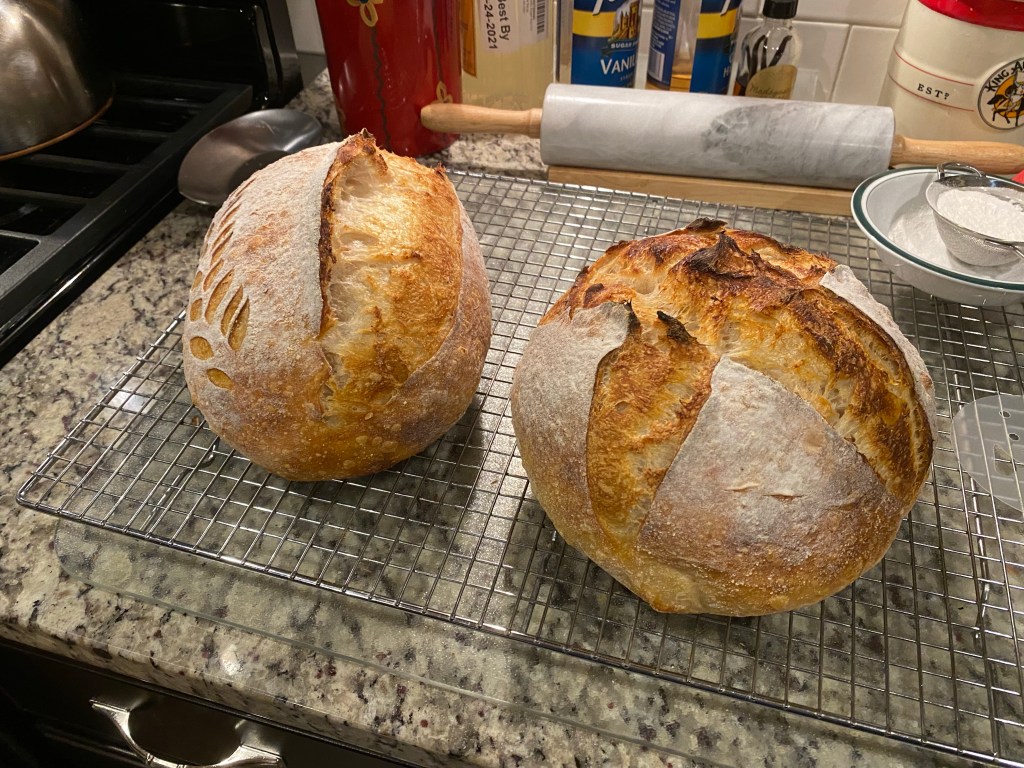
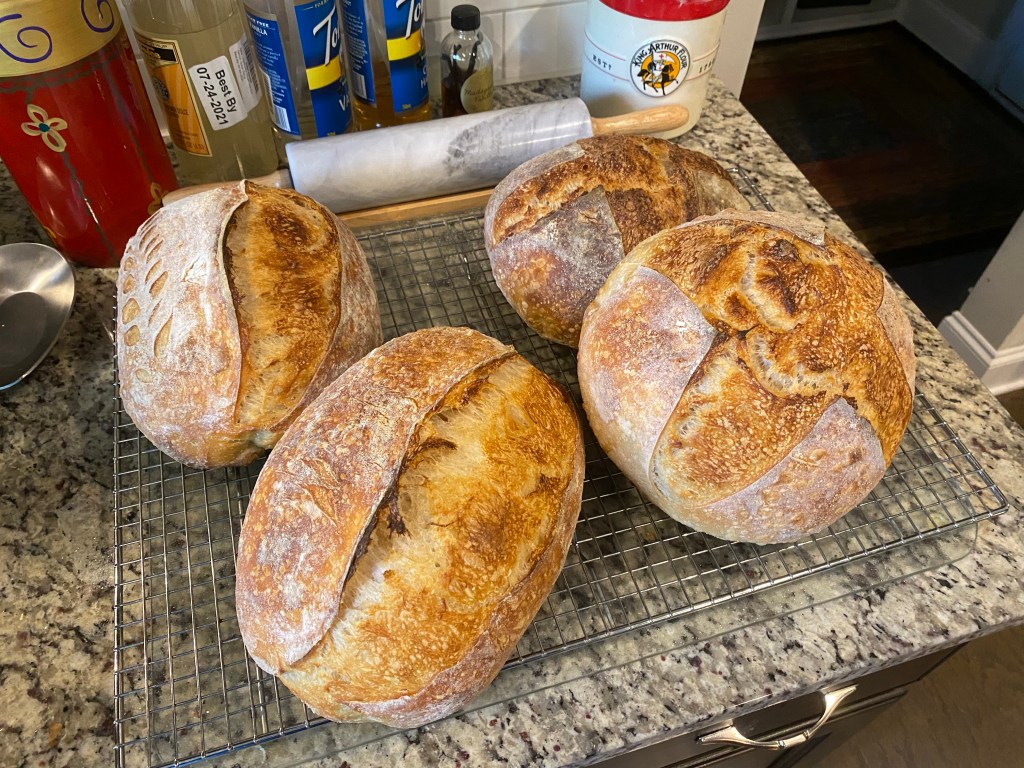
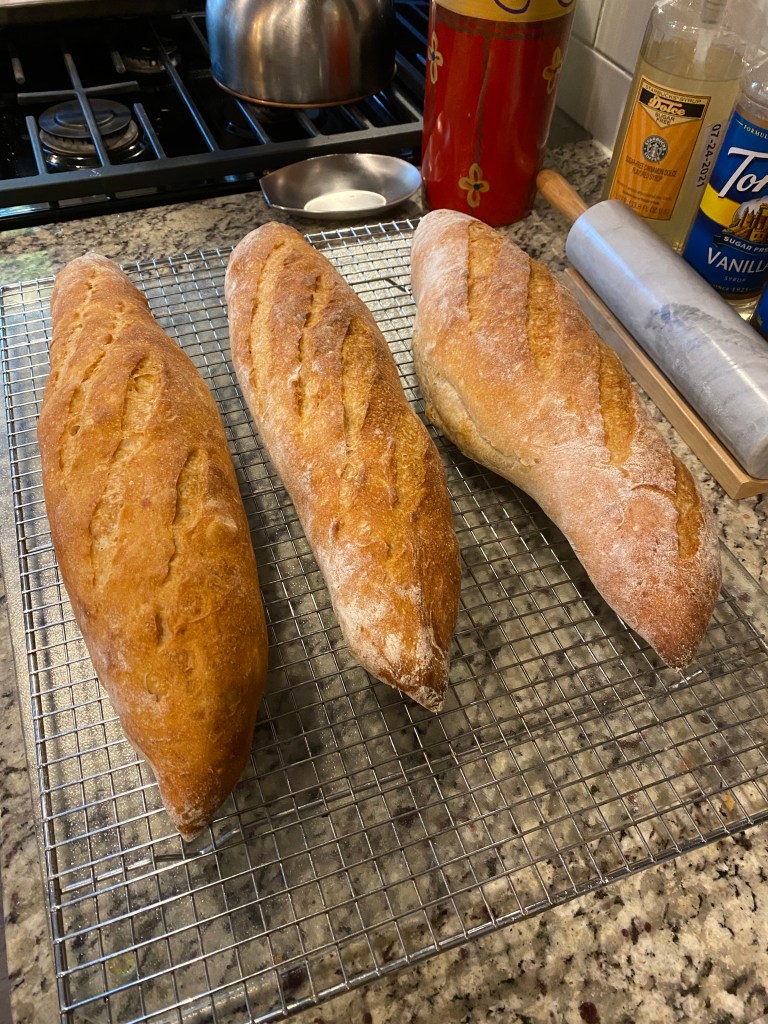
The sourdough bread loaves came out great! I think I had a slashing error on my 3rd batch going deeper rather than at a more shallow angle under. Overall I’m very pleased with the results.
Sourdough loaves baked
My proving the croissants on the carpet in front of my fireplace was OK. given the other things I’ve been distracted with I ended up having them get too hot. Result… butter melting out. Ouch! I’m hoping that they don’t suffer too badly as a result.
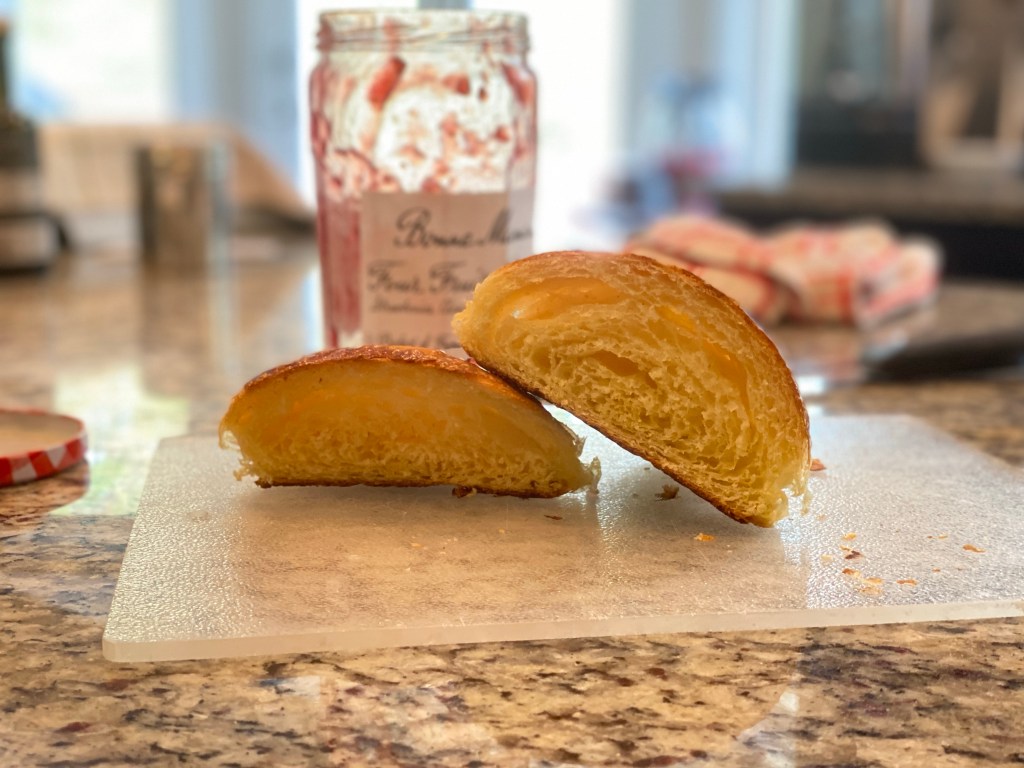
I did cut into one to examine the crumb structure. Then, having cut it open, I decided to taste test it as well… Ha!
Croissants cross section sample
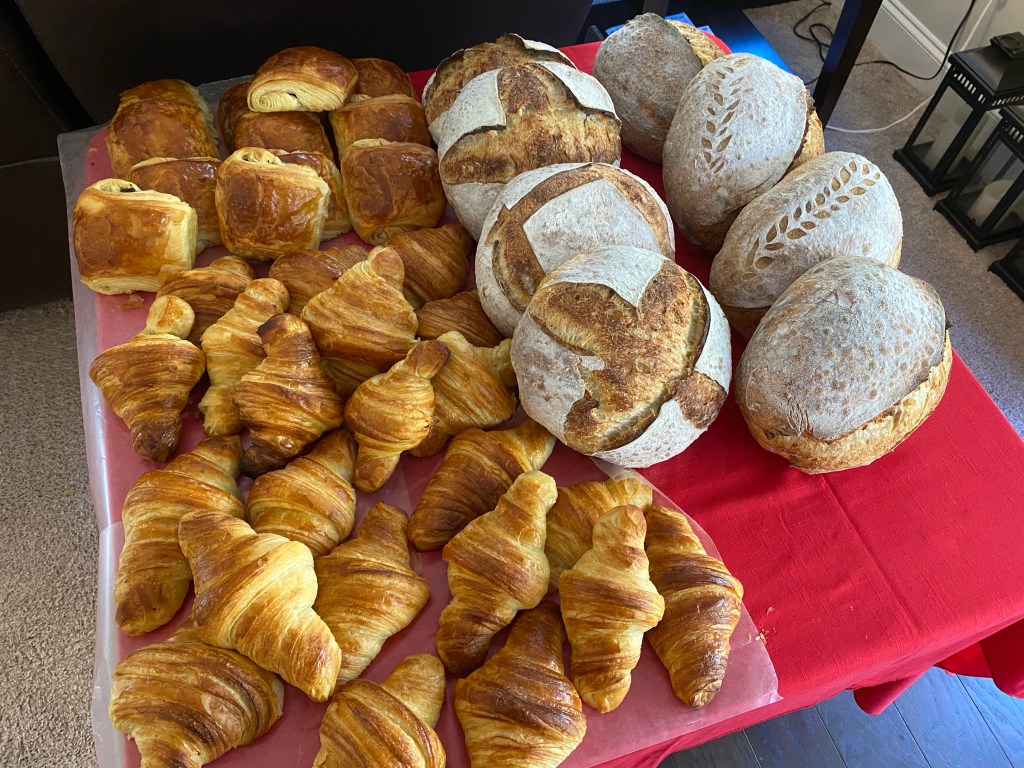
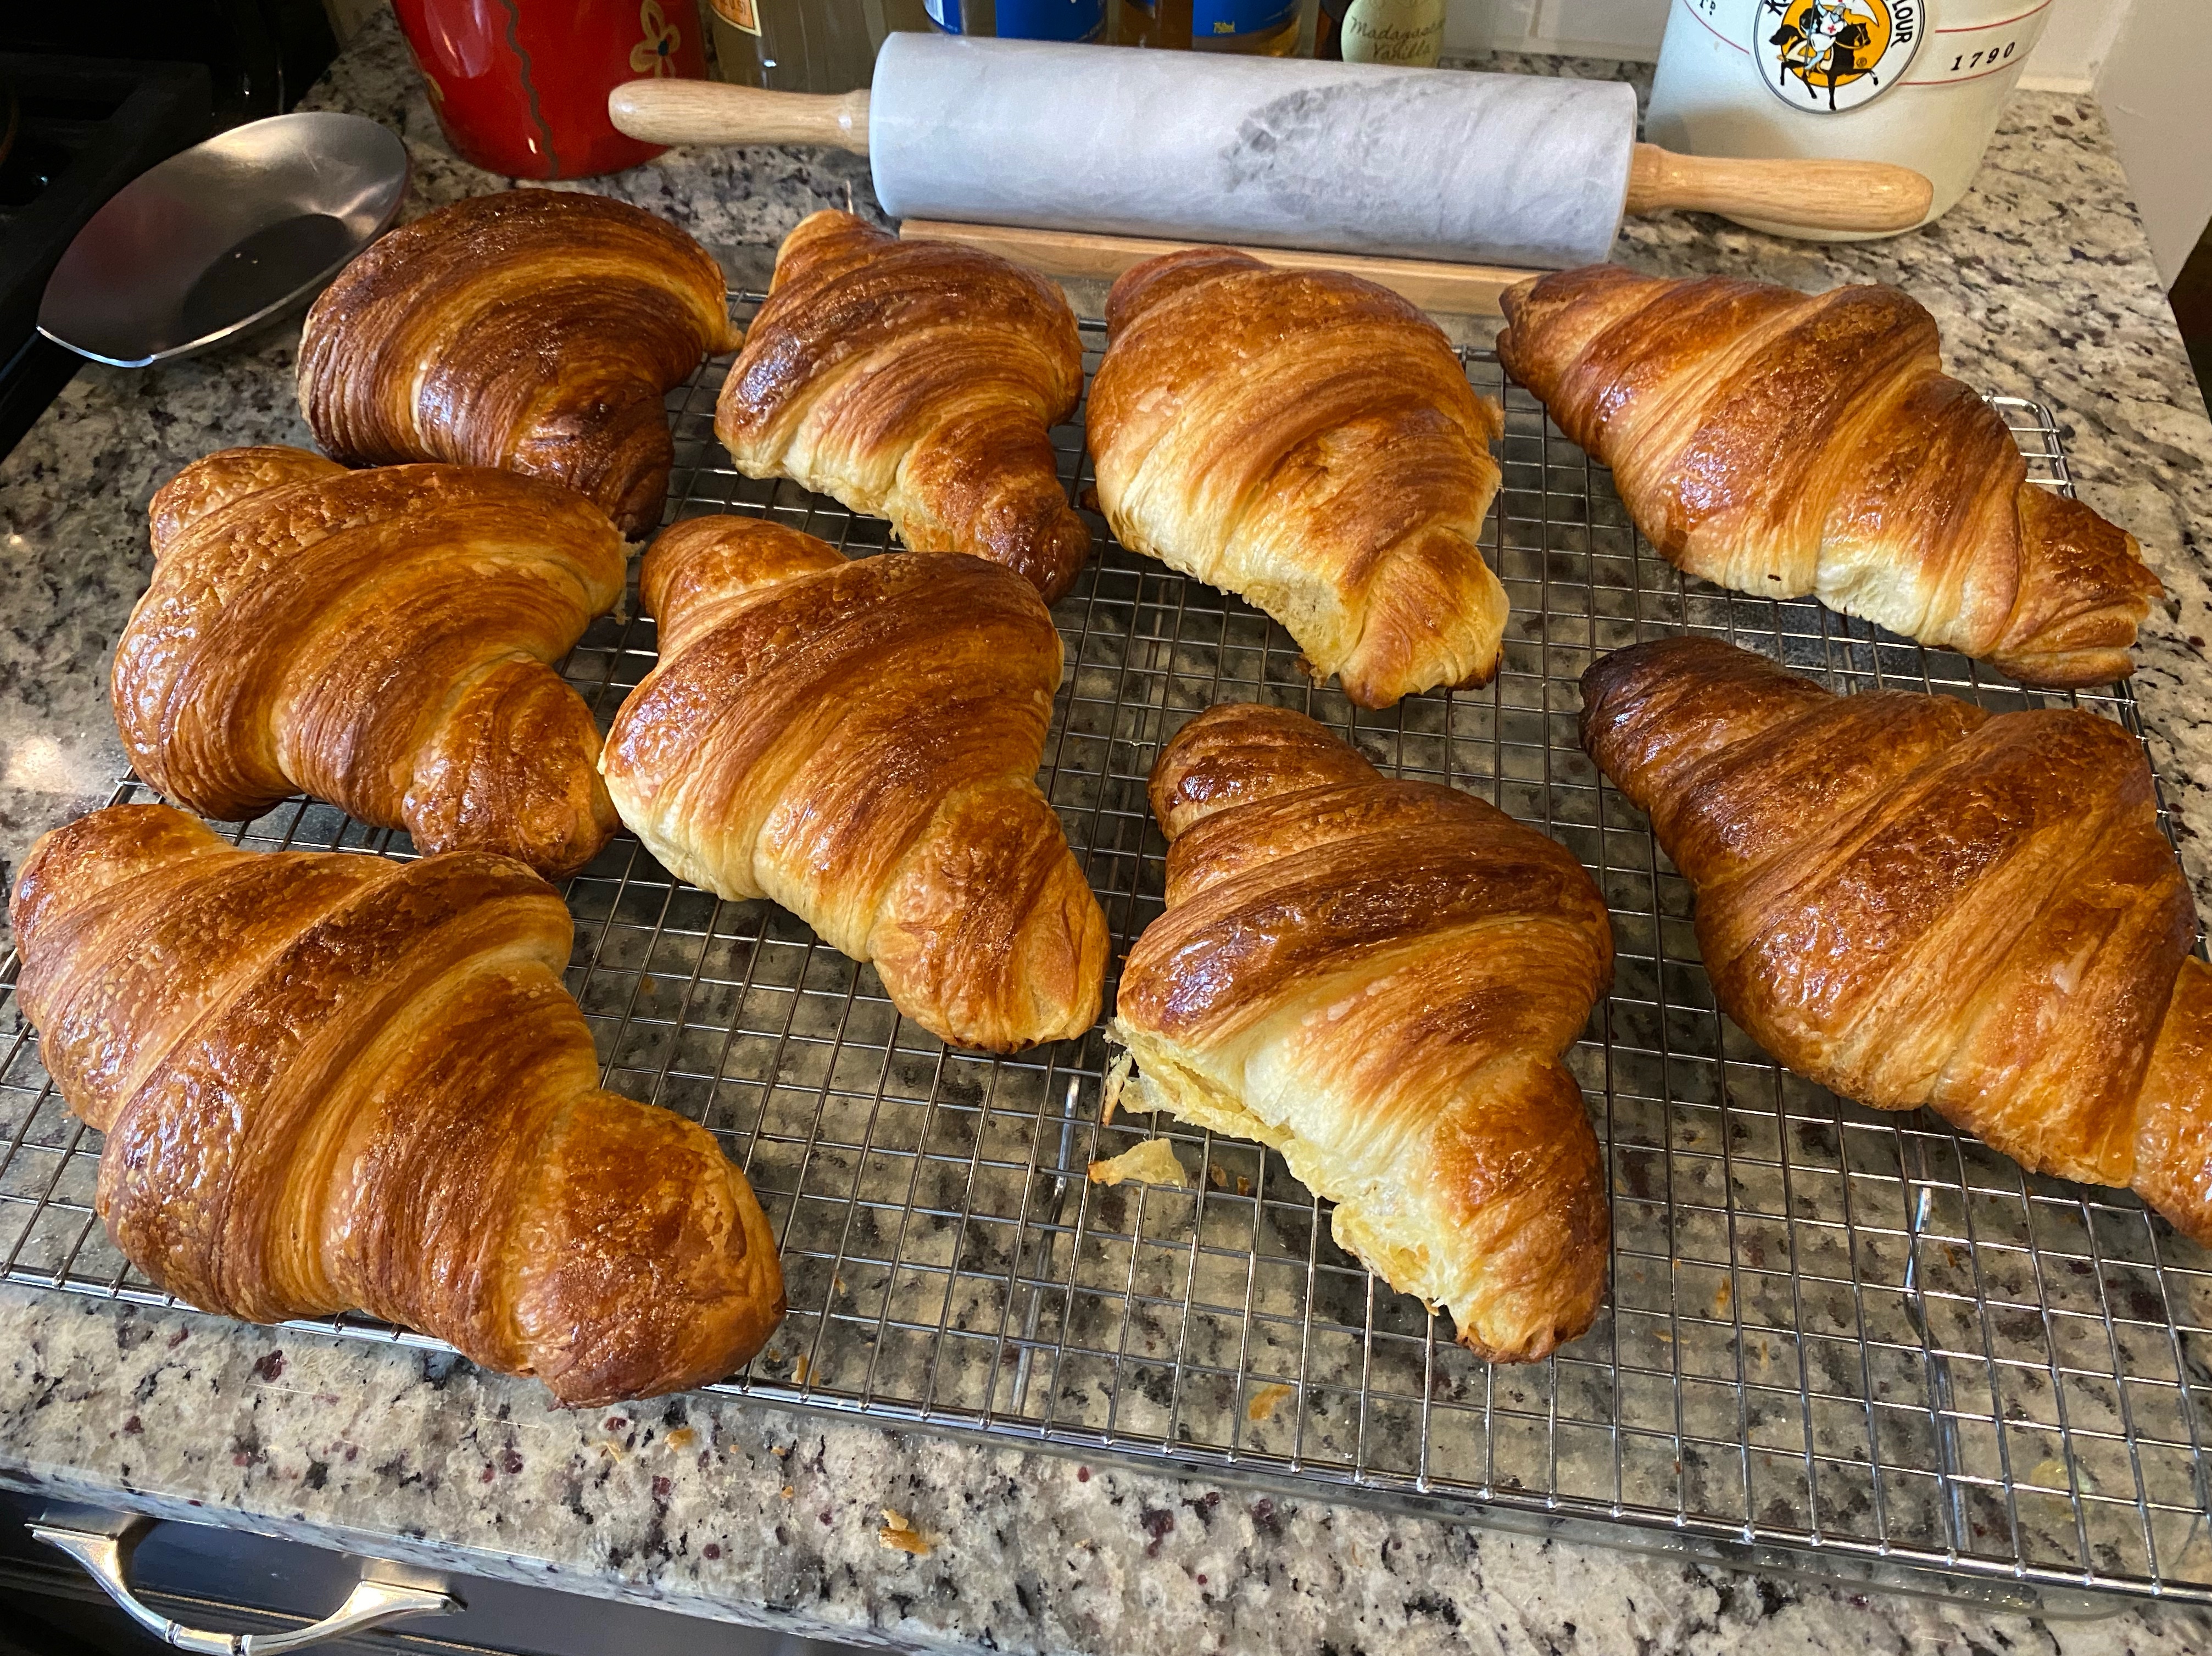
My progress by 1pm has resulted in my having the bread loaves, croissants and Pain Au Chocolat completed
Loaves, croissants and Pain Au Chocolat cooling
My last portion of my bake is the baguettes. They’re coming along nicely. I’m glad I practiced first and learned things. For instance, my Poolish and Leaven were awesome this morning! within 3 hours my Leaven had TRIPLED in size (unheard of!) and my Poolish almost 4X. And this was at the same time!
Leaven and Poolish
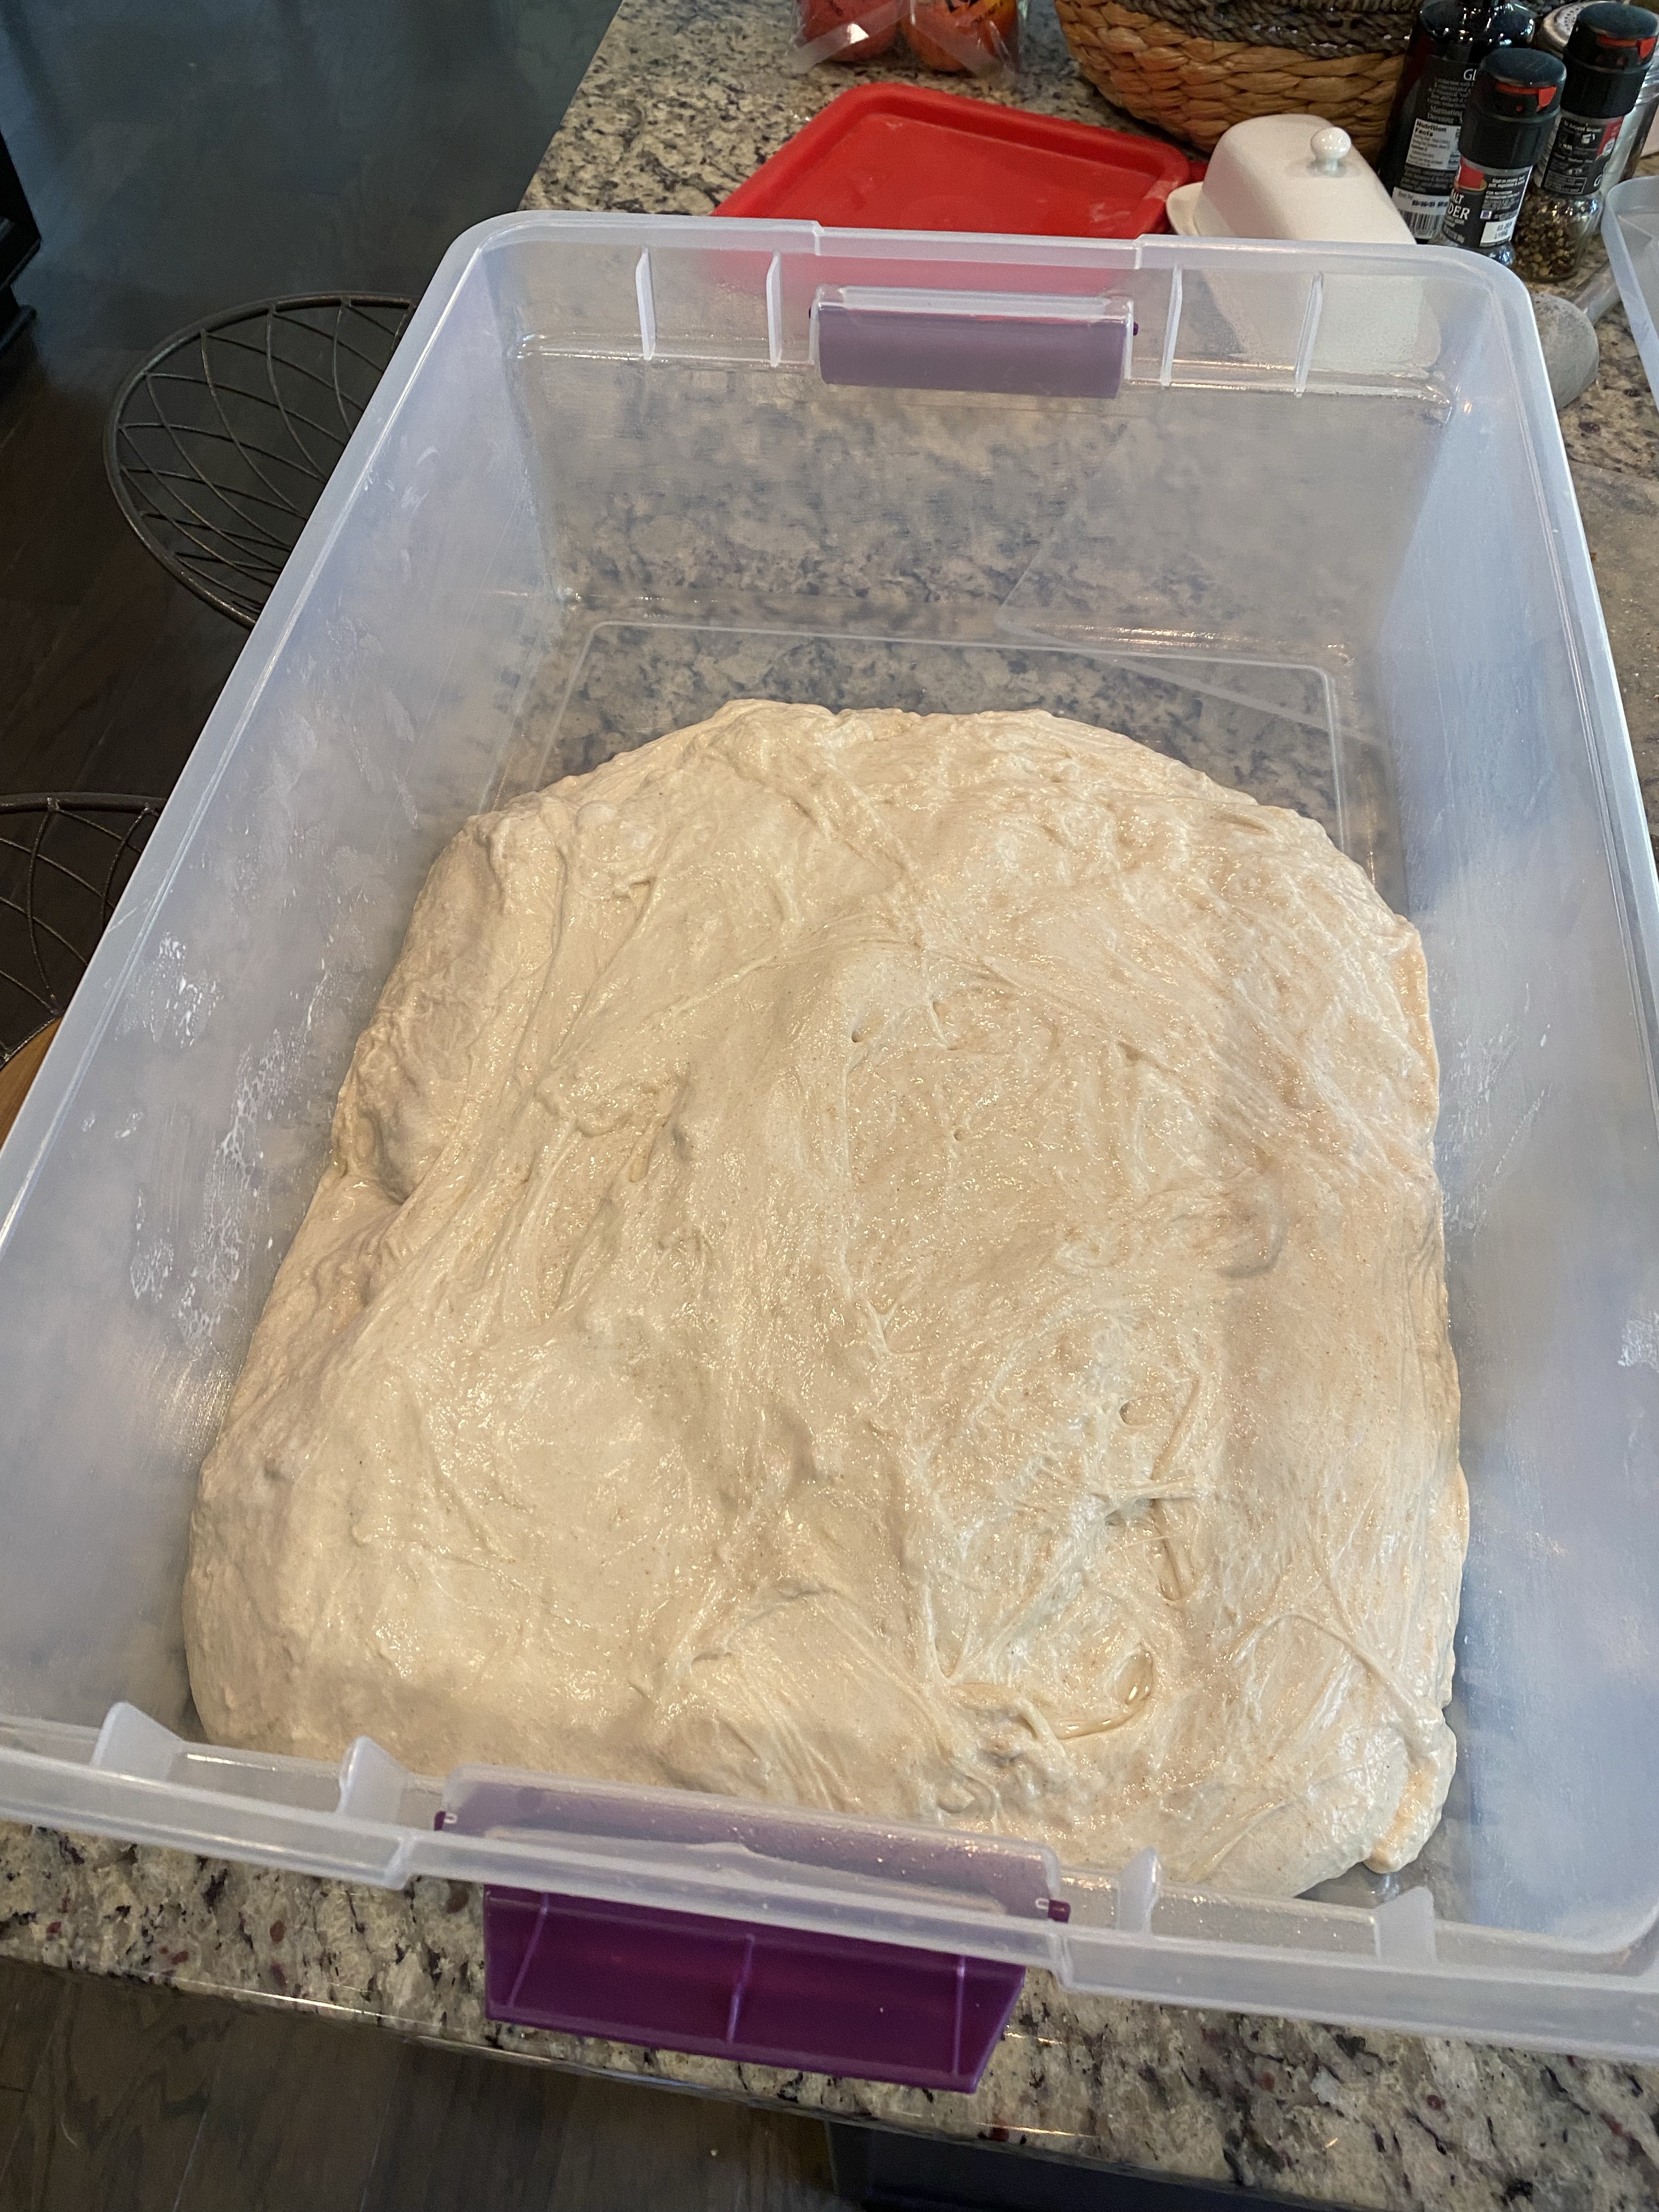
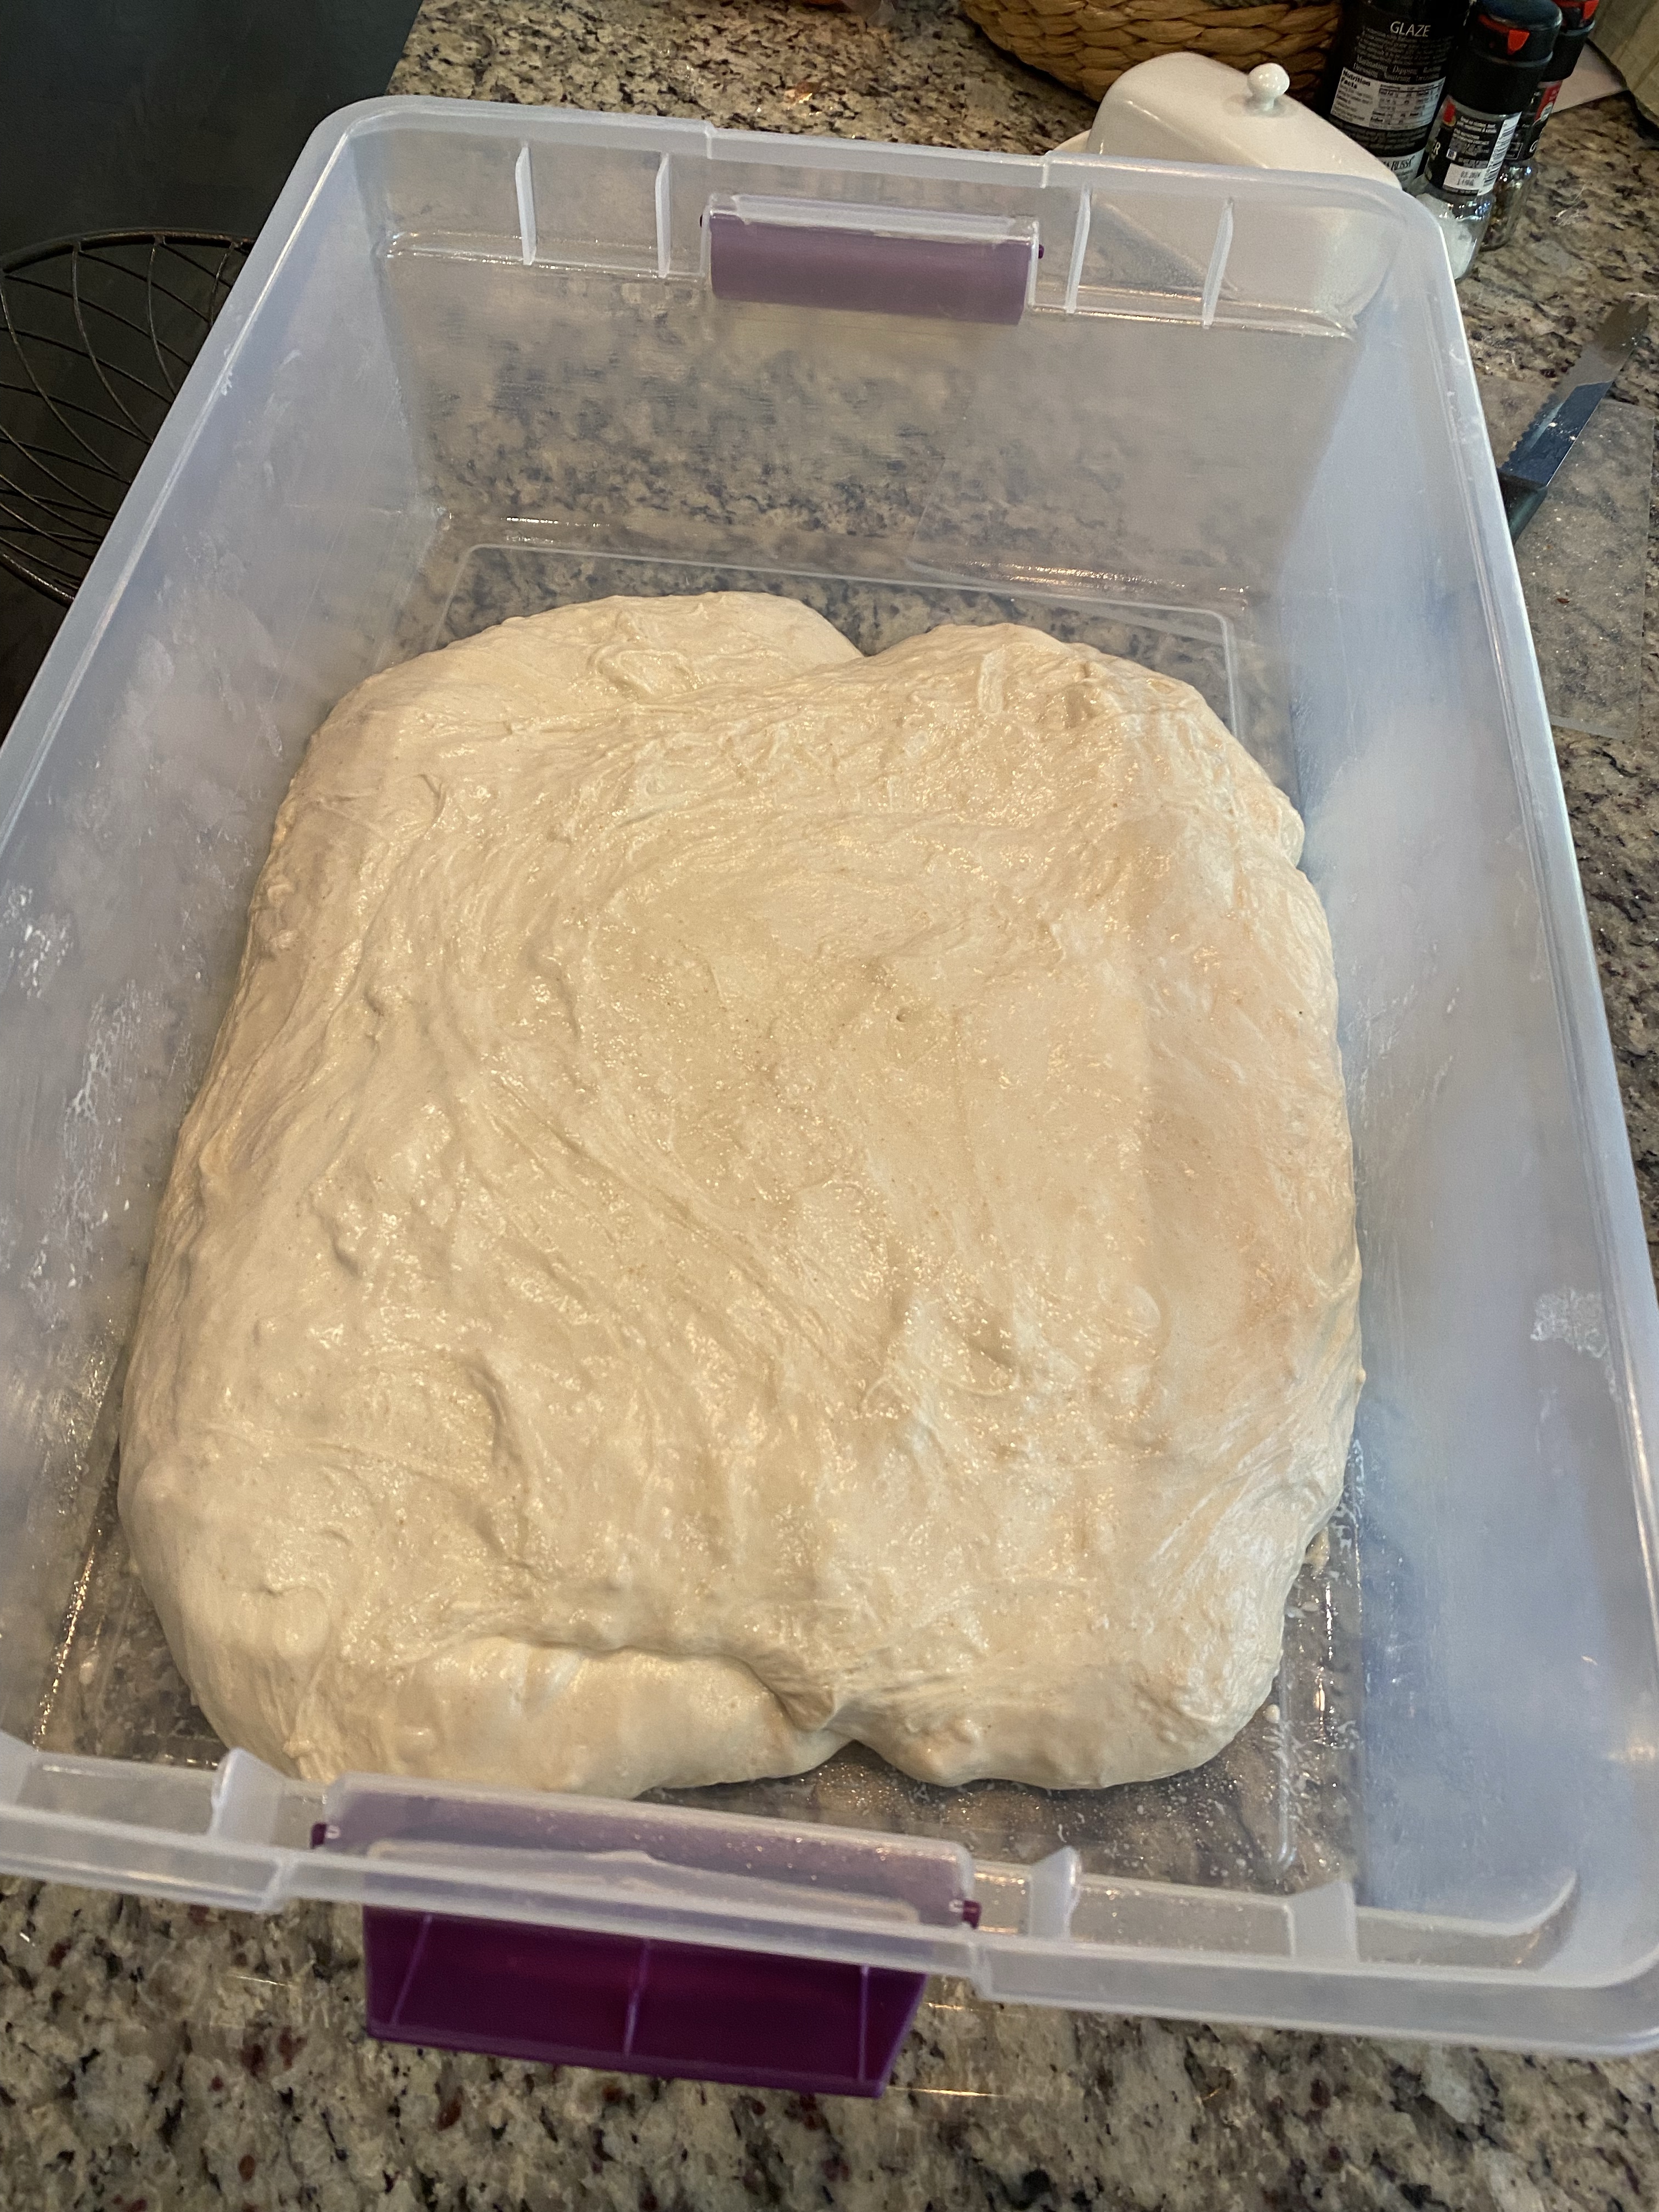
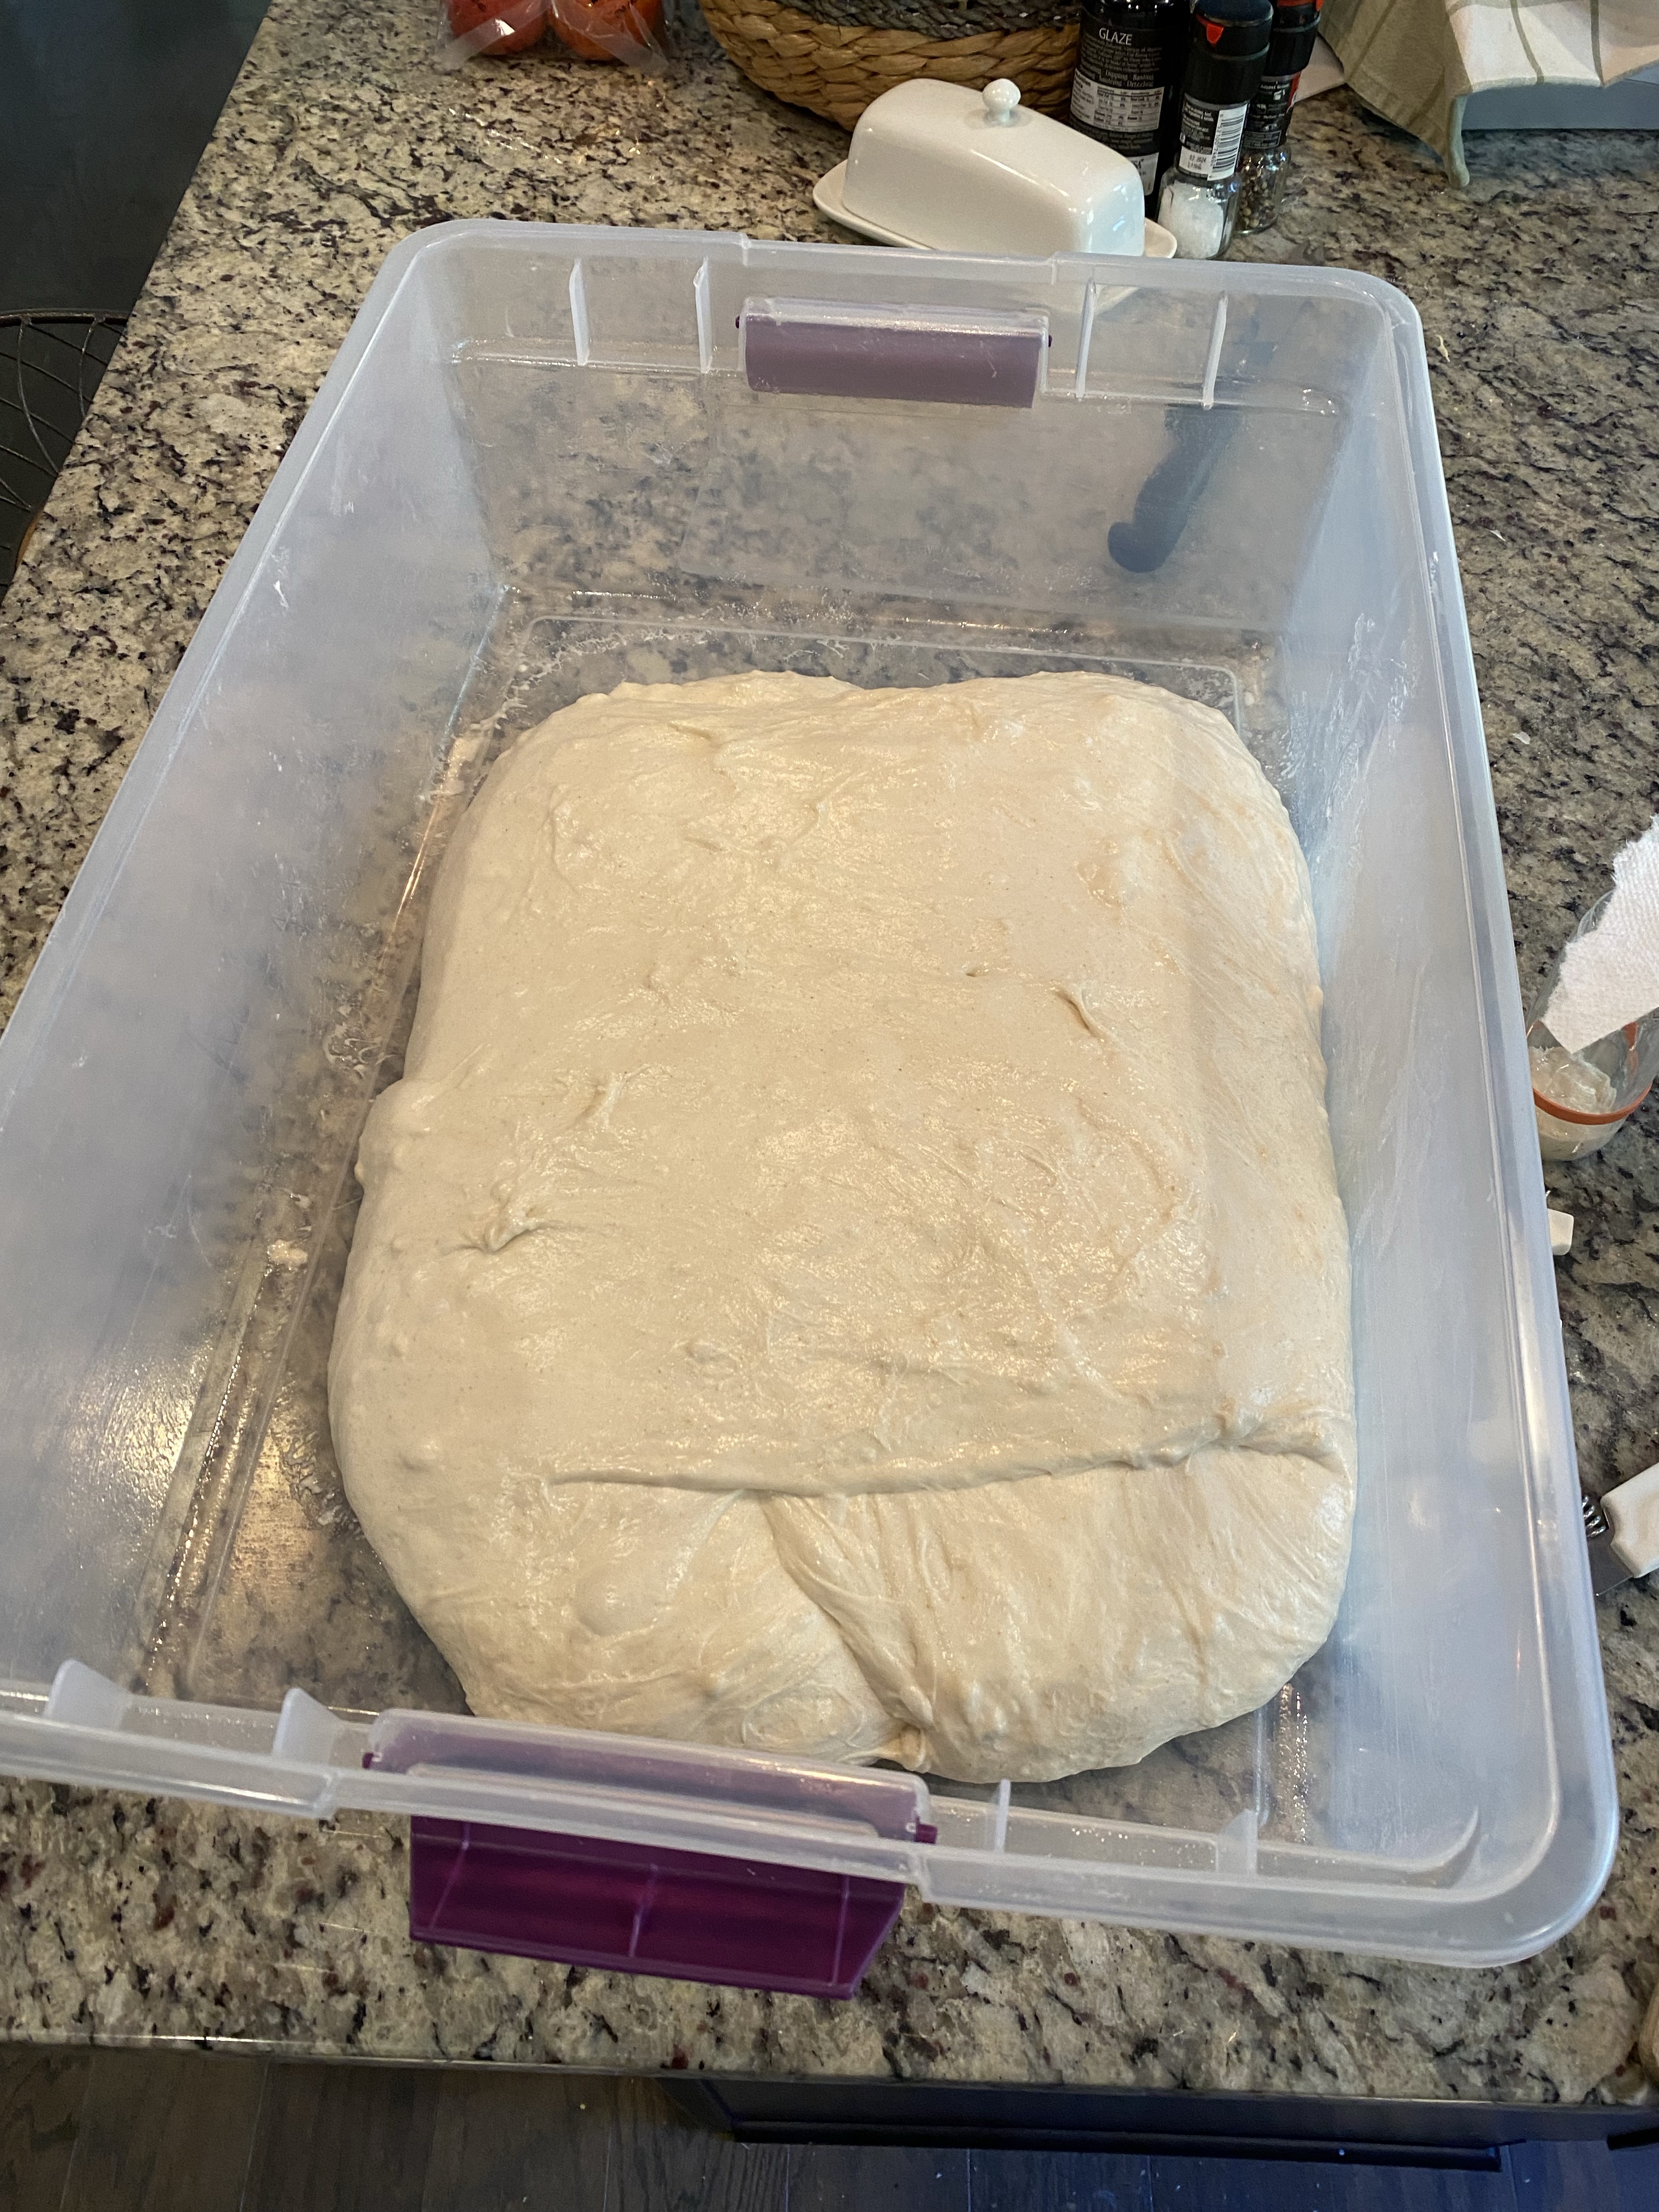
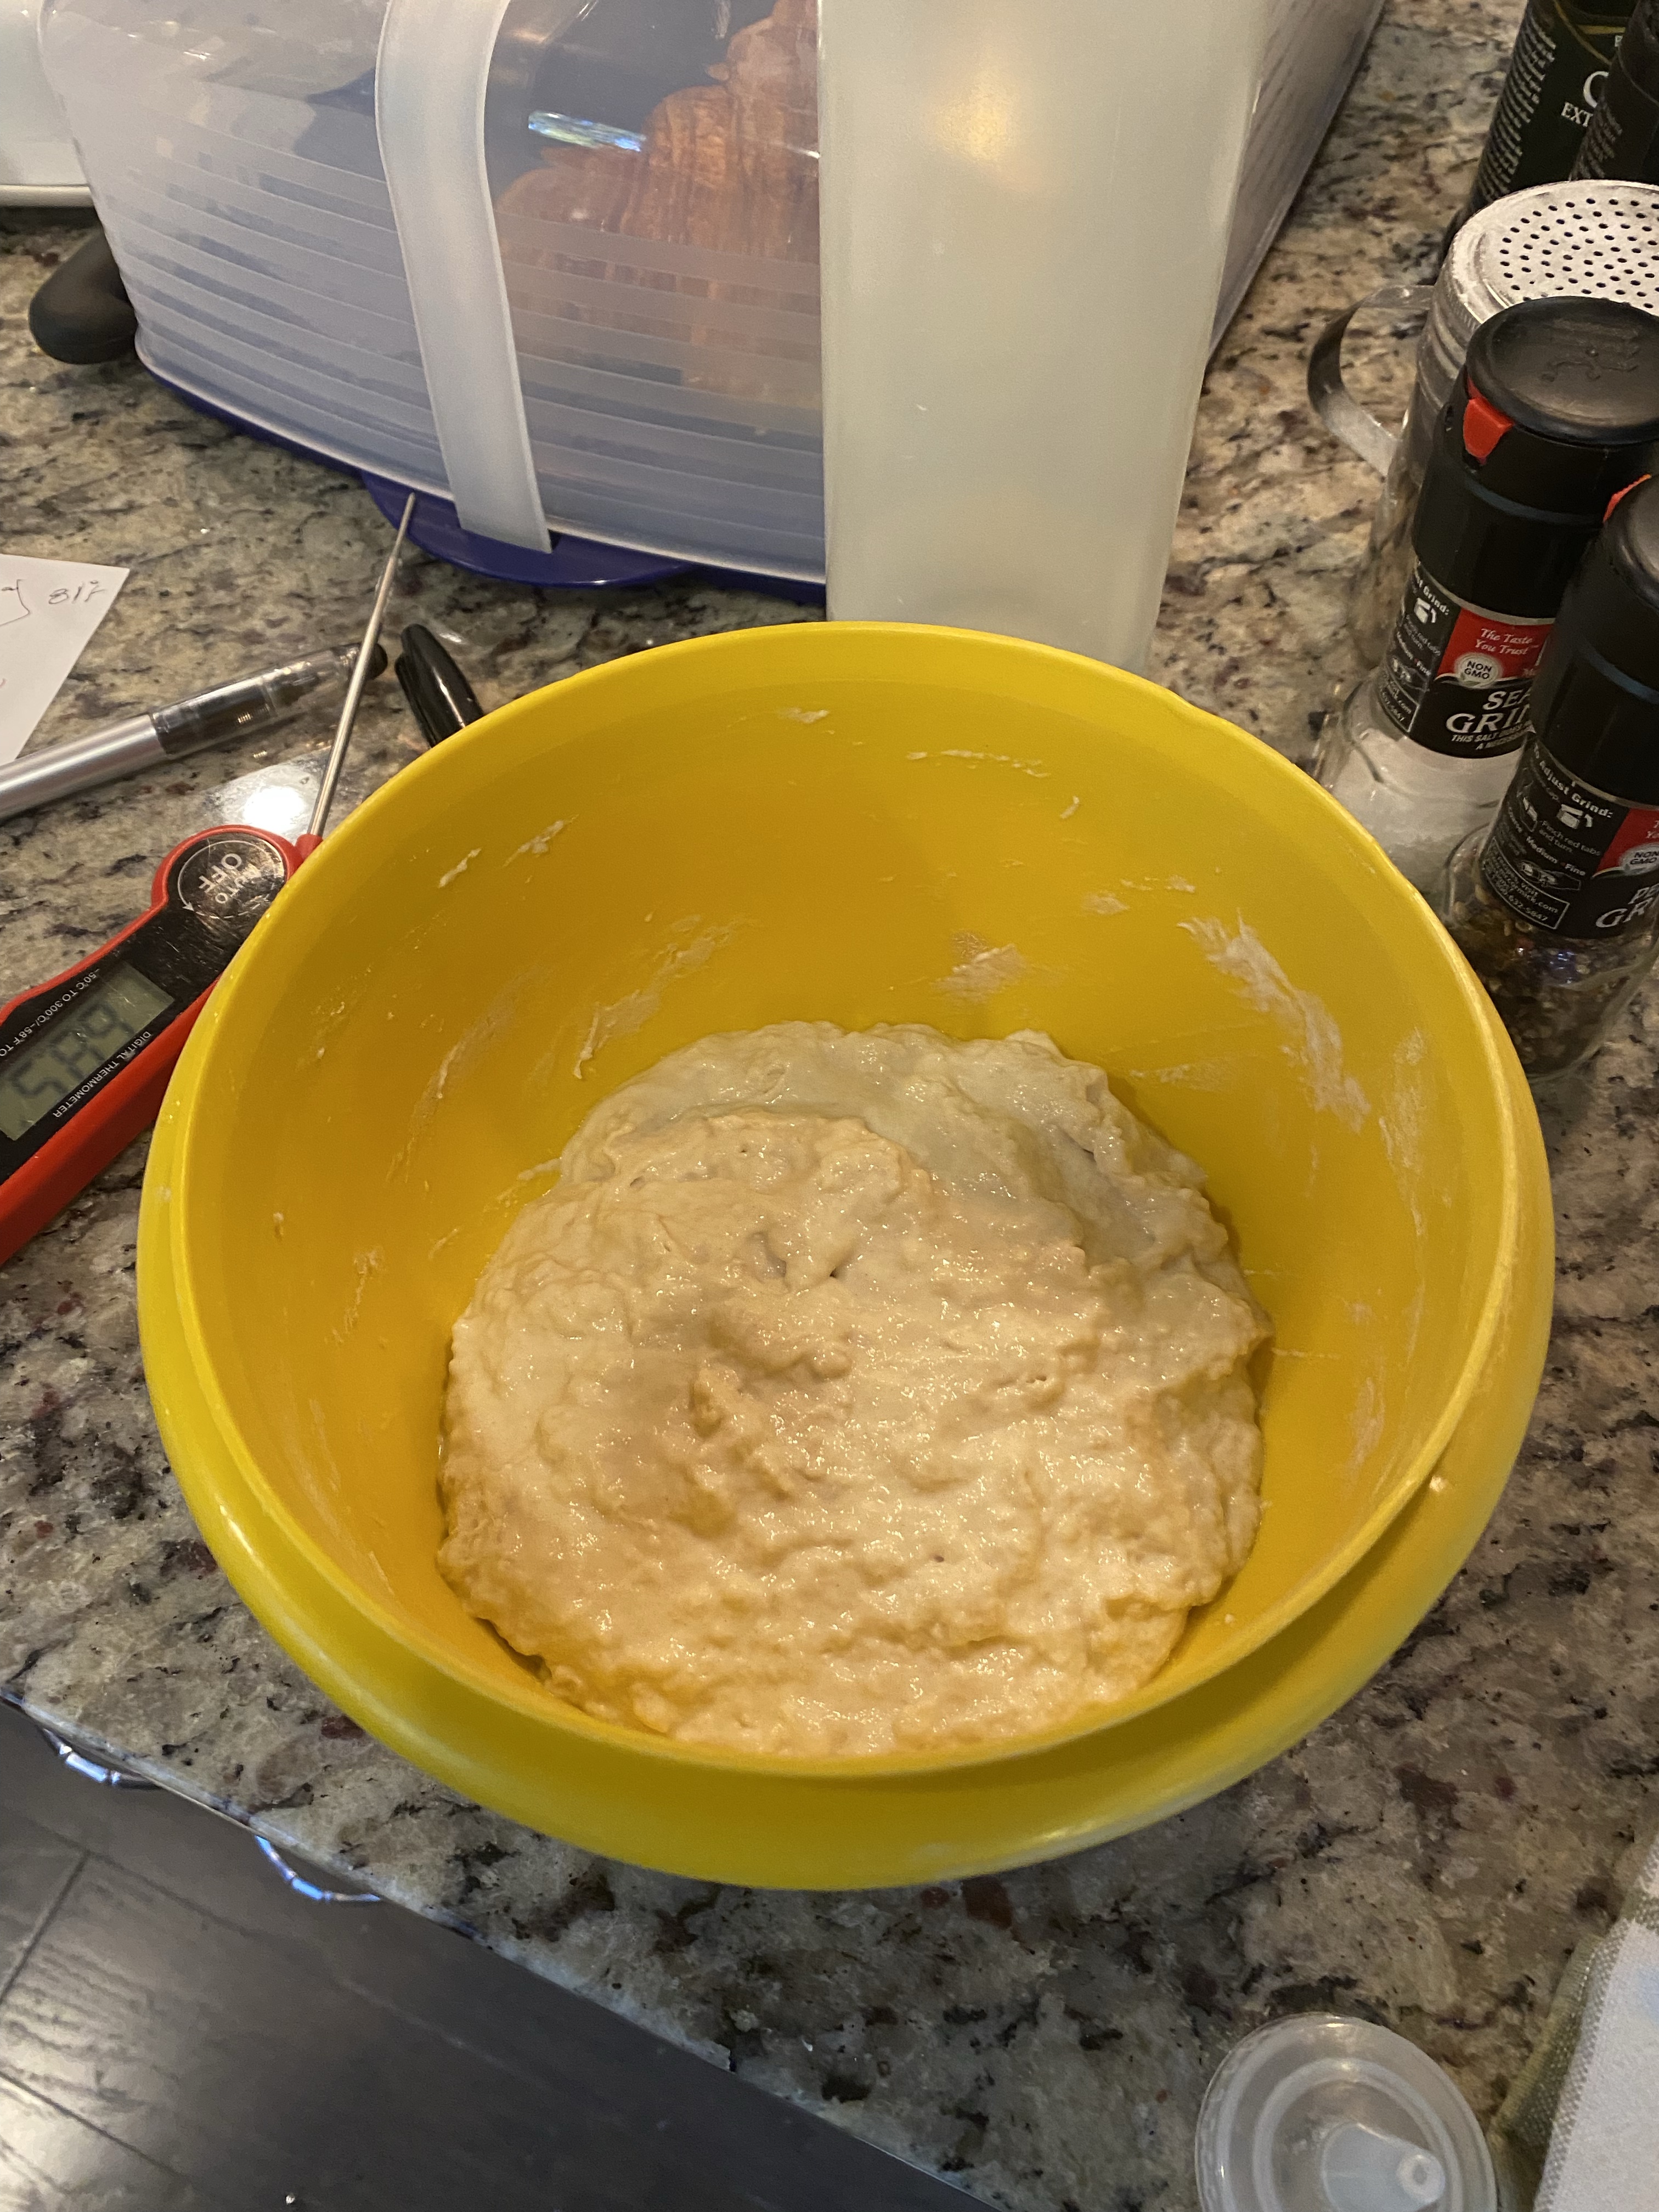
The baguette dough was the best I’ve ever made! It looked really good at my dough dump.
Baguette dough prior to dough dump/dividing/weighing
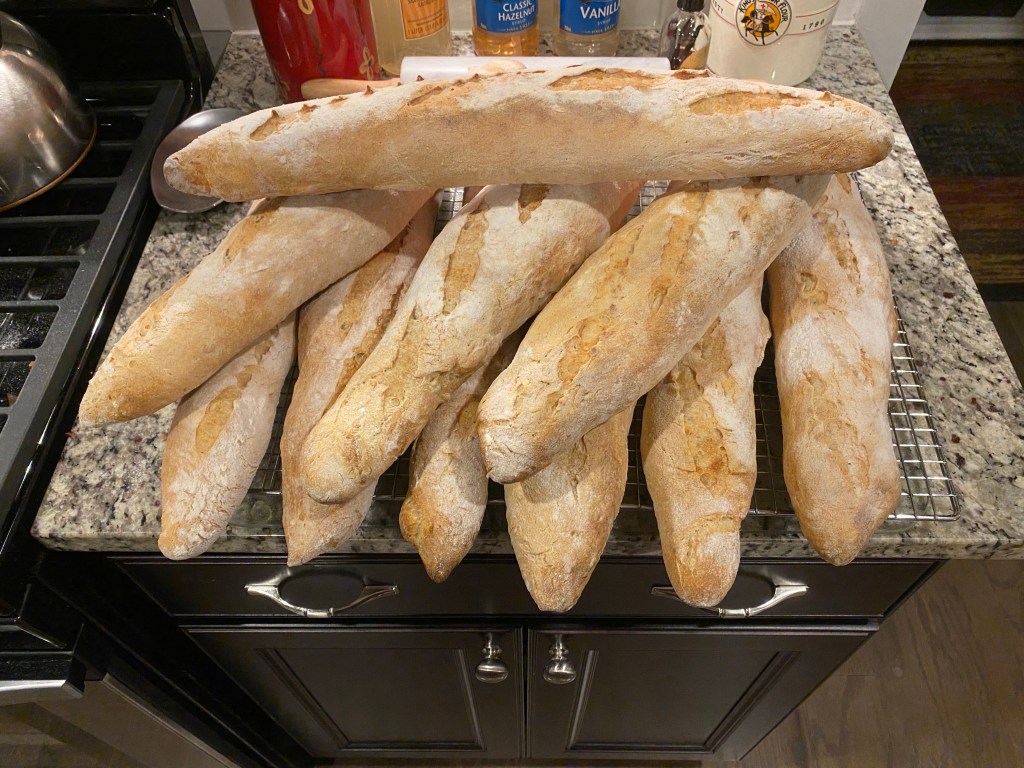
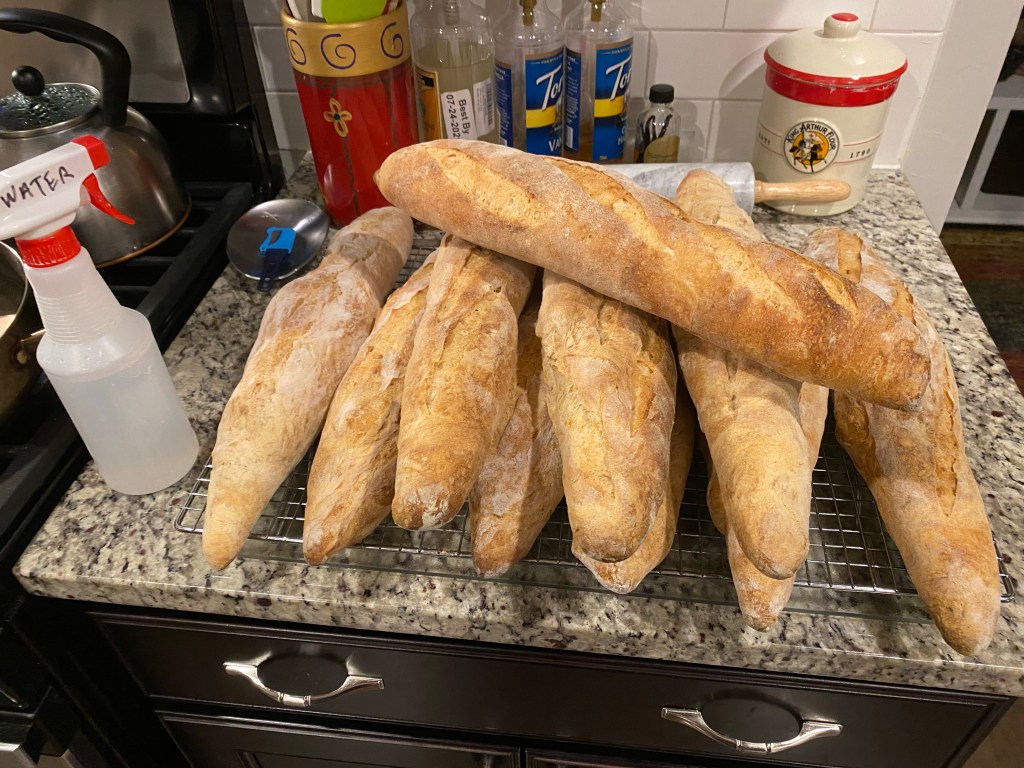
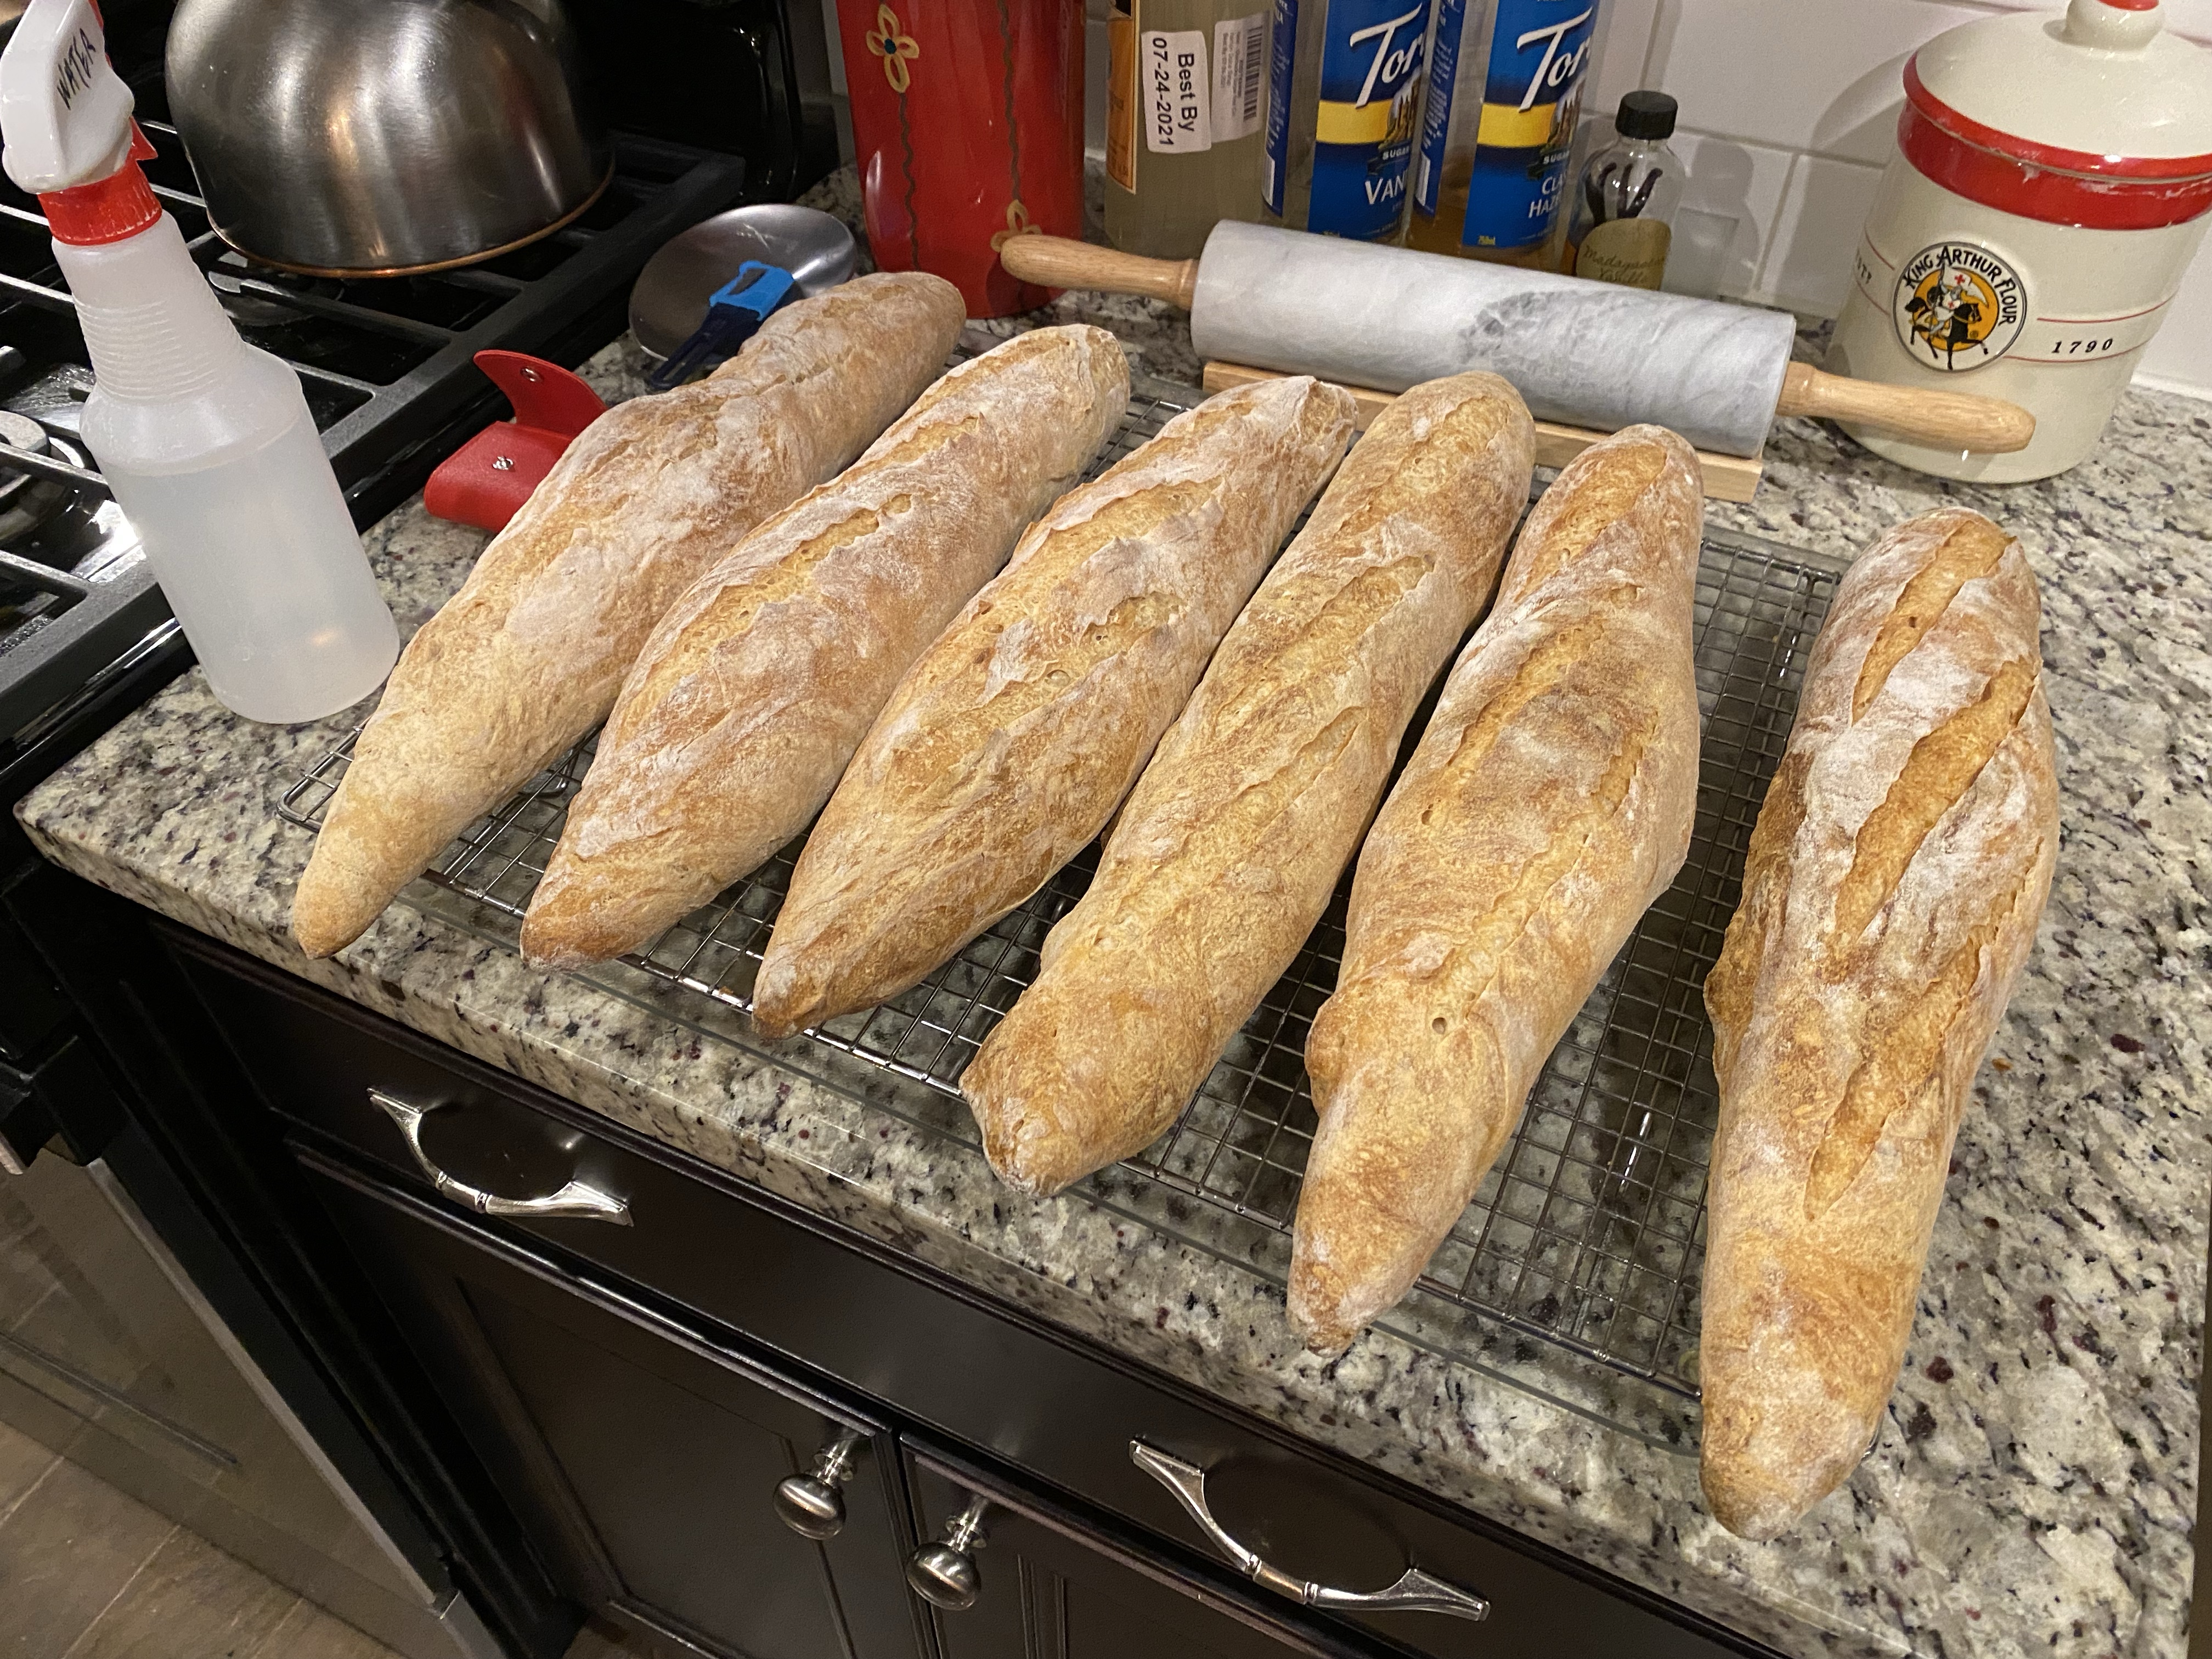
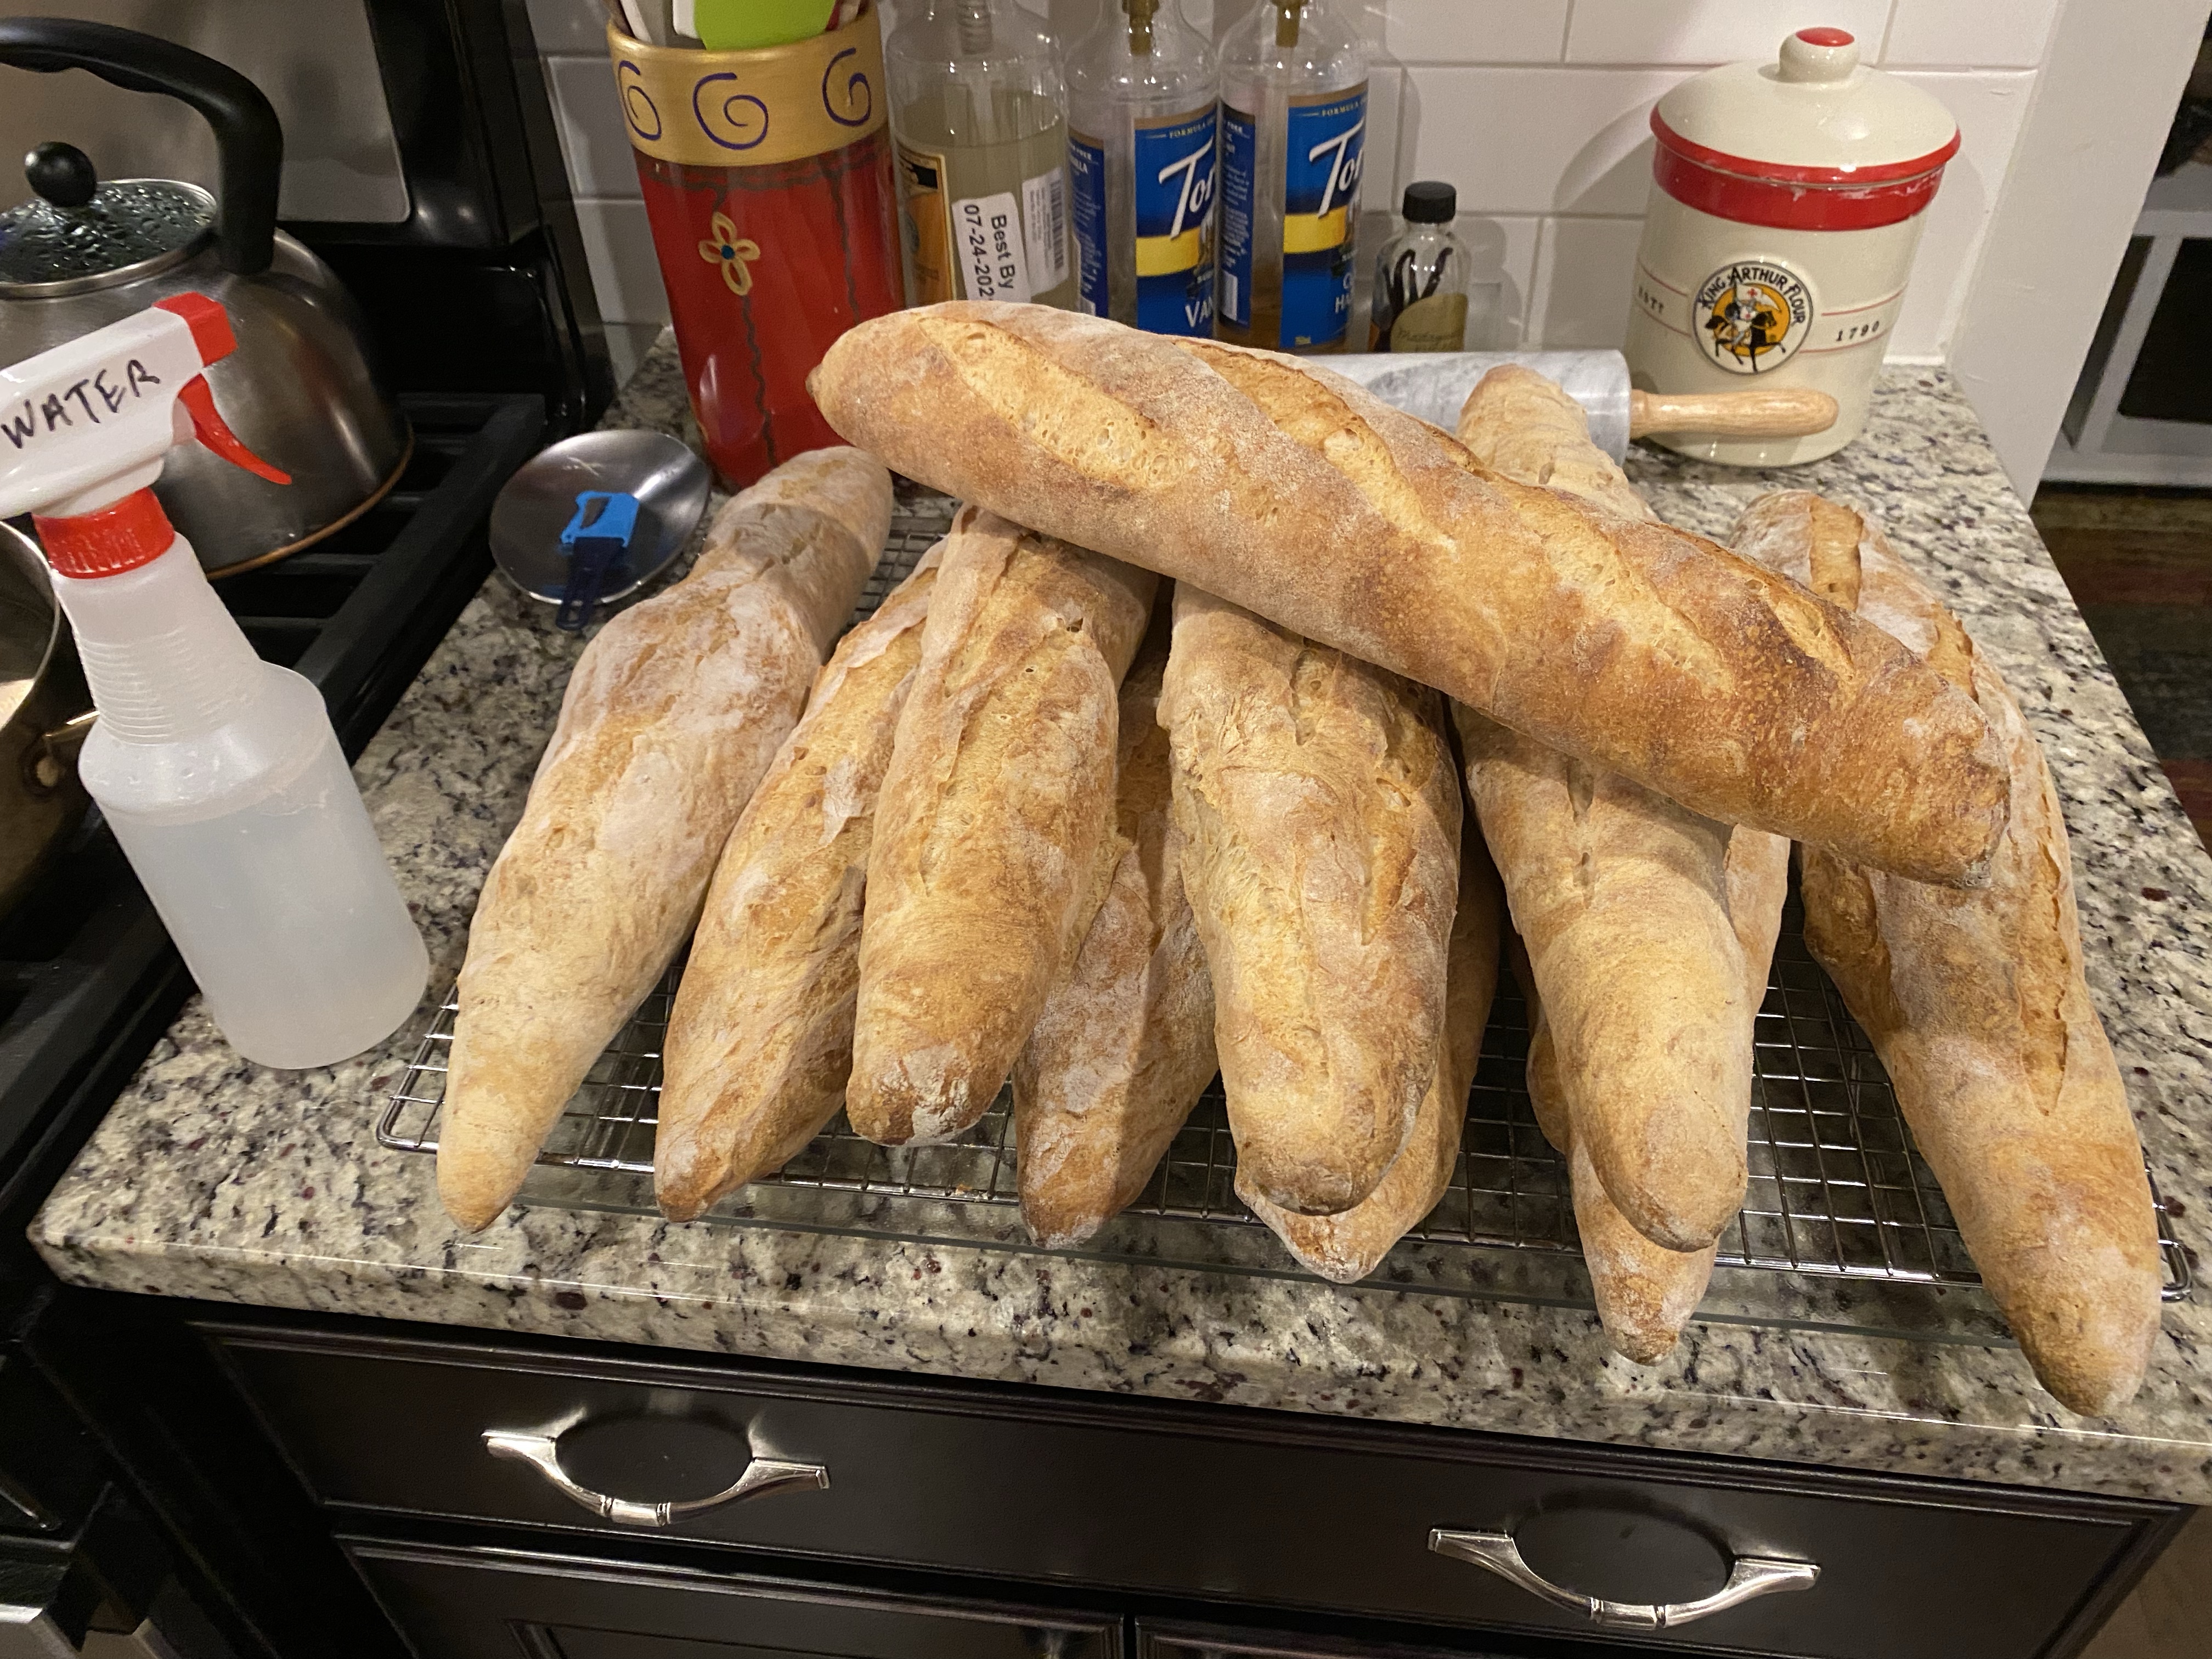
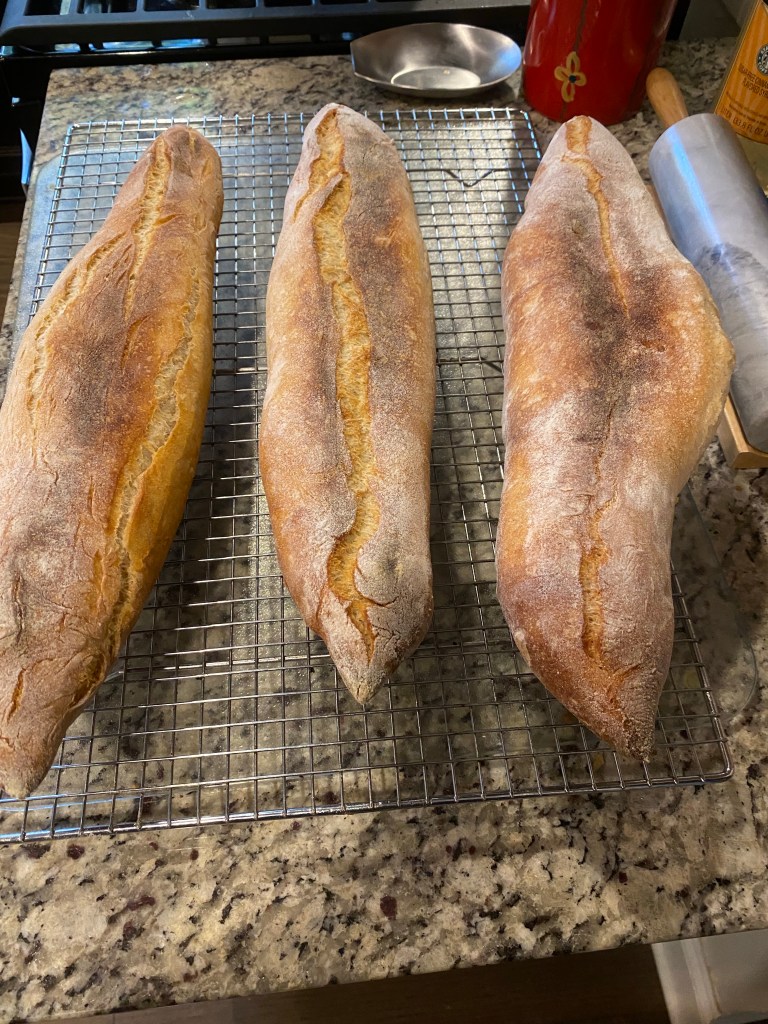
Rice flour is indeed the bomb! Loaves pop right out of the Couche. My shaping & slashing is getting better. I’ll continue to work on the bake and steam production.
Finished Baguettes
Tomorrow is a big day! My first attempt at selling my baked goods in an open market. That too will be an opportunity to learn!
I’m up and getting ready to bake. Not quite “Baker’s Hours” bu close enough. I had to start the coffee manually earlier than it is normally set to go off.
Necessary start…
Today I’m practicing baking four times since I can only fit two Dutch Ovens in my oven at a time. Pretty much “cottage baking”.
Aside from my poor shaping due to my yet to develop “baker’s hands” I believe it’s gone OK to this point. My goal this morning was to have loaves baking by 0530 (check). It was also to be moving ahead of that time so I didn’t do something silly like burn my hands, forget to turn off the home alarm or forget to take medicine (check, check….oops! Be right back!)
Take medicine (check).
Today I’m experimenting a bit with temperatures and times. I preheated the oven 10°F more than I normally do bumping it to 430°F (Convection). Thought being I’m going to be opening/closing the oven door and taking the lids off repeatedly. Might be good to bump the oven temp a bit higher. I’ll balance that by taking the lids off at 20 minutes vice my normal 25 minutes to check the oven bloom/color of the loaves.
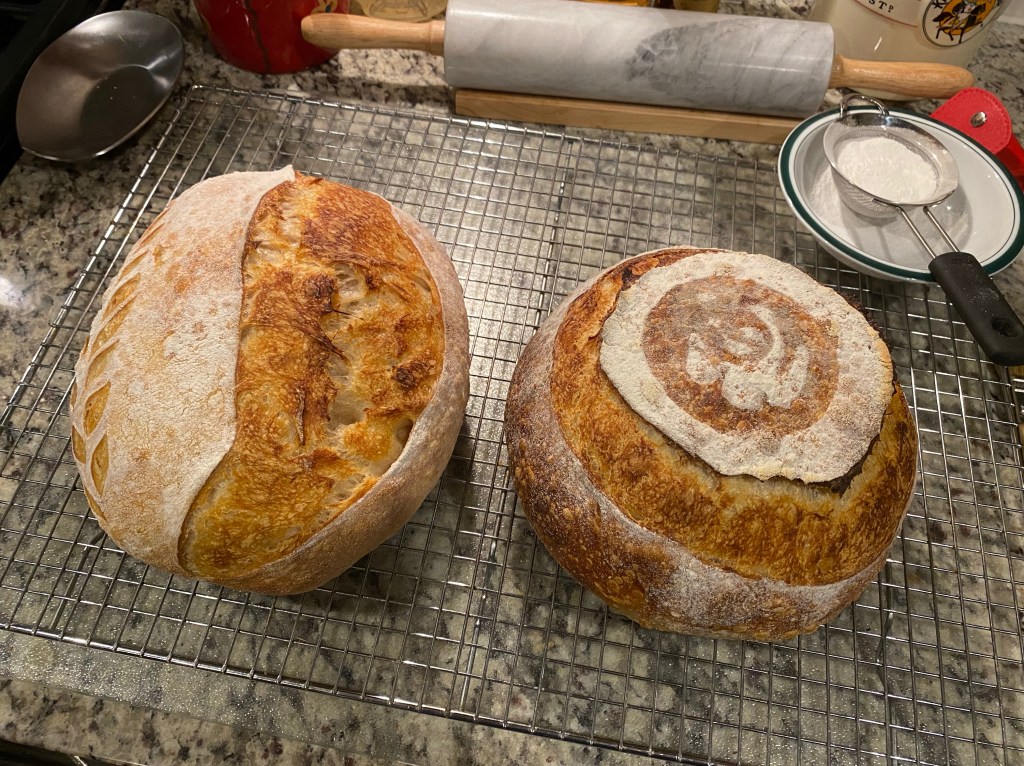
I’m also experimenting with lightly dusting the loaves with rice flour and decorative scoring on the loaves and/or slash patterns.
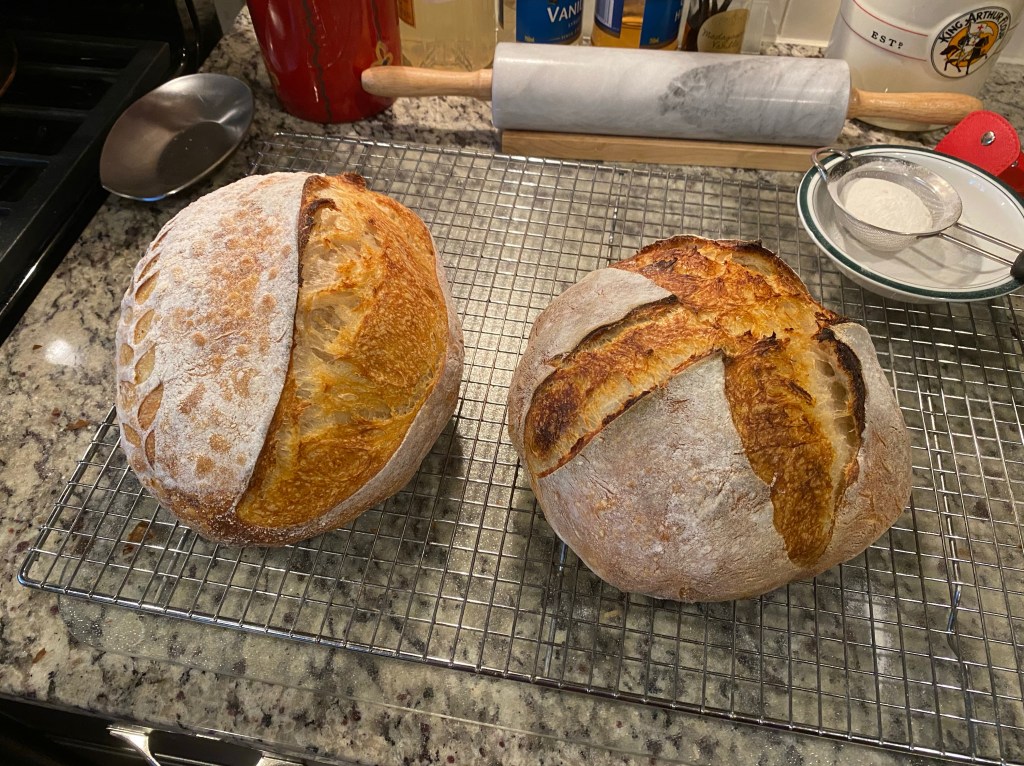
Bake #1
I’m liking the light dusting contrast to rest of the crust. Blisters are present and the ear is pretty good. Probably not as dark a coloring as artisan bakers. I may try extending my times on the next bake by 2 minutes in both covered/not covered sessions.
Bake #2
Coloring is good. I like the “Plus 2” add on to the baking durations.
I tried a different slash (circle) on the Boule #2. I used a stencil that was supposed to look like a bear. Looks more like a Rhino wearing a saddle blanket… Need to up my stencil game (and get a better stencil)!
Bake #3 is done. Went back to the “Plus” slash on the Boule. I’m going to try a square slash pattern on the last bake. Additionally, I’m going to go back to a slash with no decorative scoring on the last Batard. I’d like to see if there is any difference in the oven bloom and ear development.
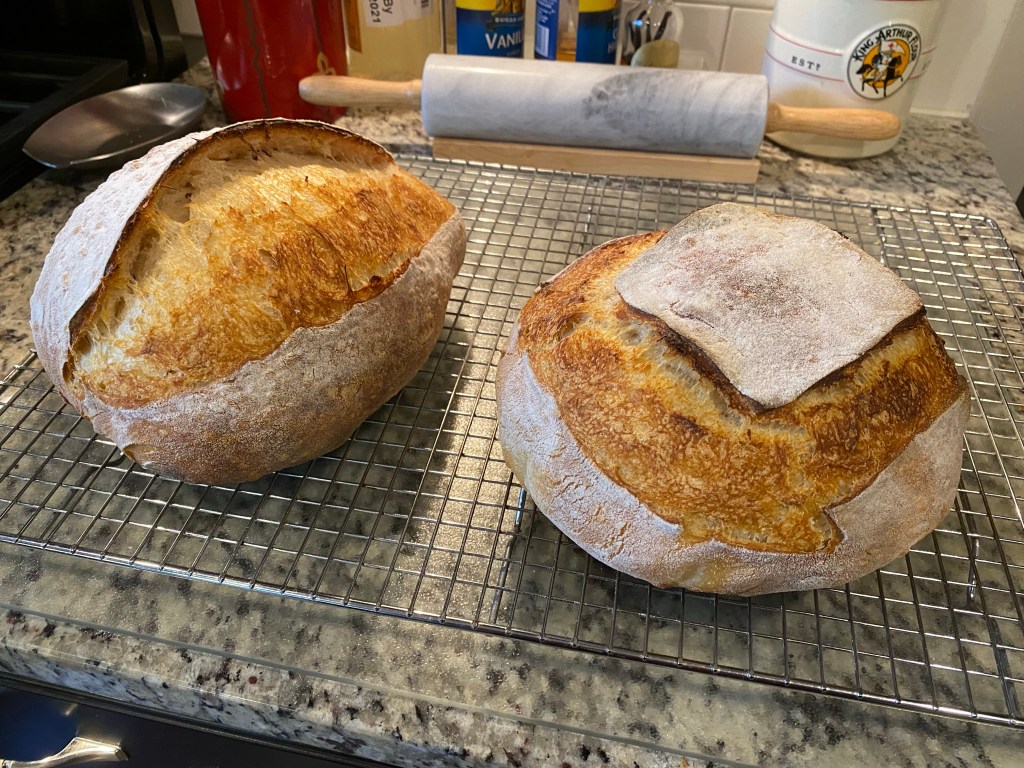
Bake #4 (of 4)
Bake #4 is done! My oven bloom on the Batard was a slight bit larger. The ear is probably not a result of my attention to the slashing angle. I like the square slash on the Boule.
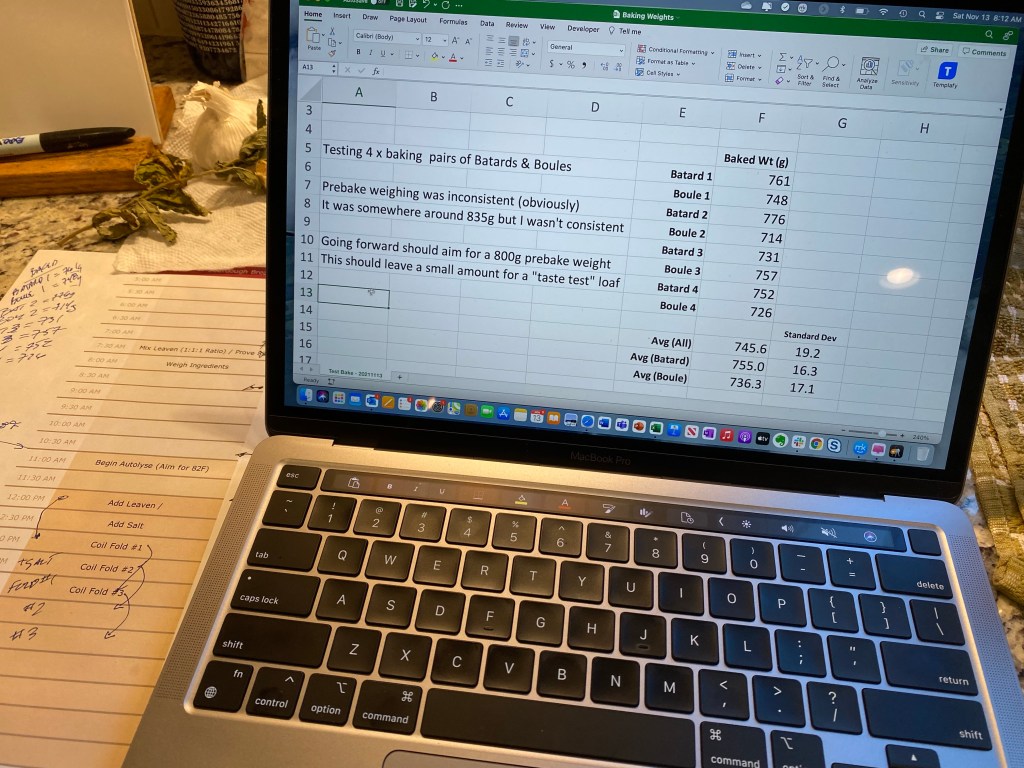
My final baking time was just under 3 hours. I’d planned on a pair per hour. The final baking time average is 40 minutes. I can allow 45 mins going forward to give me a bit more time to stabilize oven temp/reheat the covers.
As I baked I checked the final bake weight of each loaf. What is clearly evident is the need to be more consistent when weighing initially. Maybe just pick a standard gram weight (800g prebake?) and have a residual bit of dough for a smaller “taste test” loaf.
Final Bake Weights and Averages
Overall I’m very pleased with this test run and what I’ve learned along the way!
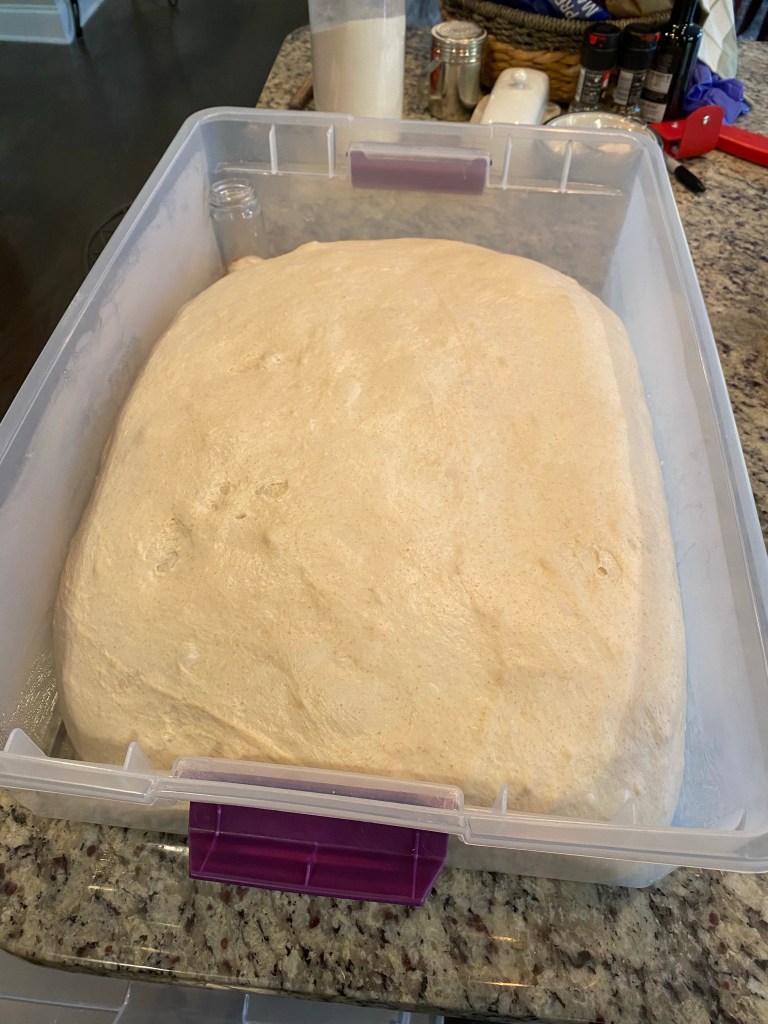
Continuing my theme of practicing first I’m attempting making 4X the loaves I normally bake. I chose 4X (8 loaves) due to my plastic tub, banneton, and refrigerator constraints. I also considered that I can only bake 2 loaves at a time and I’ll need to switch to baking croissants shortly after the last pair of loaves.
Scaling up bread
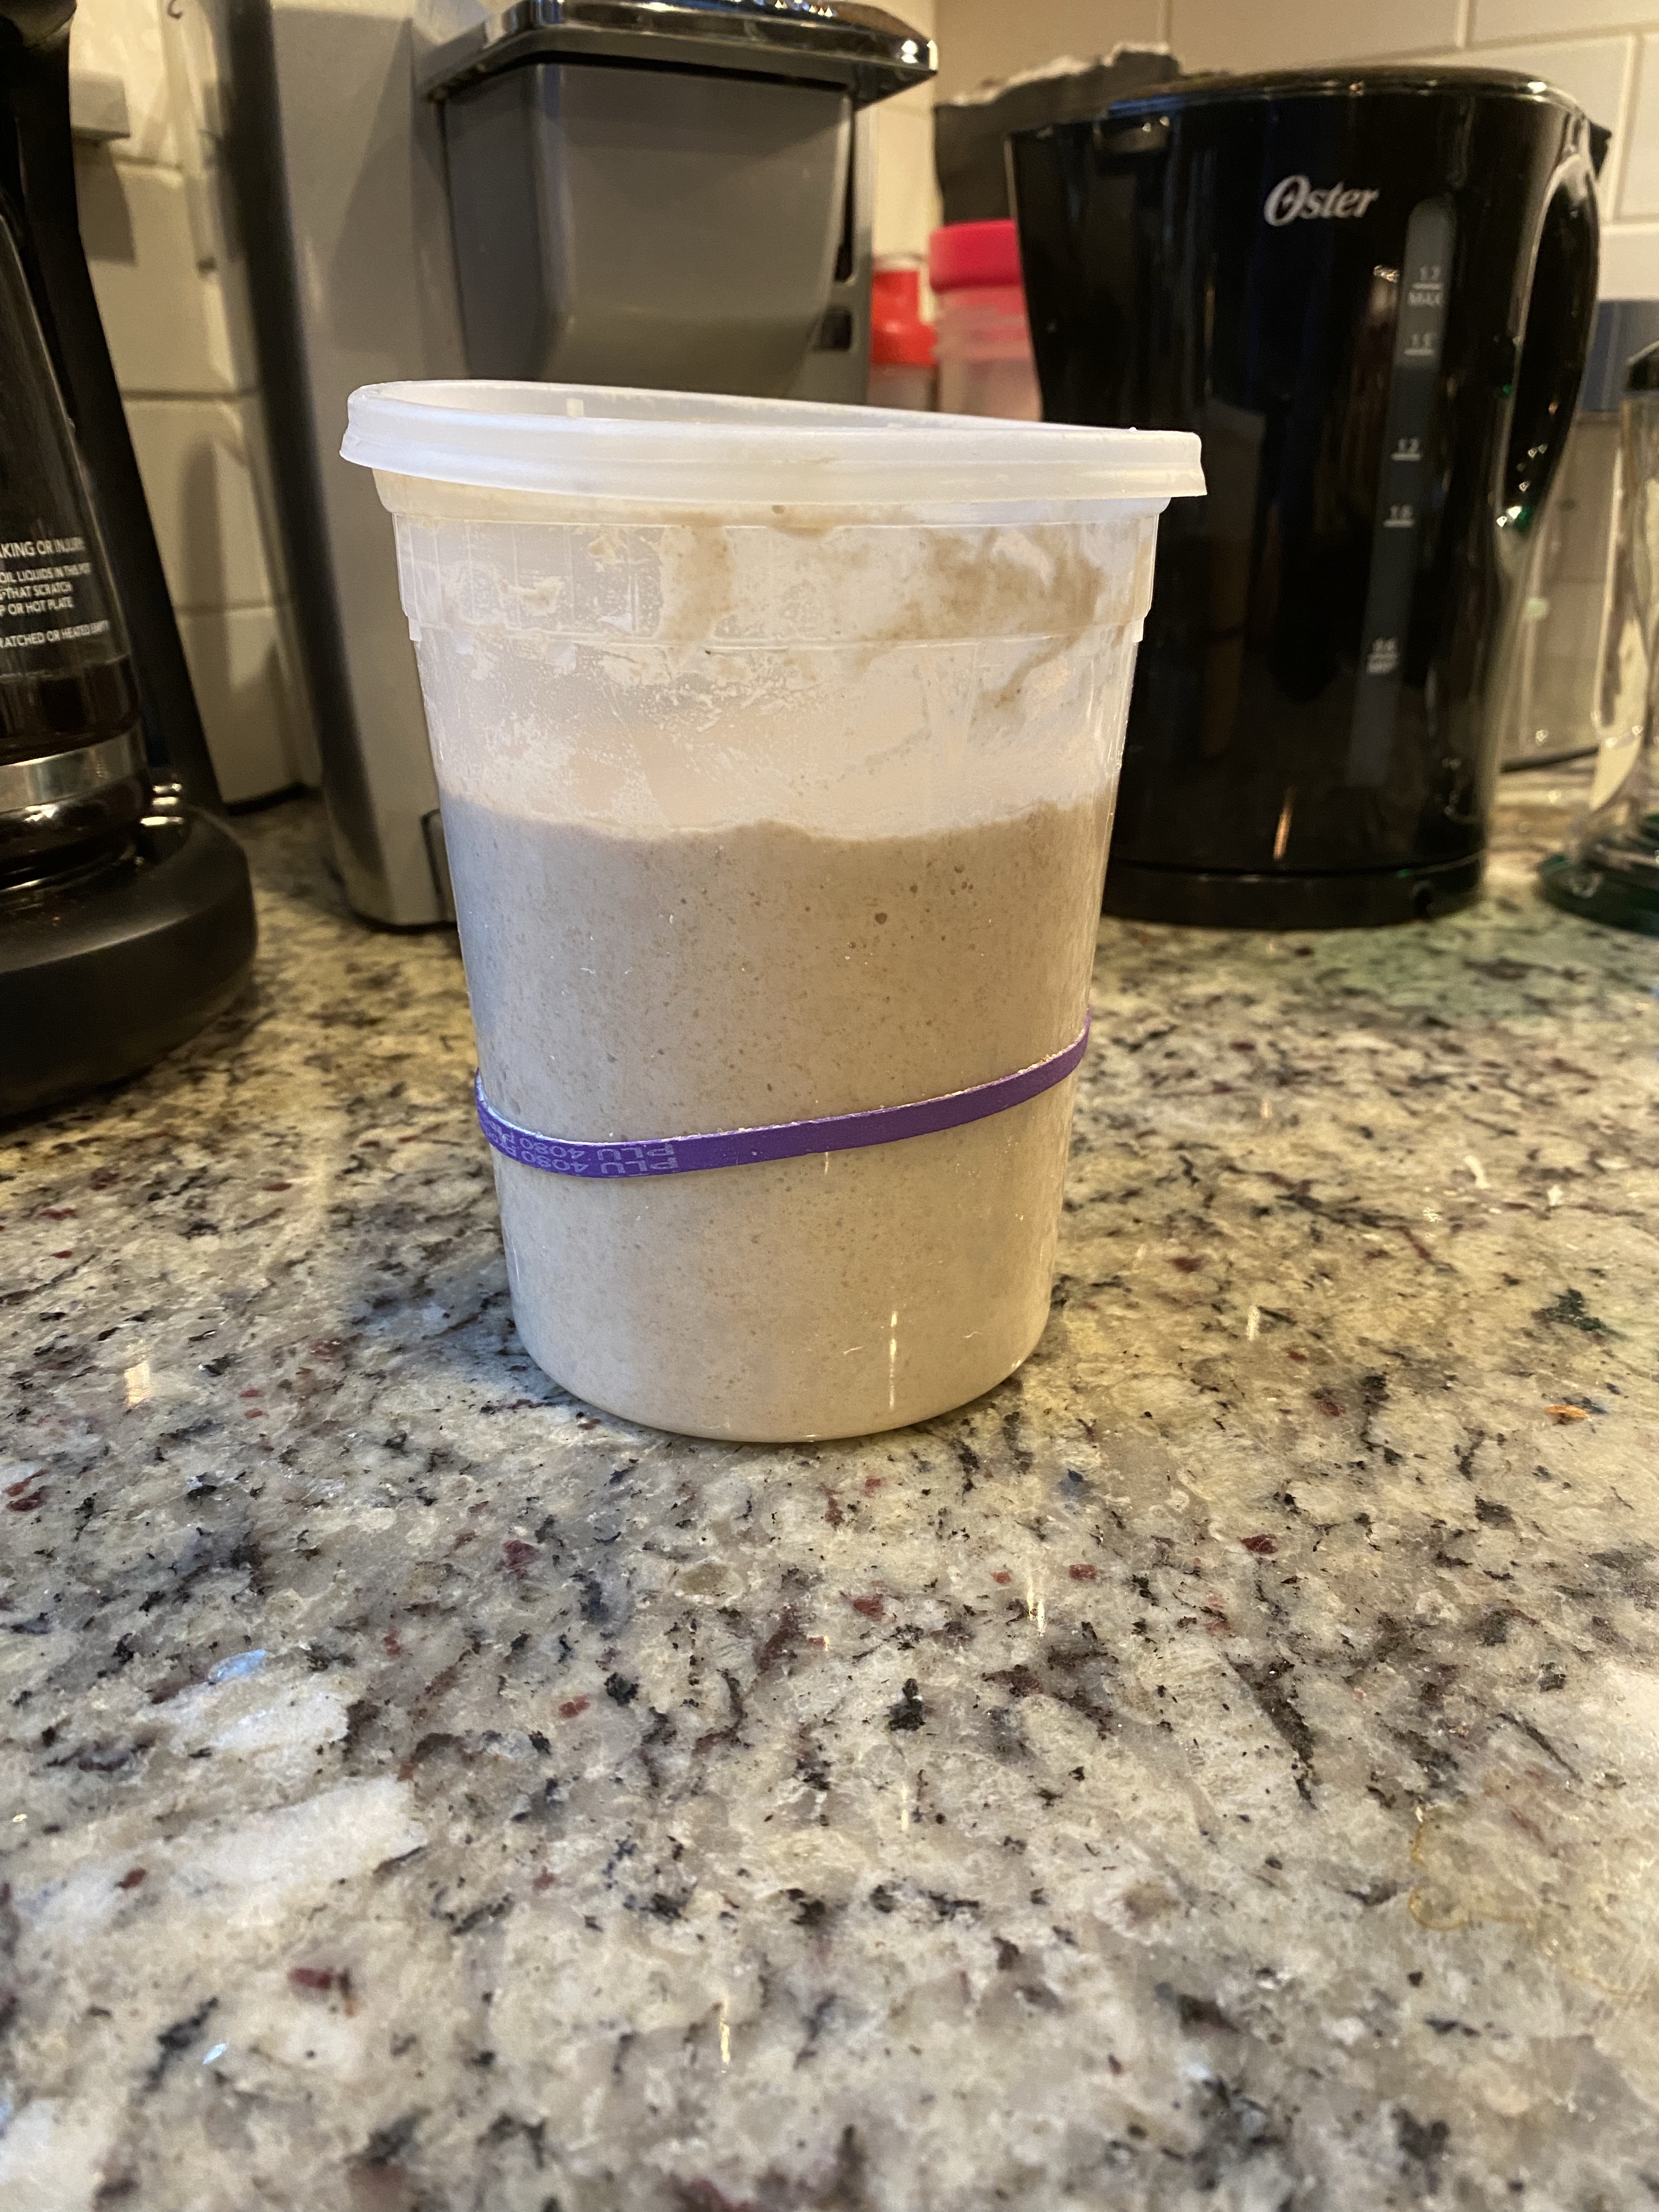
It all started last night when I fed my starter to reinvigorate it for this morning. I need 400g of fresh starter to seed the 2000g needed for the recipe. I am feeding the fresh starter on a 1:2:2 ratio. Therefore, I’ll add 800g each of water and flour to get to my 2000g total.
My normal tub I keep in the fridge was too small to make the 400g as well as another 250g or so to put back in the fridge.
Solution: Use new tub.
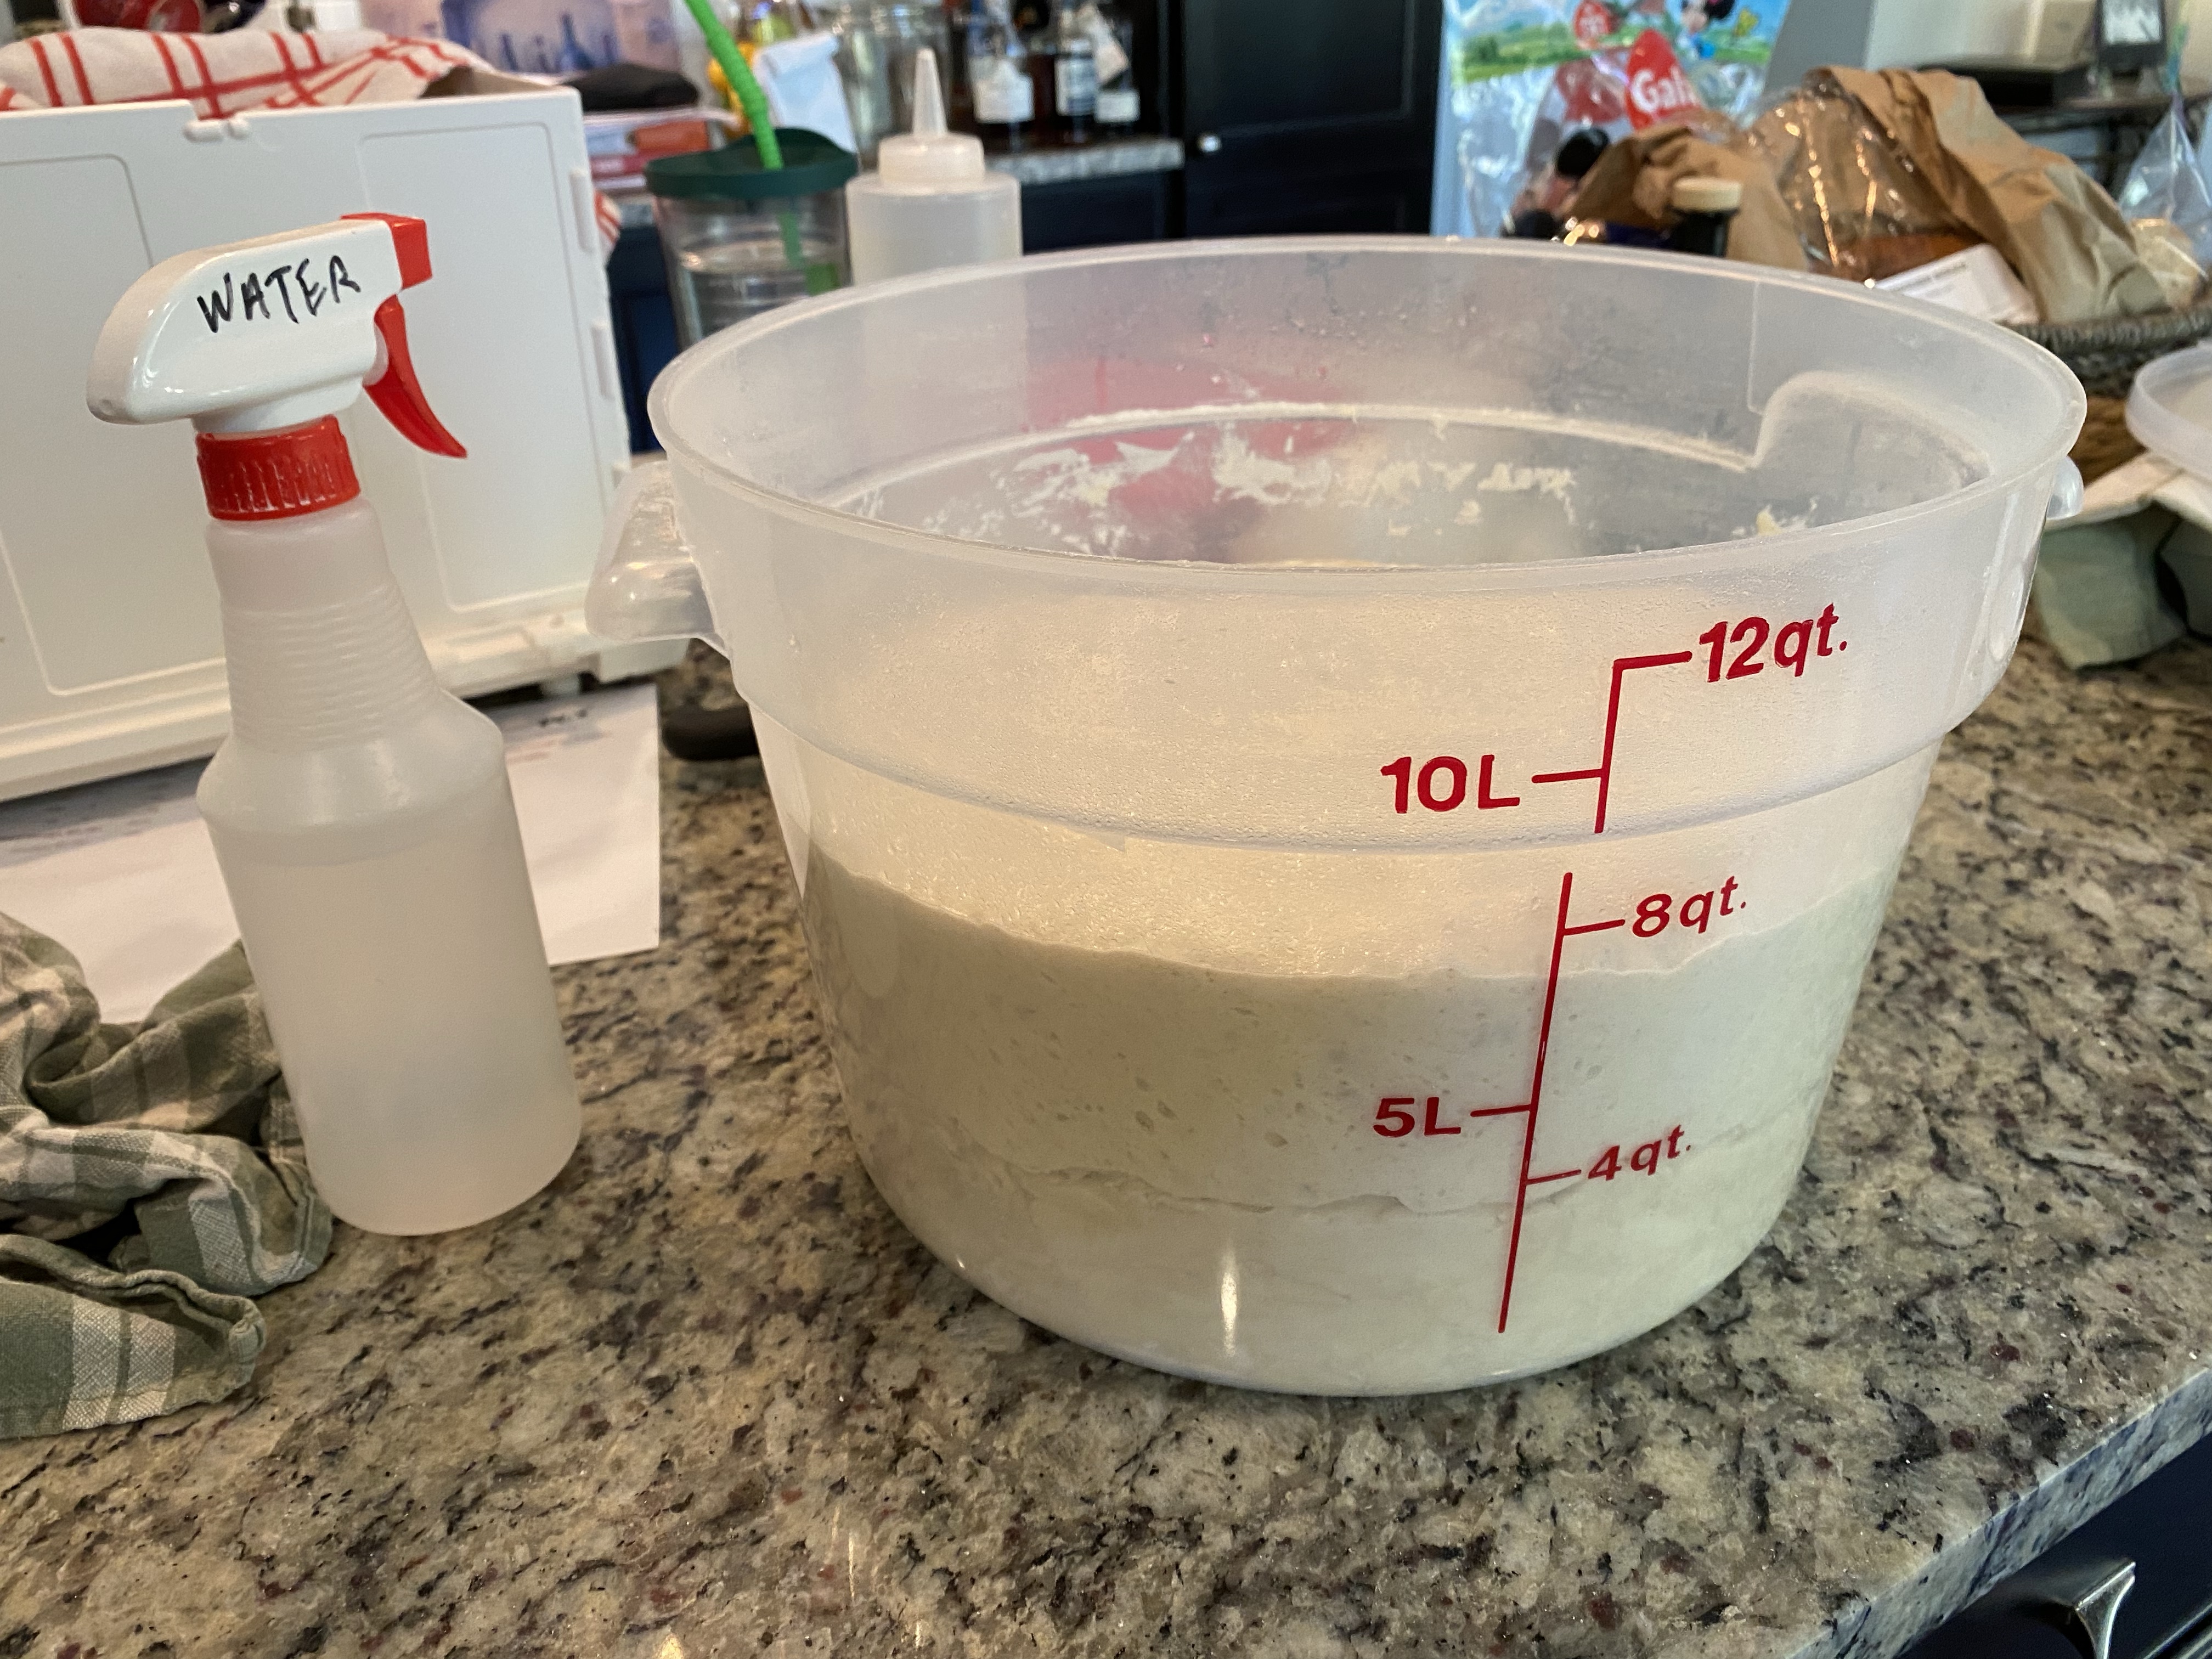
My house is also cooler now that it’s fall so I determined to use my proving box to maintain the temperature at 74°F. From the pic above you can see that my invigorated starter more than doubled.
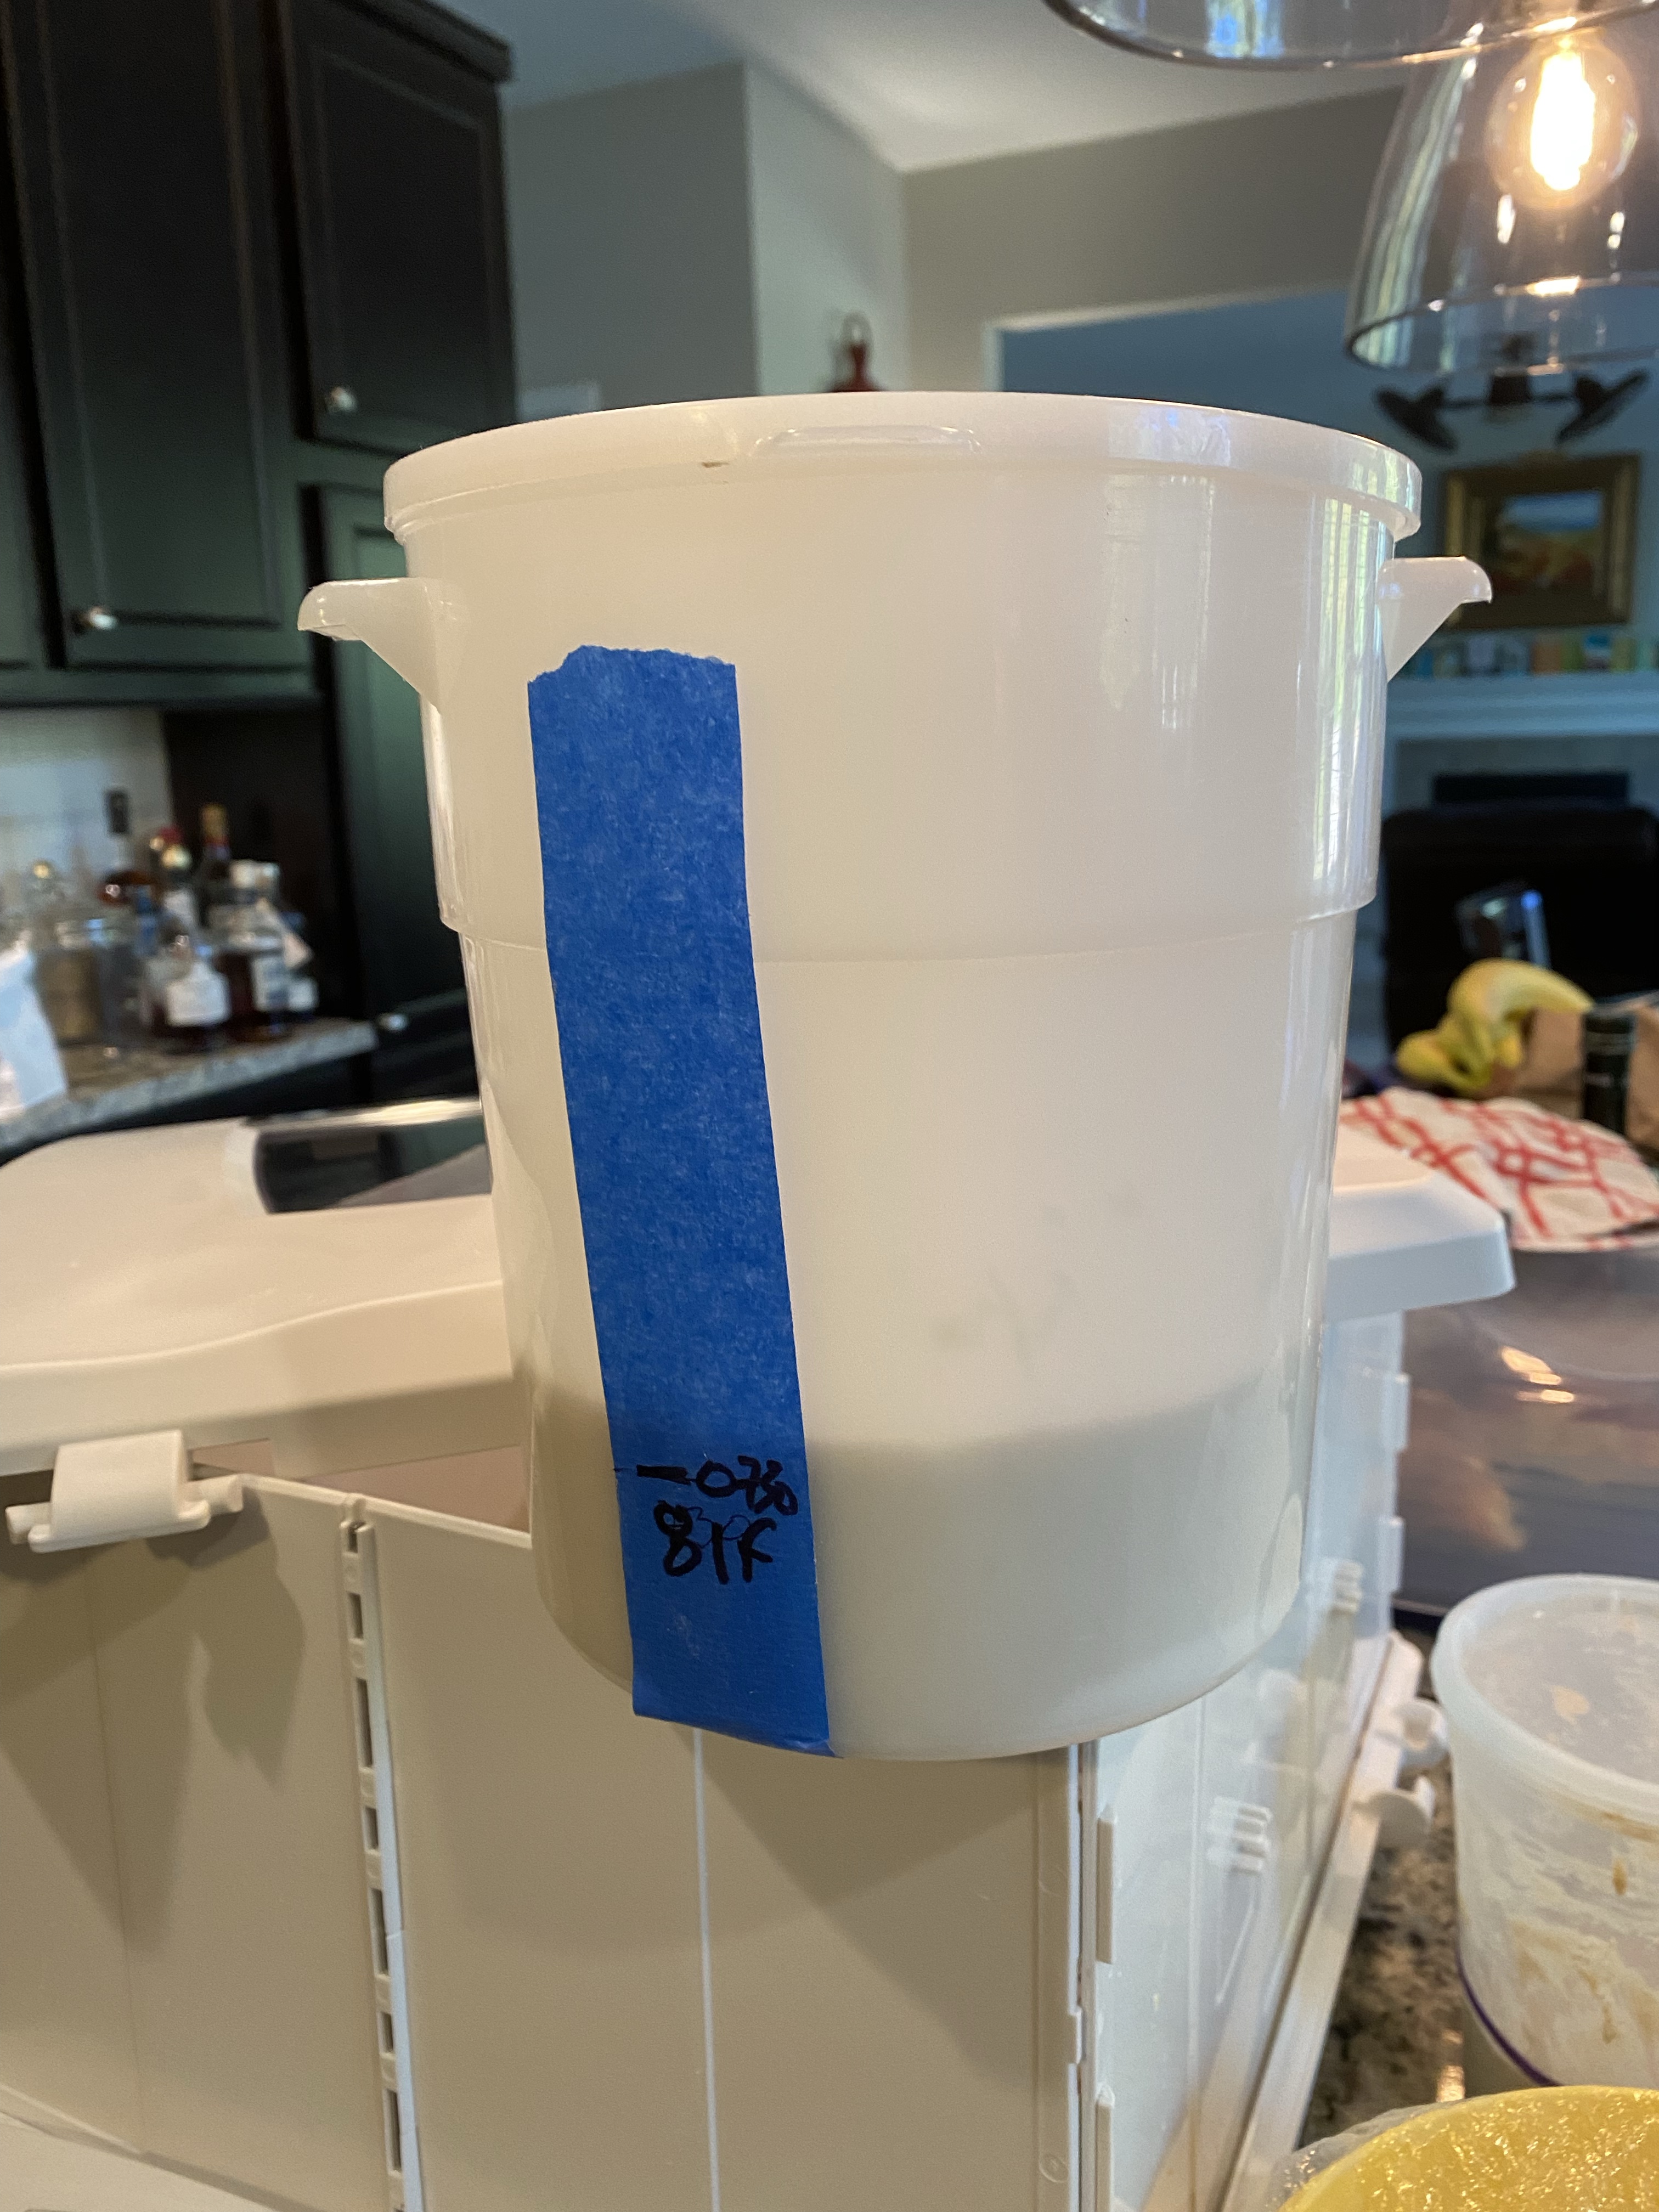
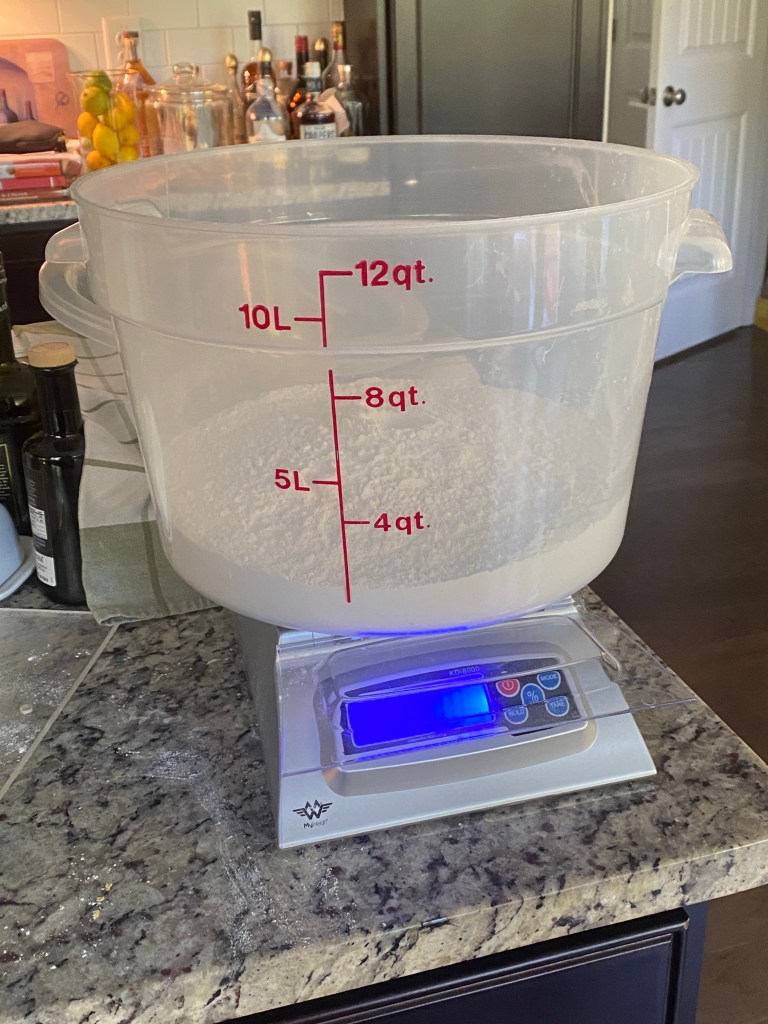
I mixed 800g of water and 400g of starter and, once combined added the 800g of flour. This is the most amount of leaven I’ve ever made!
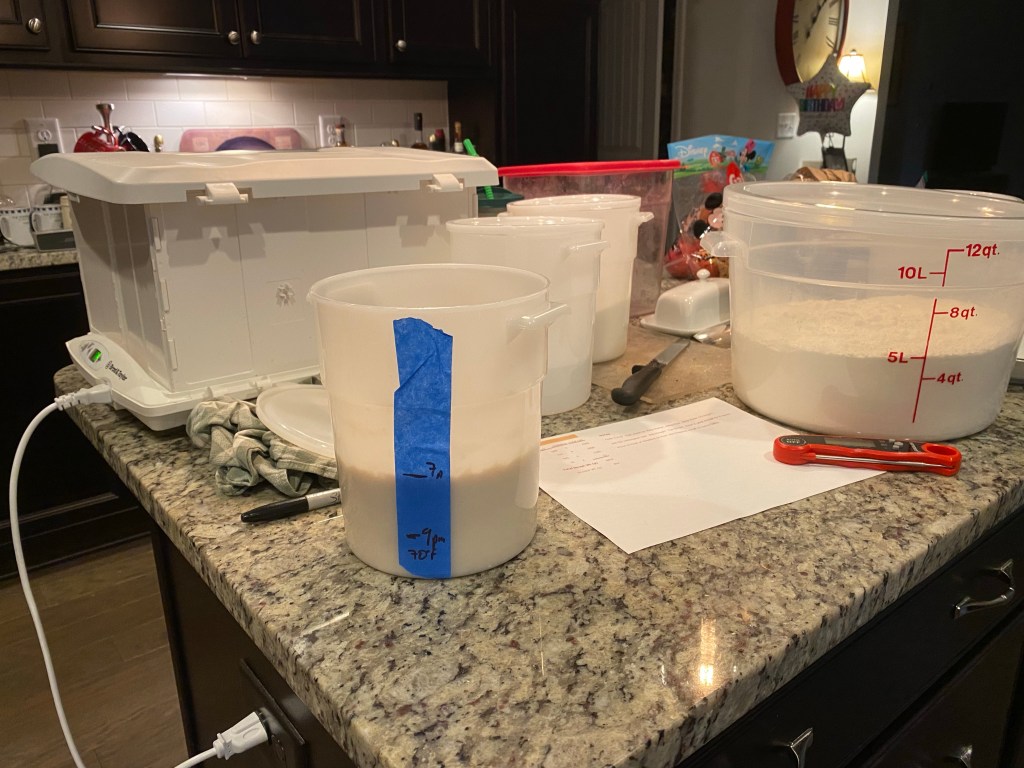
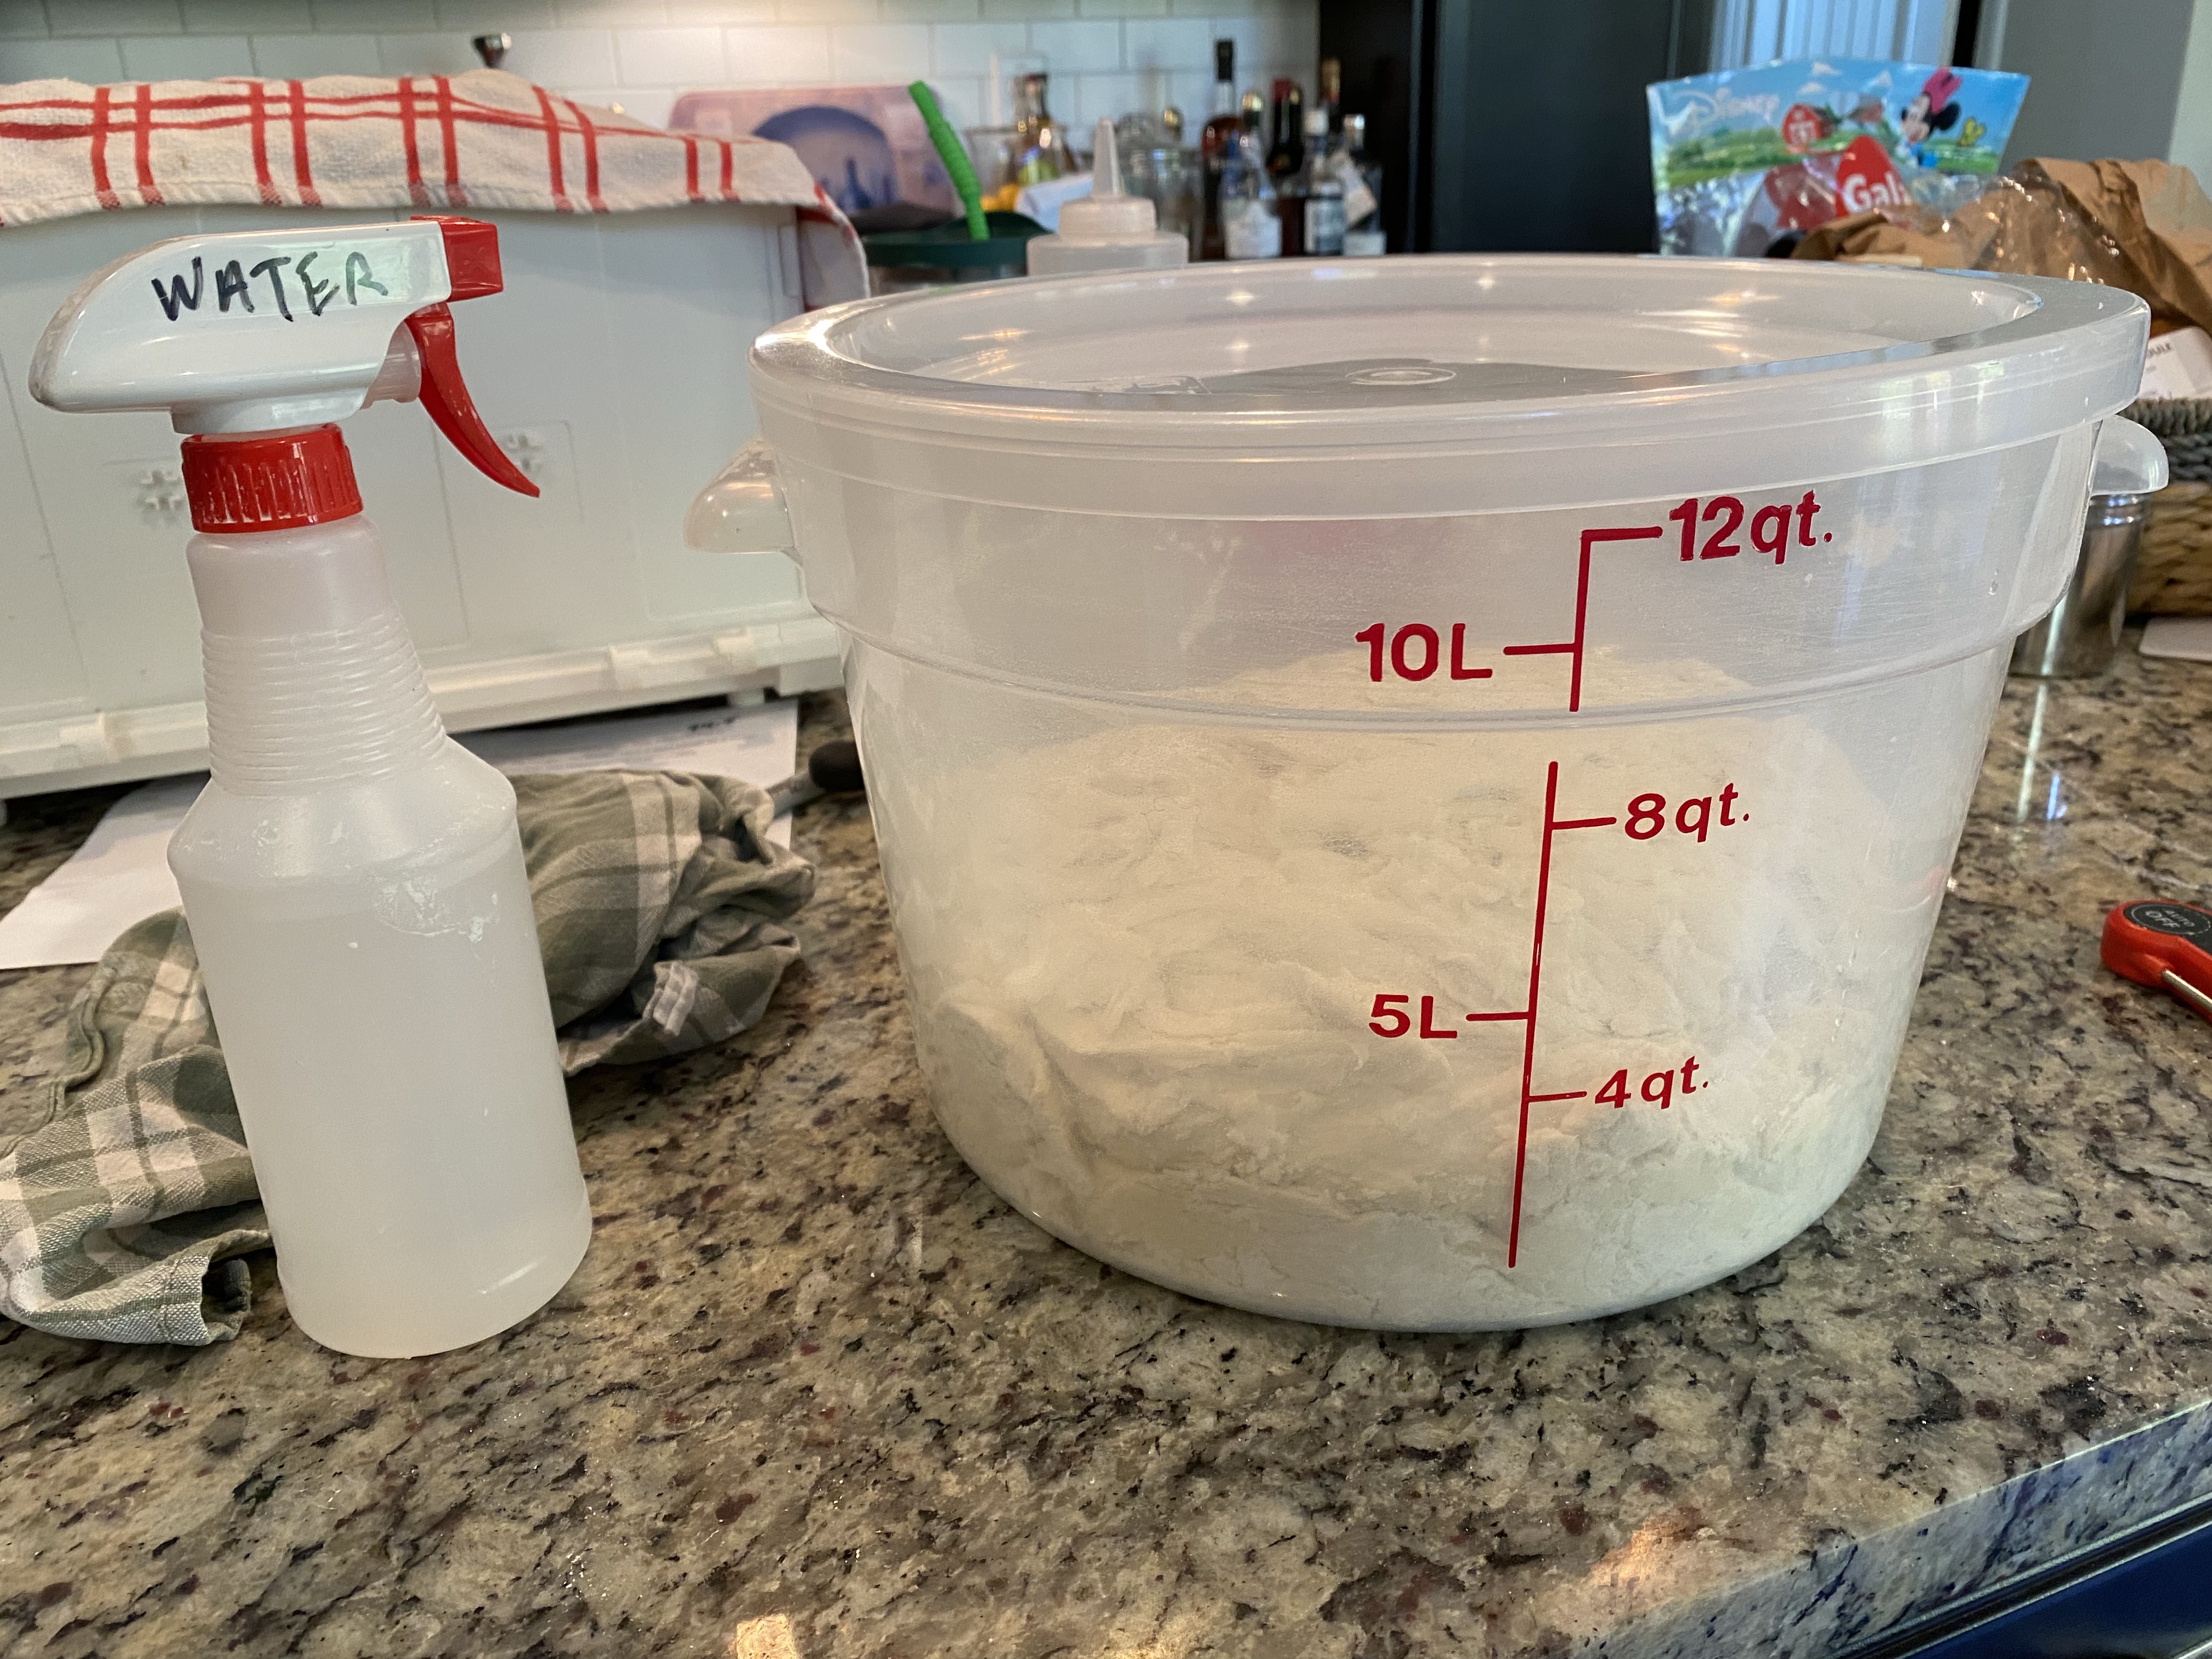
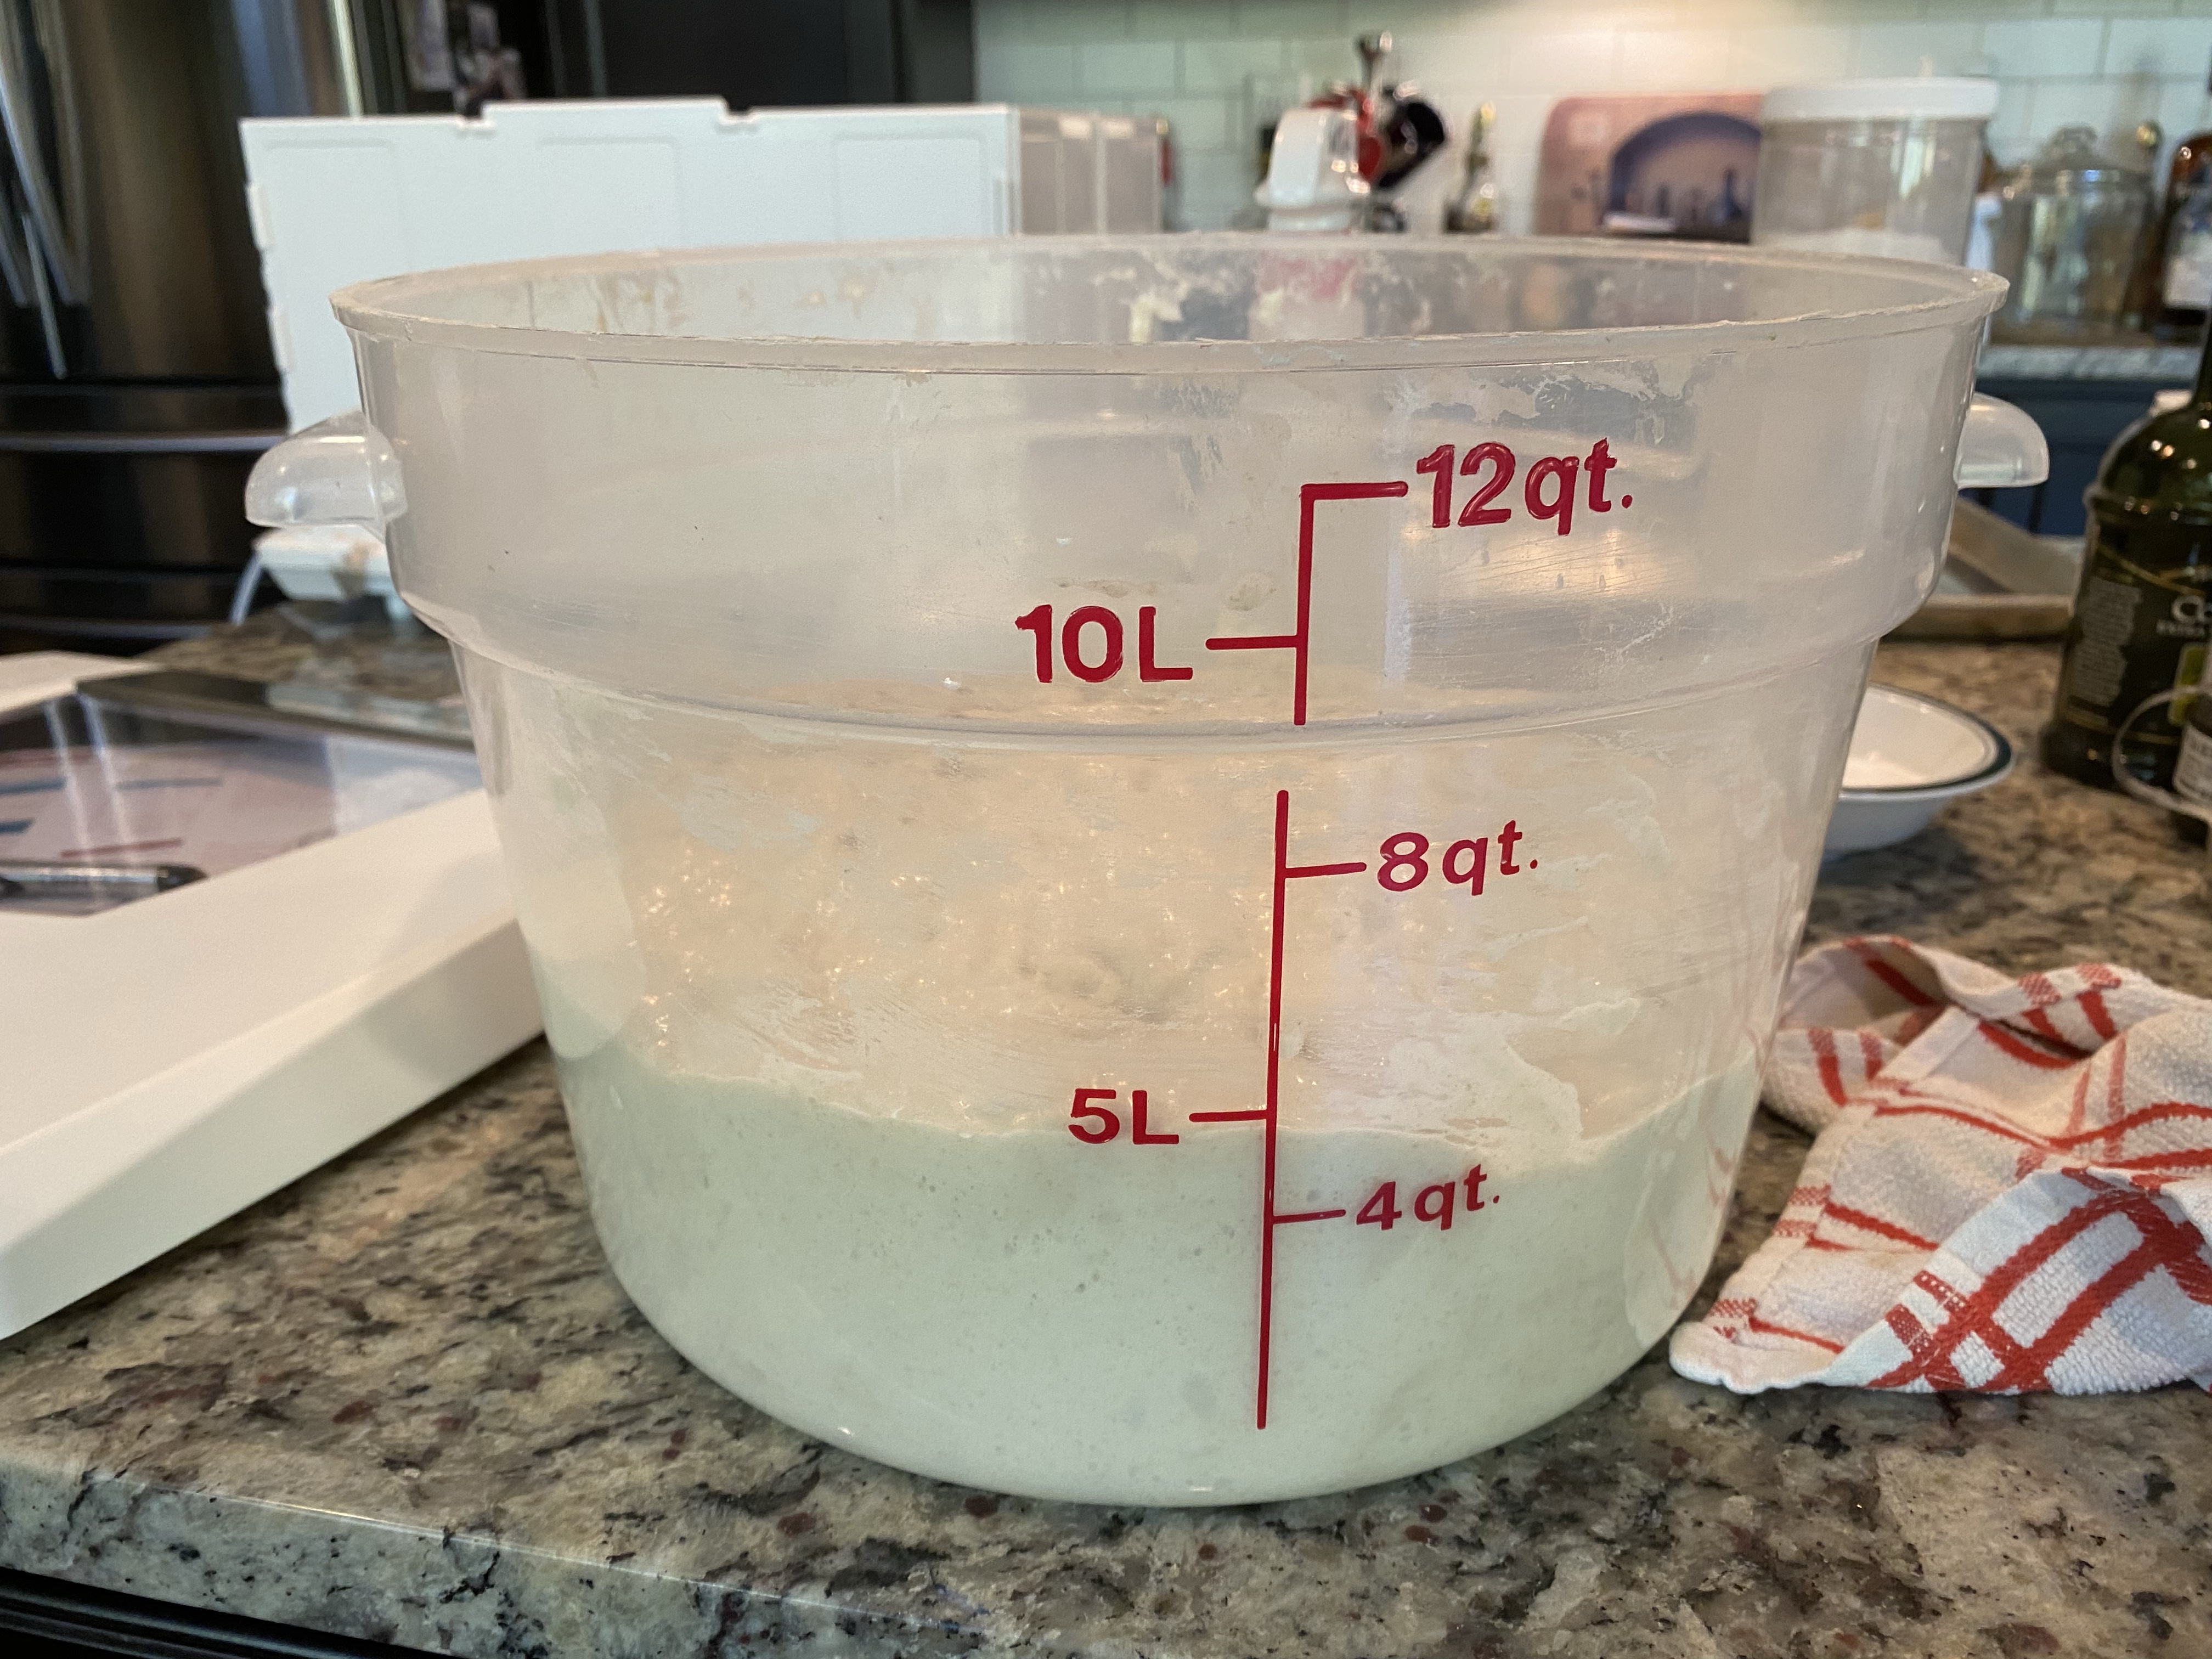
I didn’t have any tubs large enough to hold 2000g of starter that will double in size so I decided to use my Pyrex tub I normally use for ready bread flour in my pantry.
The tub was too high to place the lid on the prover so I substituted a towel instead. Again, control temperature to 74°F. The leaven was 74.5°F when I put it into the box.
Mixing Leaven
Using towel as lid
Making 2000g of Leaven
The next step is to autolyse (at scale). I have 3000g of bread flour and 1760g of water… which I’d like to have at about 94°F when I mix it with the 72°F flour. I’m aiming for a dough temp of 82-84°F as it bulk ferments.
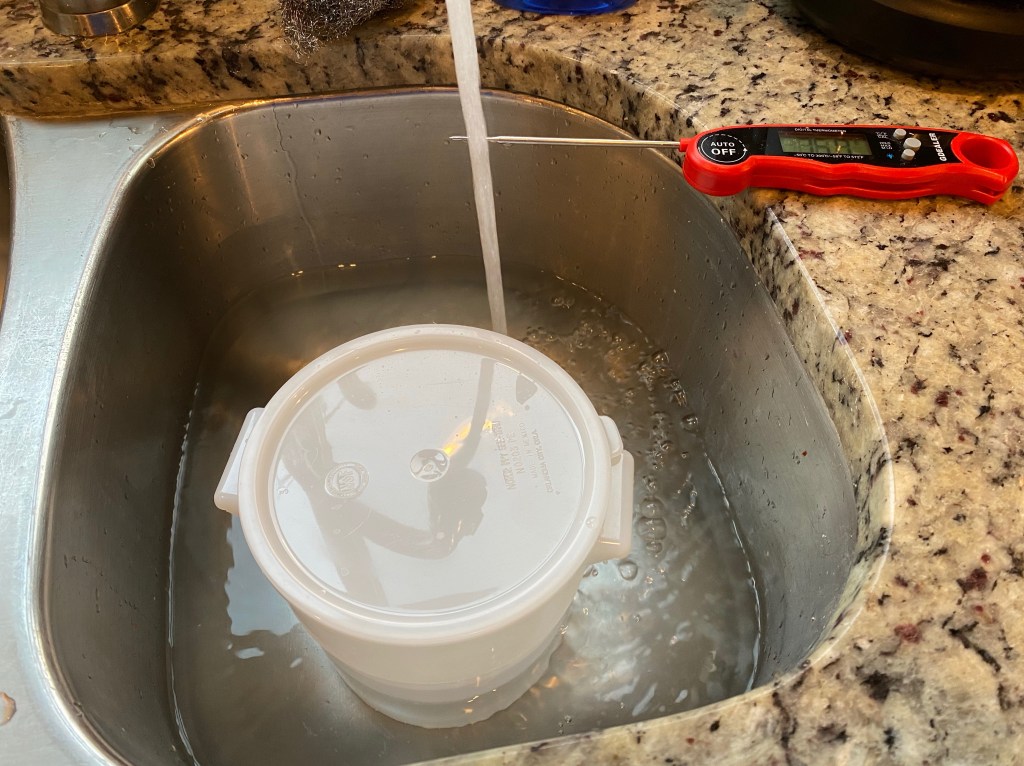
What to do? I’d considered my microwave or adding hot water but discarded those as impractical. My final solution…water bath!
Water bath to preheat water.
I placed the tub containing my measured 72°F water into my sink filled with 99.5°F water. It will heat the water inside the tub and stabilize at a lower temperature since my tub is (pardon the pun) a “heat sink”! Ha! I crack myself up!
The water should be close to the desired temp when it comes time to autolyse.
Beginning Autolyse
Spritzed and covered
Autolyse
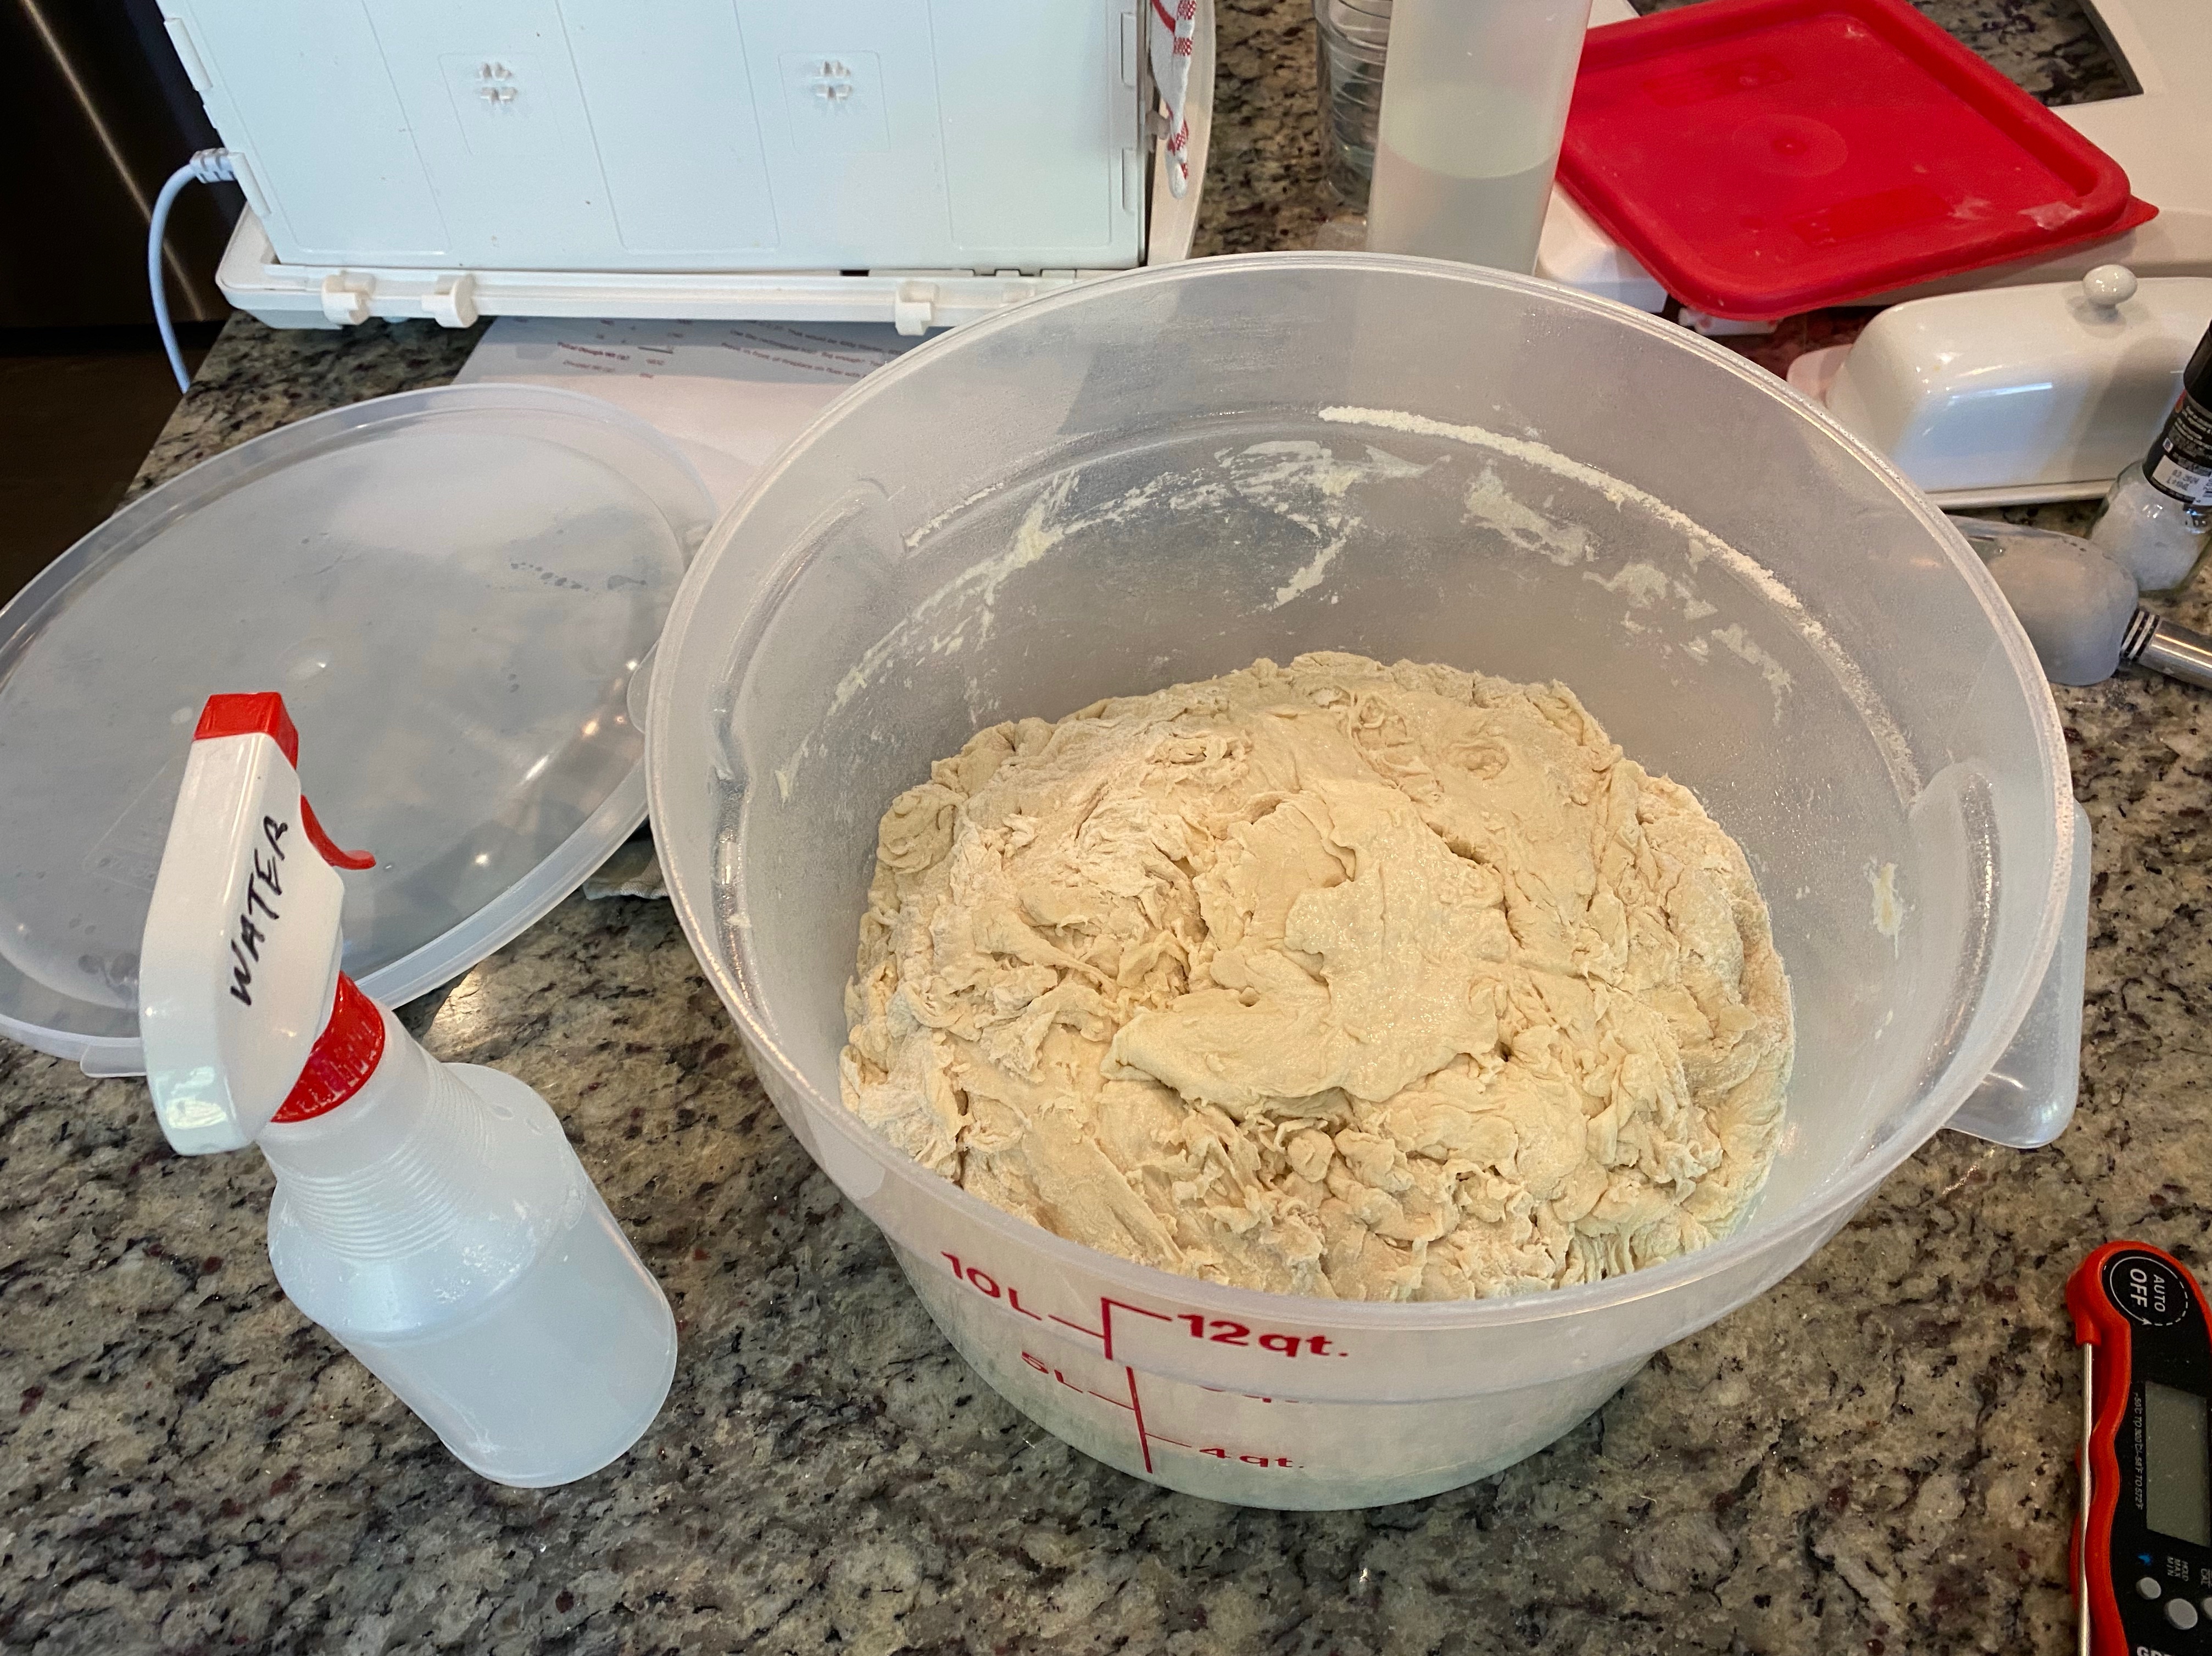
The water was a bit cooler than desired due to me starting the bath too soon (83°F). I dumped a bit of water and added warmer water and boosted the temperature to 98°F. The flour was 72°F. Mixed it was 88°F. Maybe a bit warmer than I had thought but acceptable. I’m leaving covered on the counter. It will cool down a touch so that won’t be a problem. I’m looking for the dough temp to be mid-80’s going into bulk ferment.
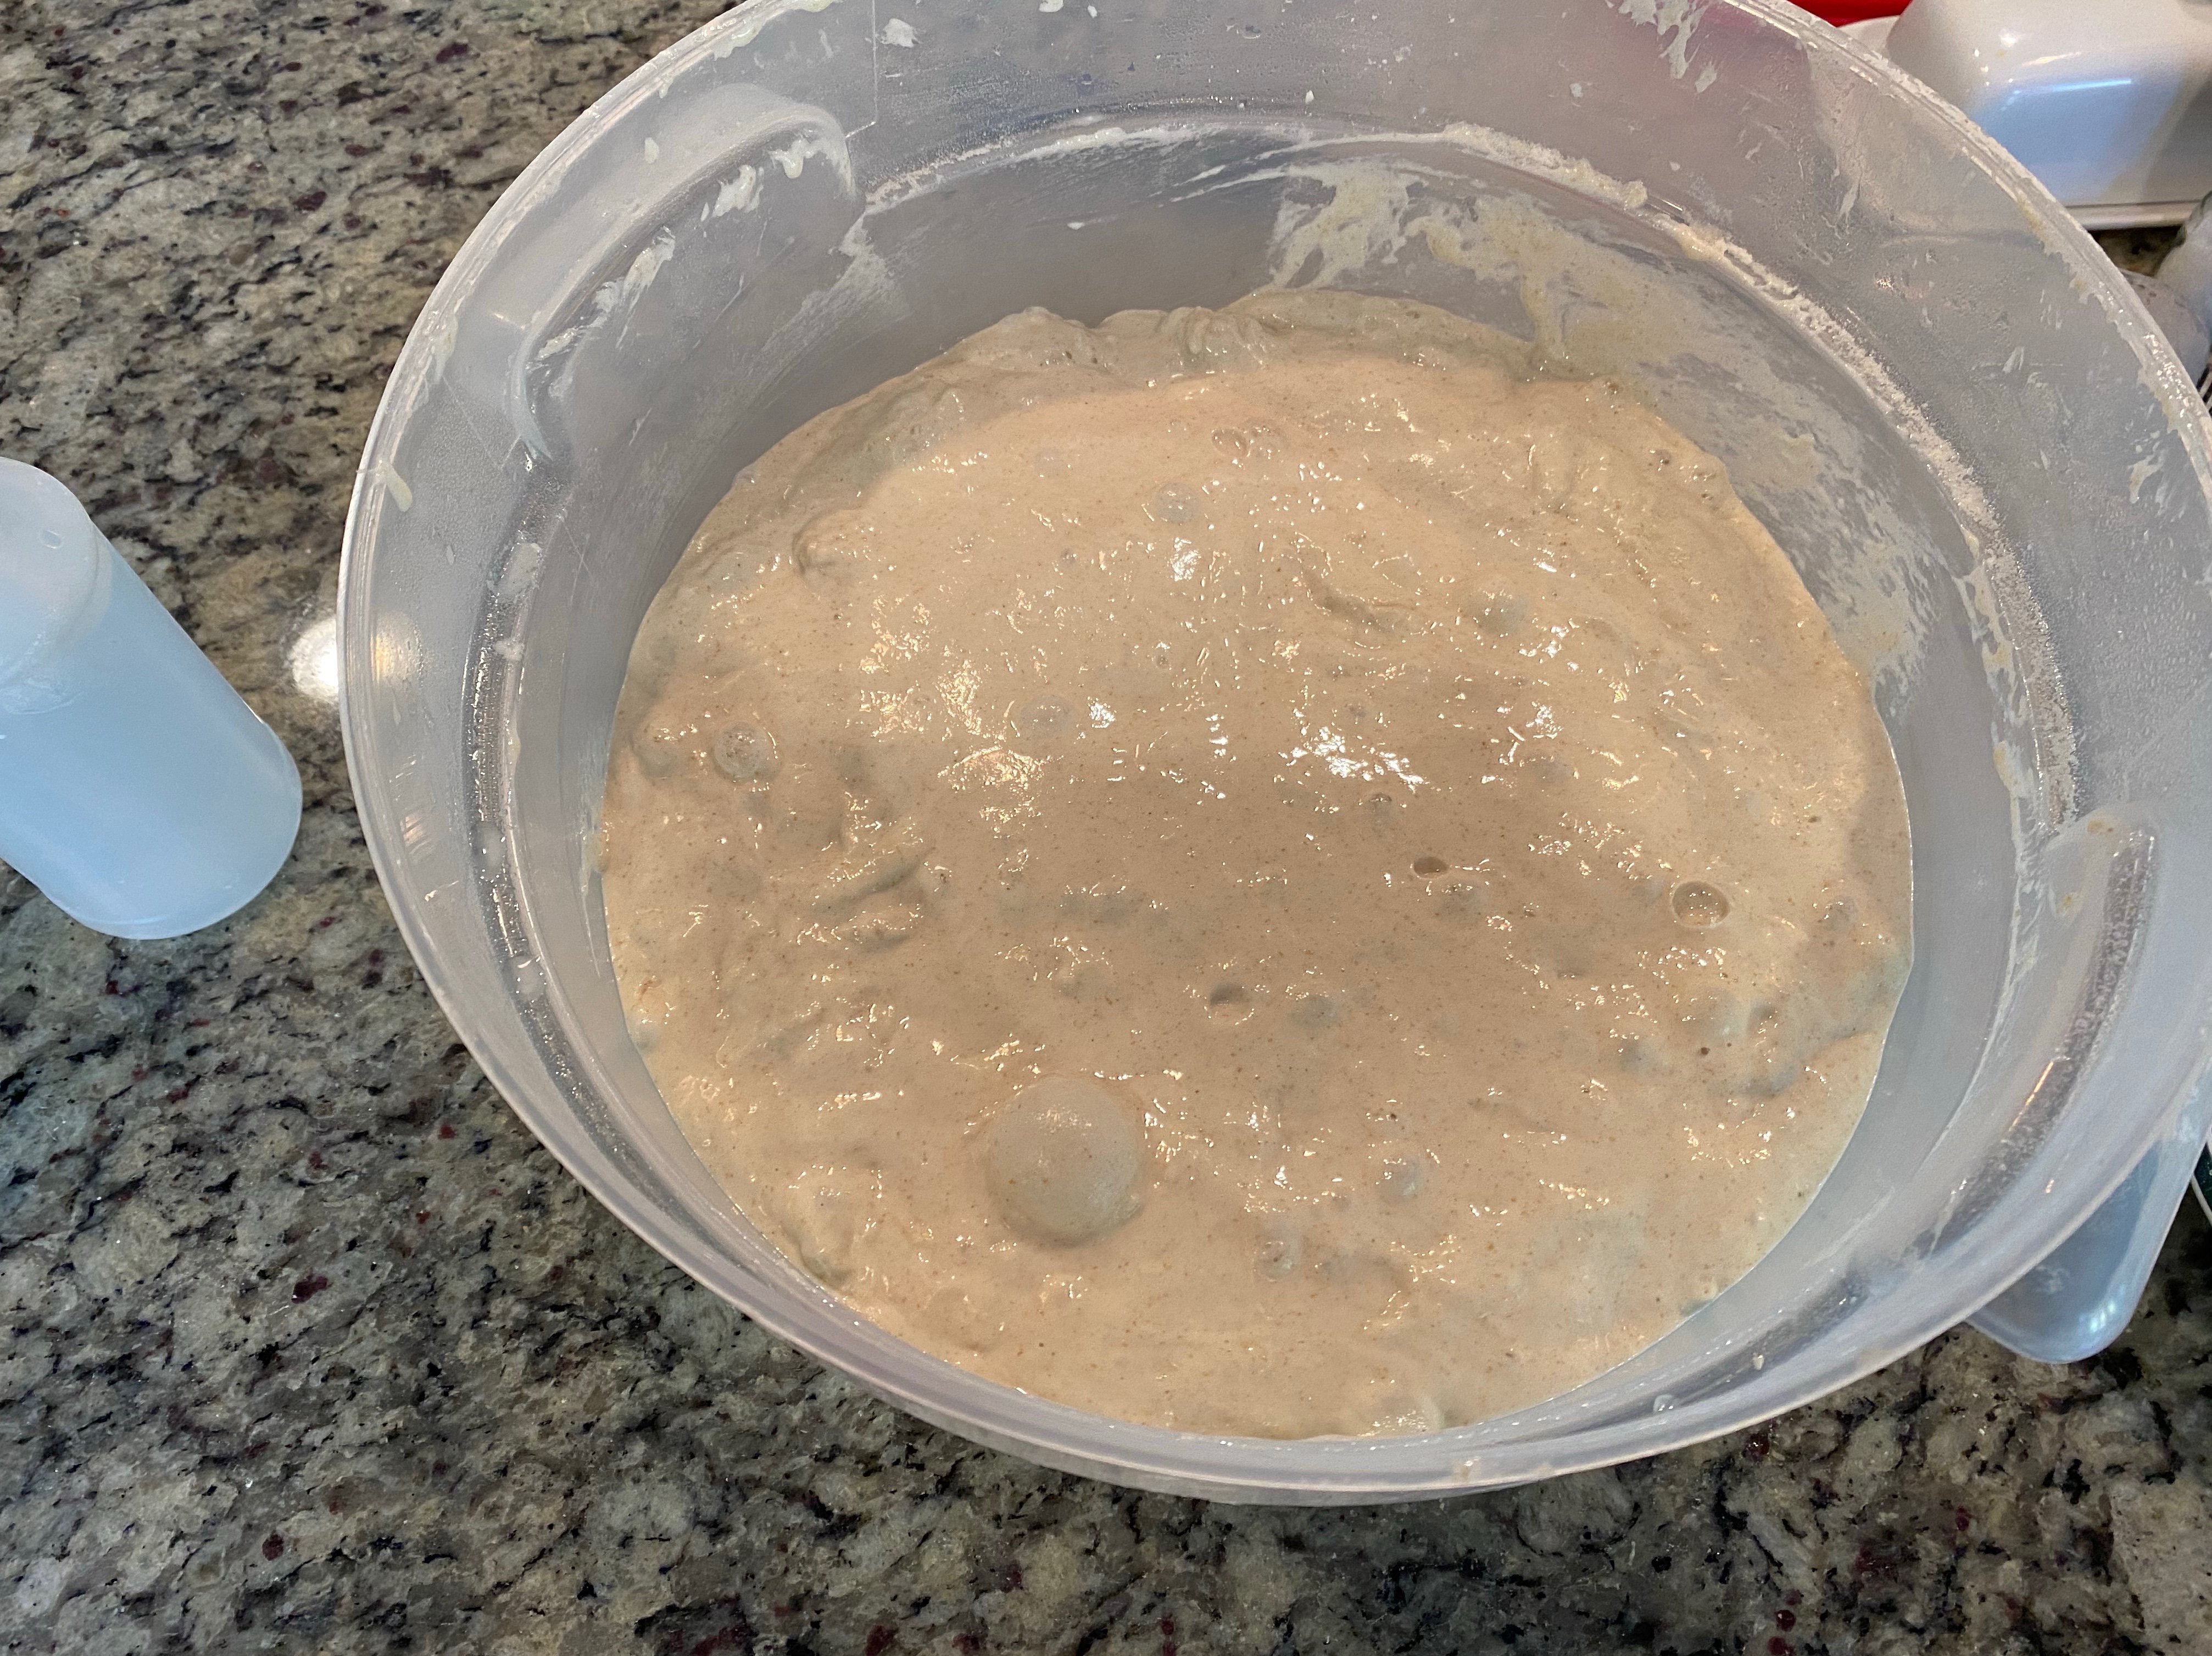
I mixed in the leaven roughly 90 minutes later due to needing to run an errand. I ha plenty of rise in the leaven. It looked great! The dough had lots of strength starting to show due to the autolyse. In my haste to mix in the leaven I failed to take a picture. It was beautiful looking! It had more than doubled and wad more than 4L in volume.
Leaven added
Mixed my hand
Adding Leaven to autolysed dough
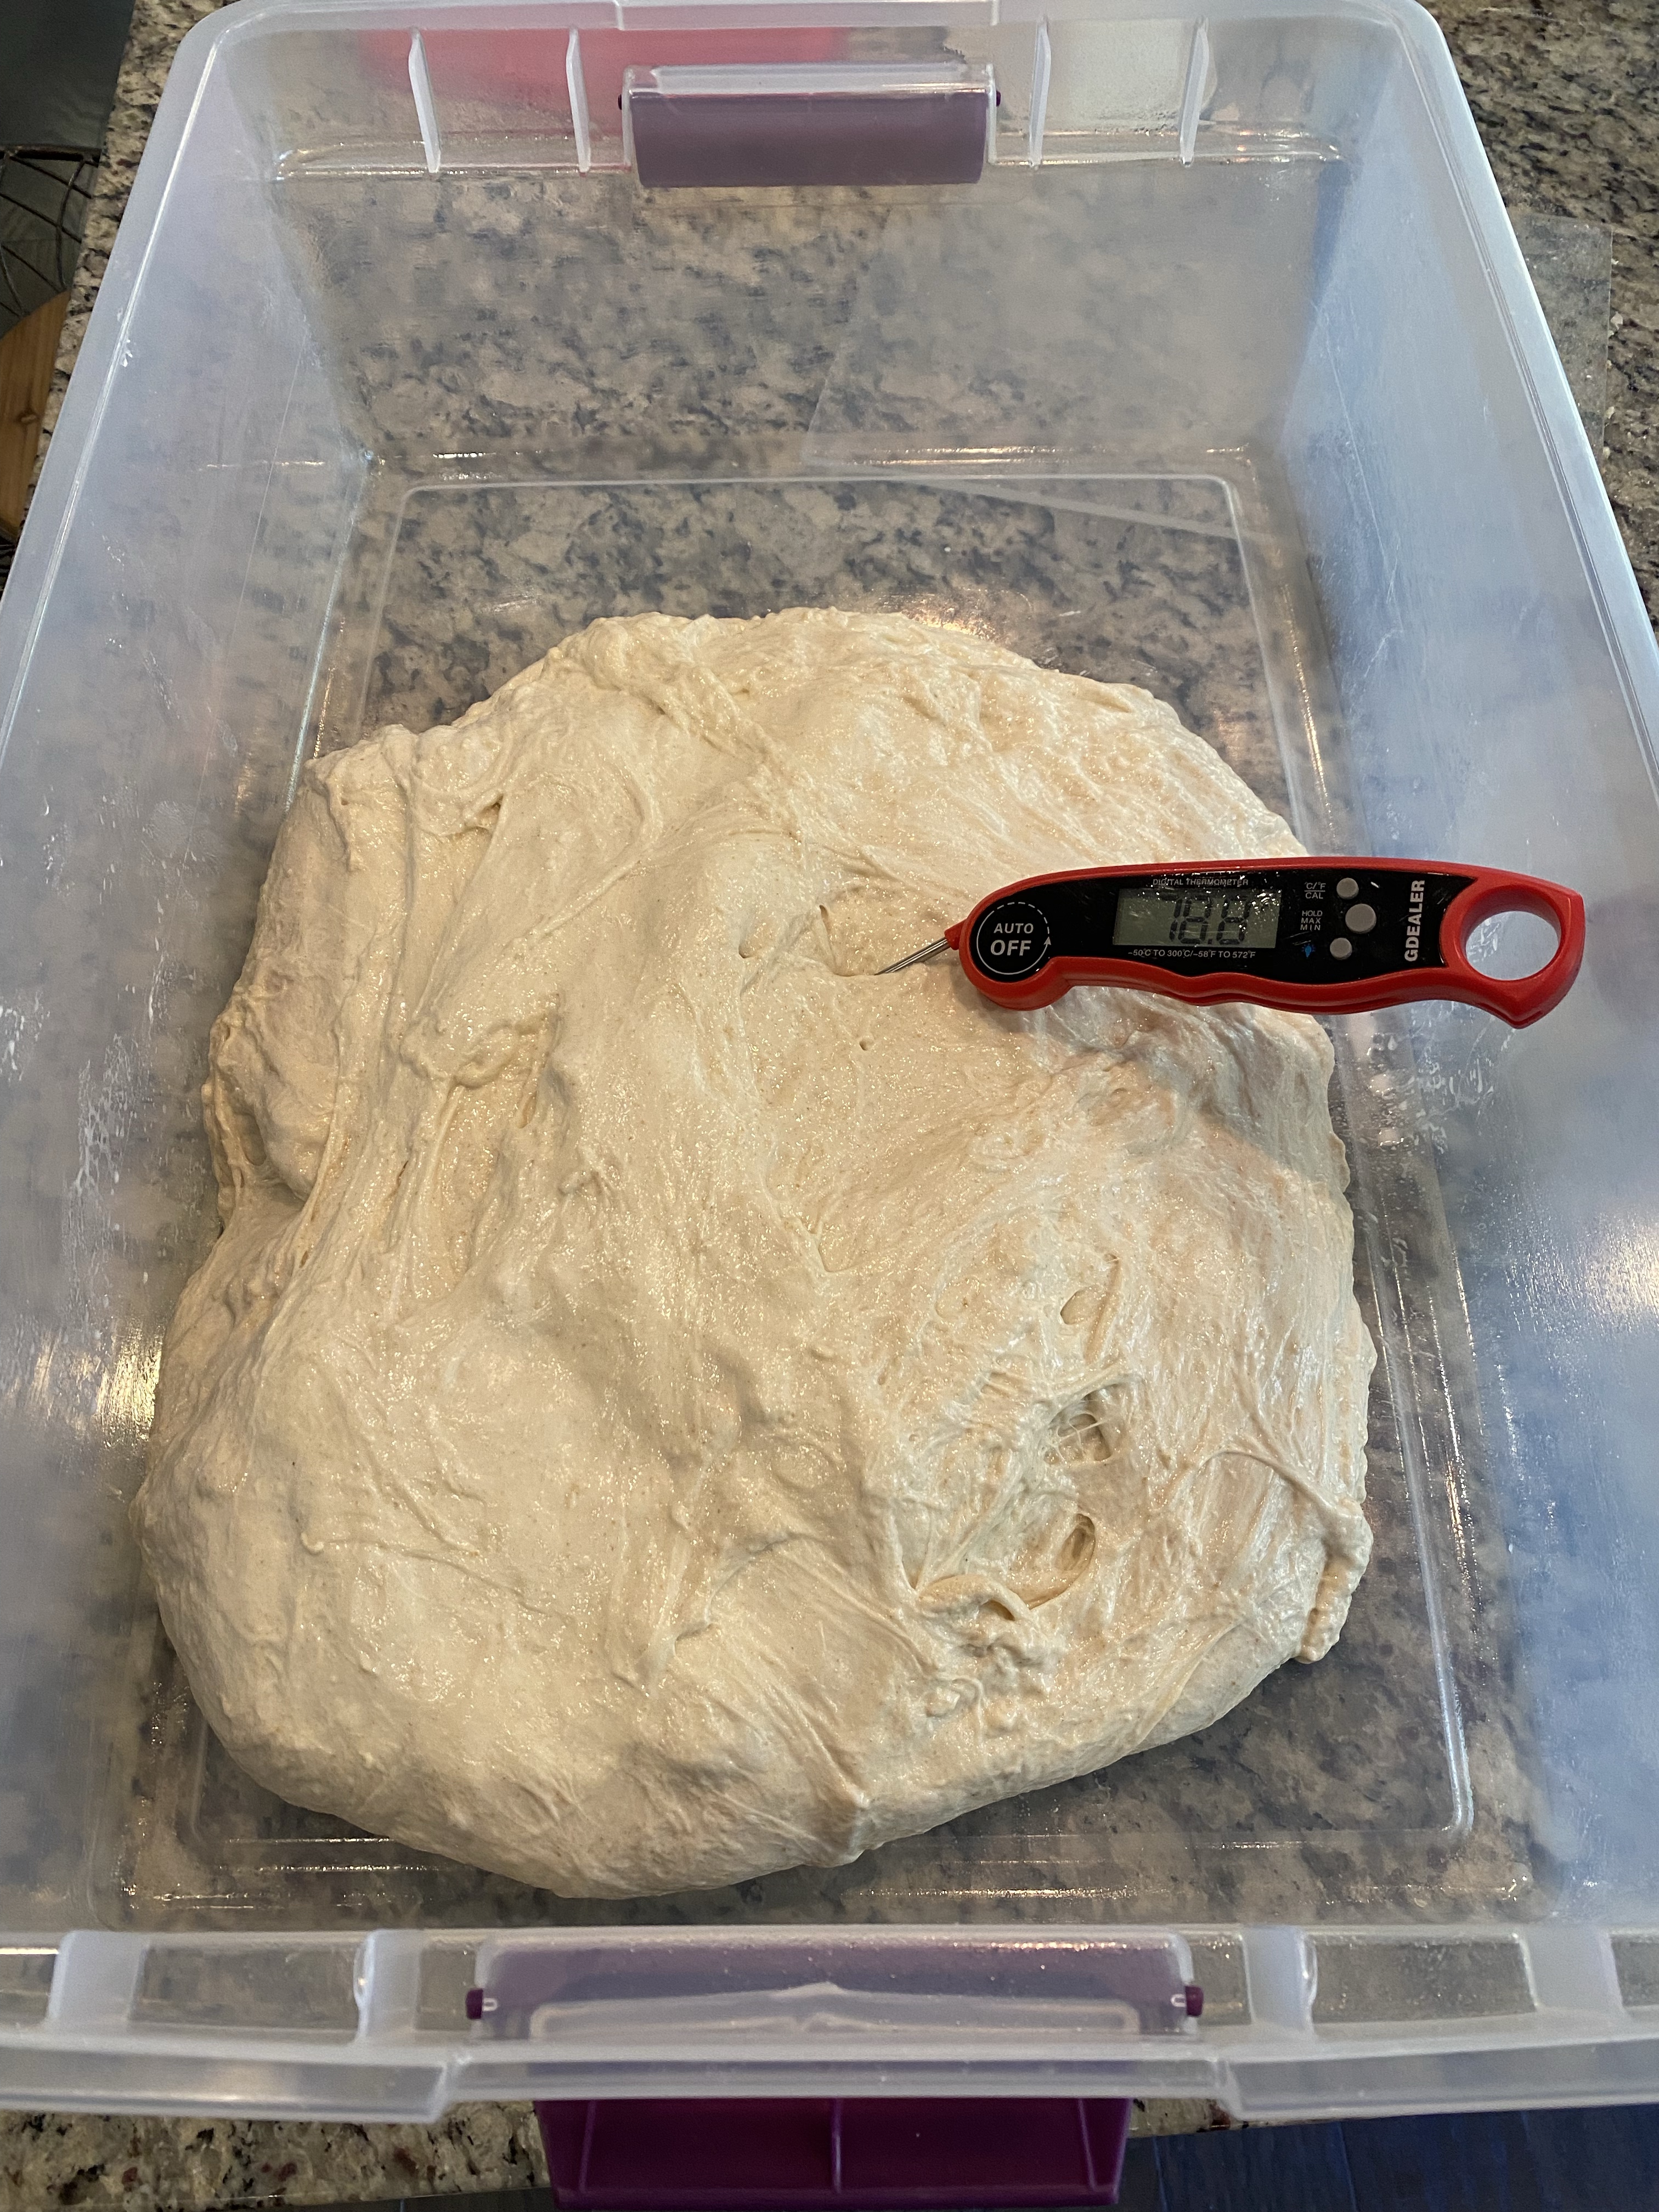
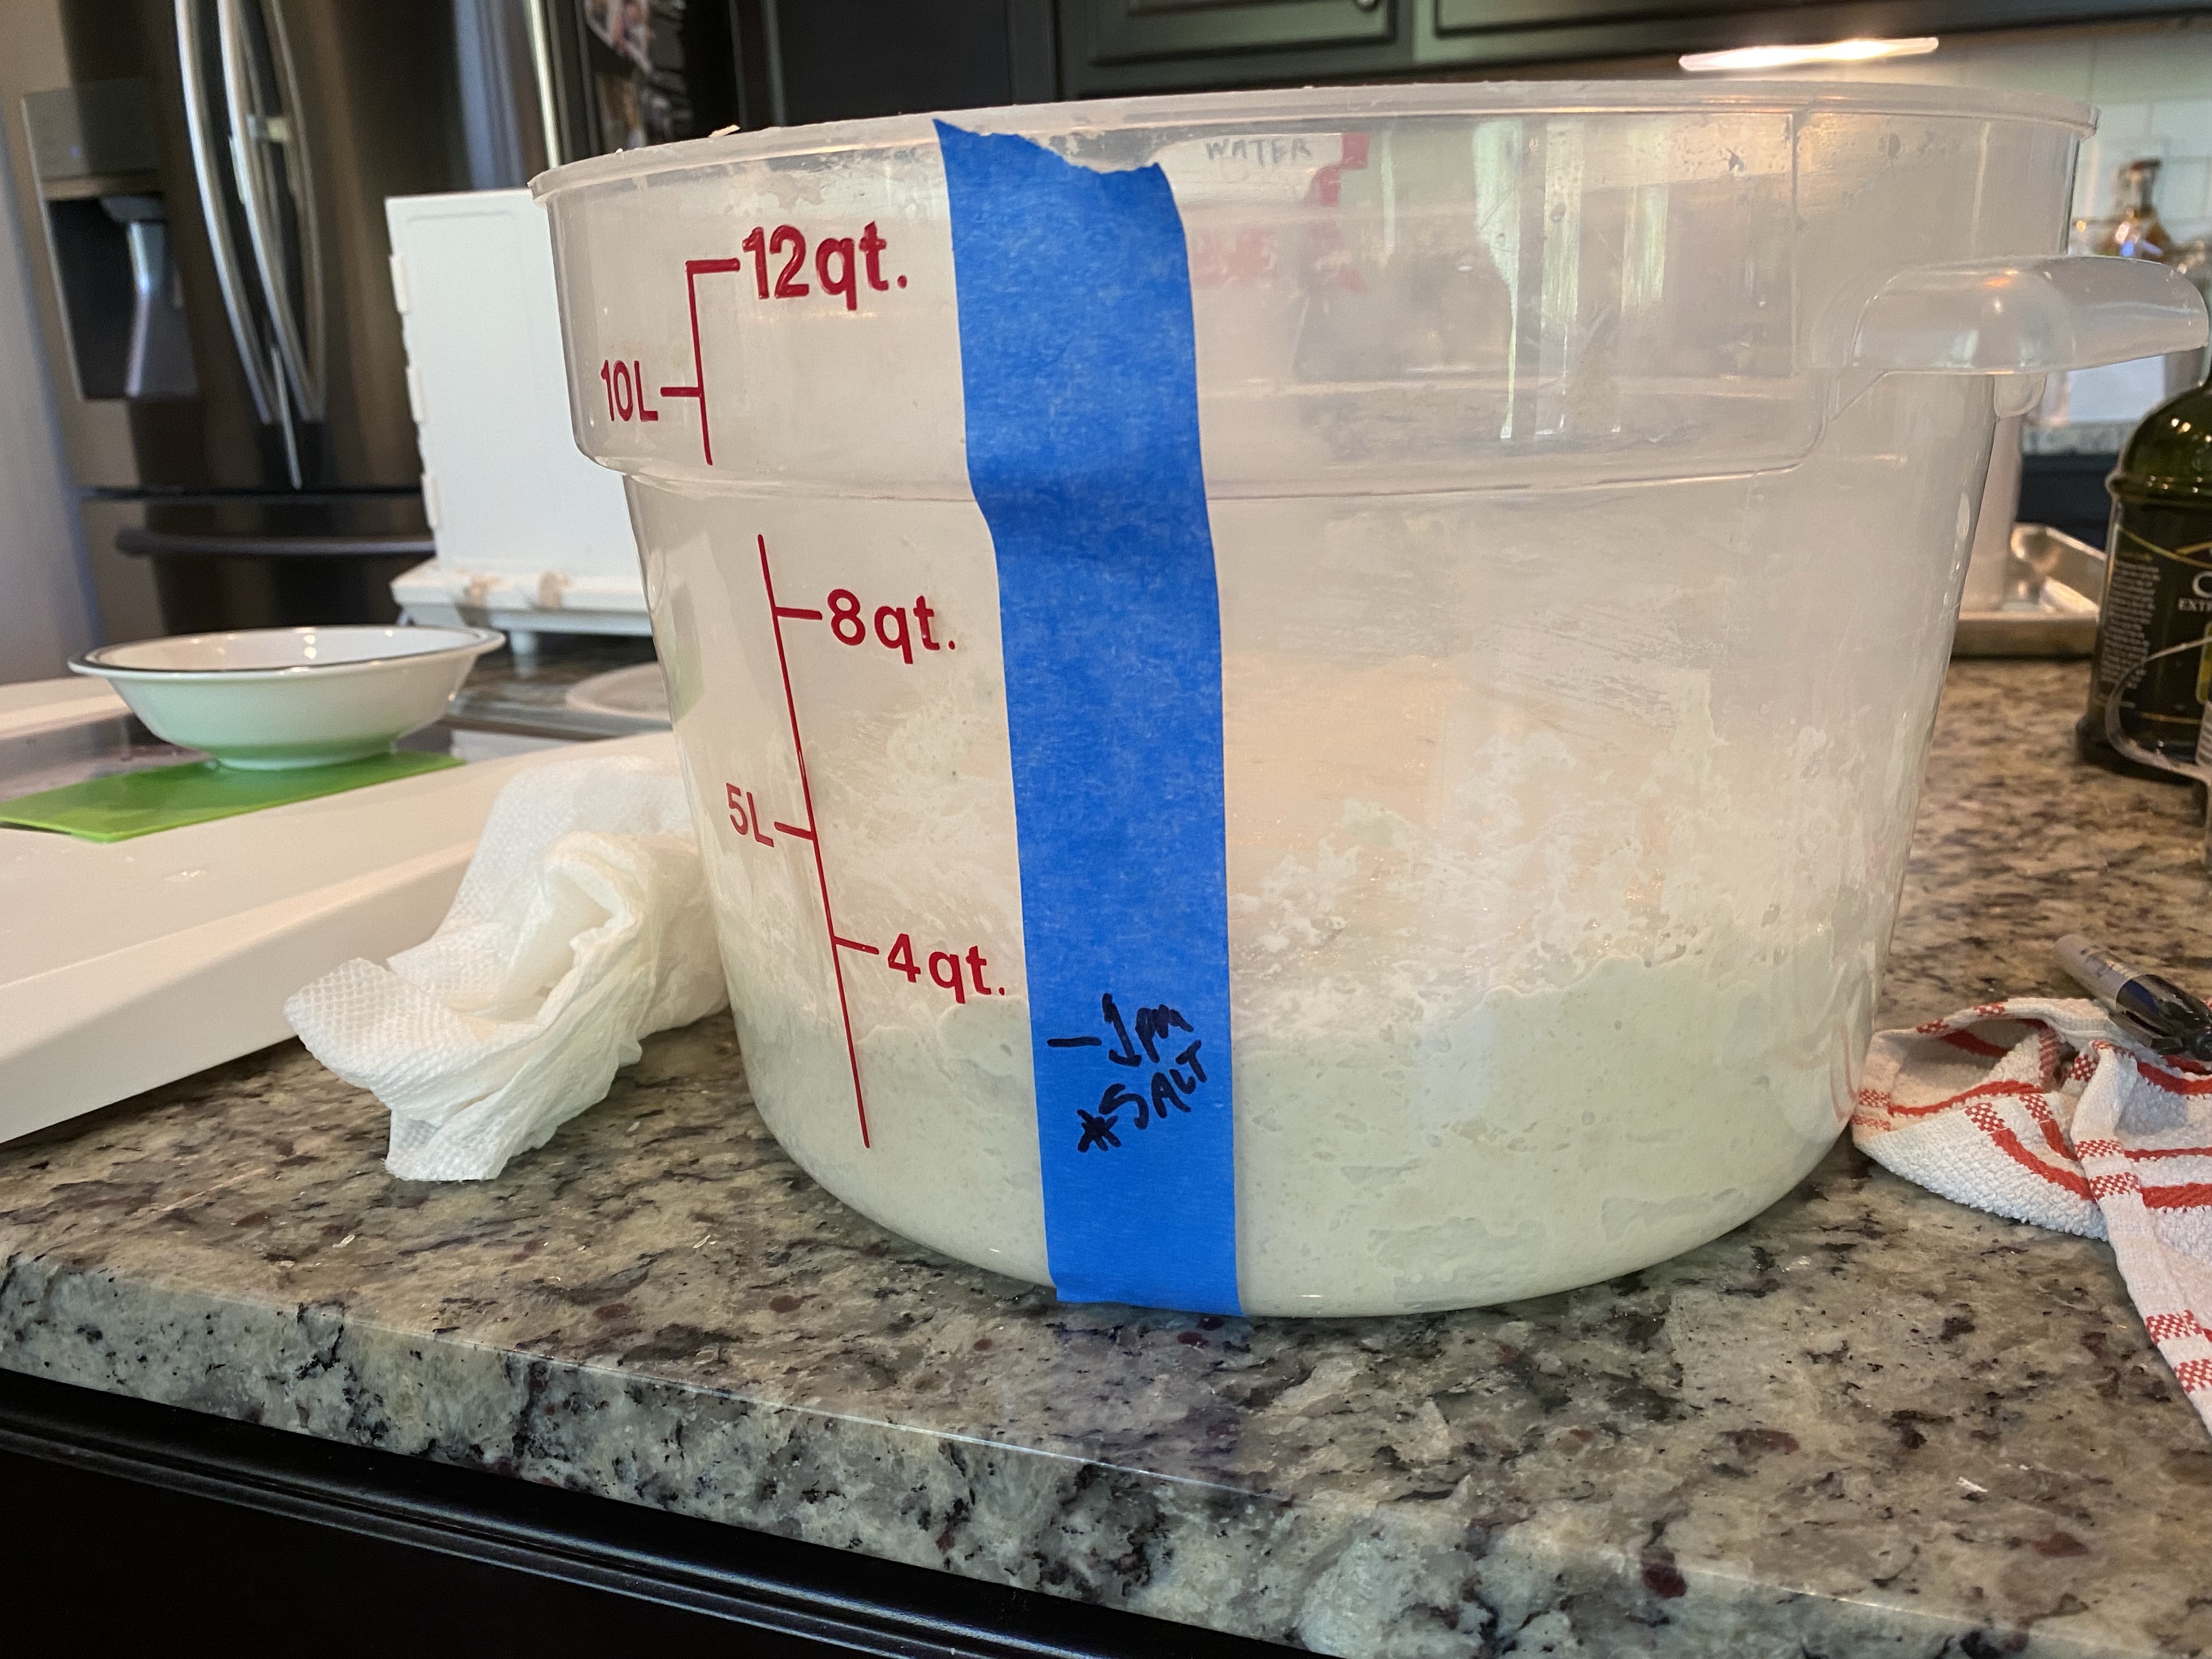
I added the salt. Pleased that I’m seeing activity/bubbles in the dough already after only 30 minutes! Transferred the dough to a larger tub where it will be easier to stretch’n fold. I’ll cut off a piece of dough for my aliquot jar at the first folding. Dough temperature is 78.8° F. This is actually lower than I wanted overall. Thinking my water temp initially could be higher.
30 minutes after mixing in Leaven
Salt added and transferred to new tub
Mixing in salt and beginning bulk ferment
First Stretch ‘n Fold. Dough feels good. I feel a few lumps of harder/non-hydrated pieces of dough. May need a better oiling of the bin next time since the dough sticks a bit as I pull it up to stretch. Dough temperature is still just north of 78°F. I cut off a piece of dough and put it in my aliquot jar to judge the bulk ferment.
Before first fold
After first fold
Stretch’n Fold #1
Stretch’n Fold #2 after 30 minutes rest. Dough is looking good. I’ve continued pinching little nodules that seem to be hard/not hydrated well. Overall I’m pleased with the progress. Dough temp is cooling slightly to 78°F even.
Before 2nd Fold
After 2nd Fold
Stretch’n Fold #2
Stretch’n Fold #3 after another 30 minutes of rest. Dough continues to look good. I’m pleased with how it is looking/growing. The dough is holding its shape through the 30 minutes and not expanding outward to both sides now. Dough temp is falling a bit to 77.2°F. I’m expecting that that will prolong the bulk ferment a hair but not substantially. Now to let it double in size/volume.
Before 3rd Fild
After 3rd Fold
Stretch’n Fold #3
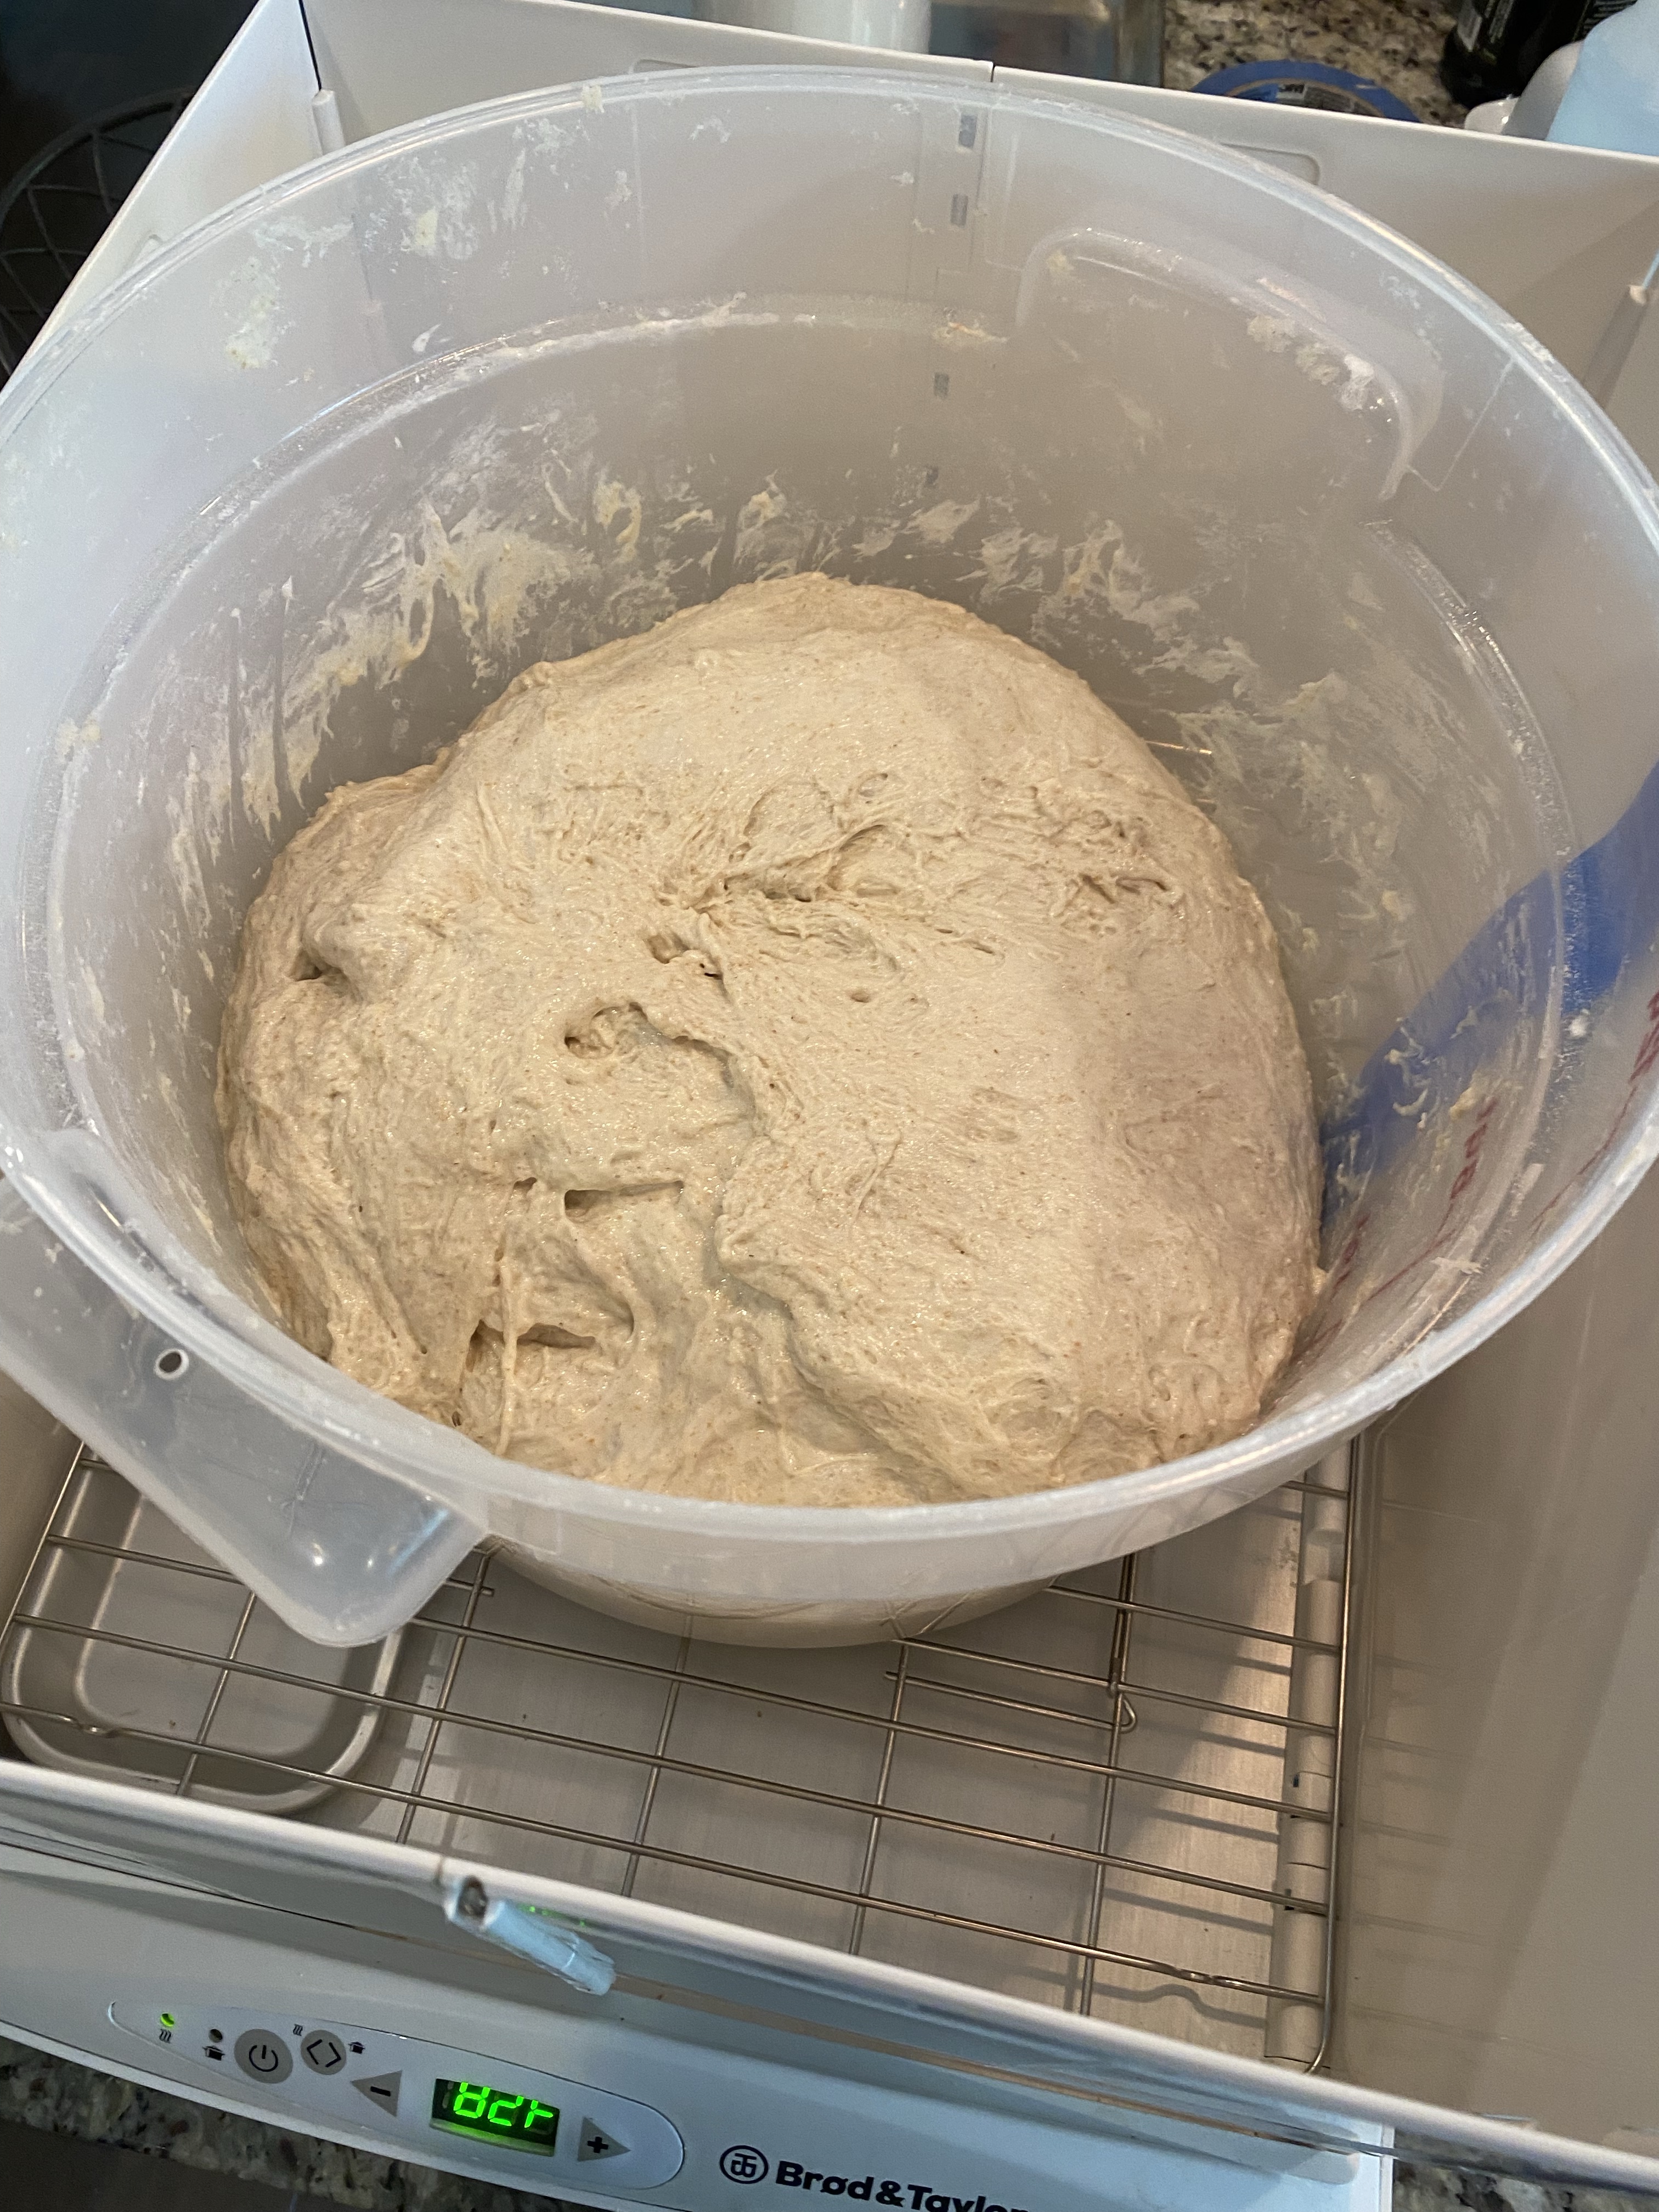
It has now doubled in size! Dough temperature is holding at 77.7°F. It is now time to do a dough dump, weighing out eight loaves and preshaping!
Note: next time I’ll dump it horizontally so I don’t hit my pendant lights with the tub.
Dough Dump
I divided the dough into eight loaves, preshaped and let rest.
Preshaped Loaves
My shaping leaves something to be desired. Frankly, I don’t do a very good job. The rice flour makes it hard to create tension if it is covering too much surface.
In any case I have four Batards (loaves) and four Boules (rounds) in the fridge.
Need to practice scaling up my recipe and leveraging past lessons on temperature control.
Better to try one batch at a time than to try scaling up three different bakes concurrently. THAT could be a disaster!
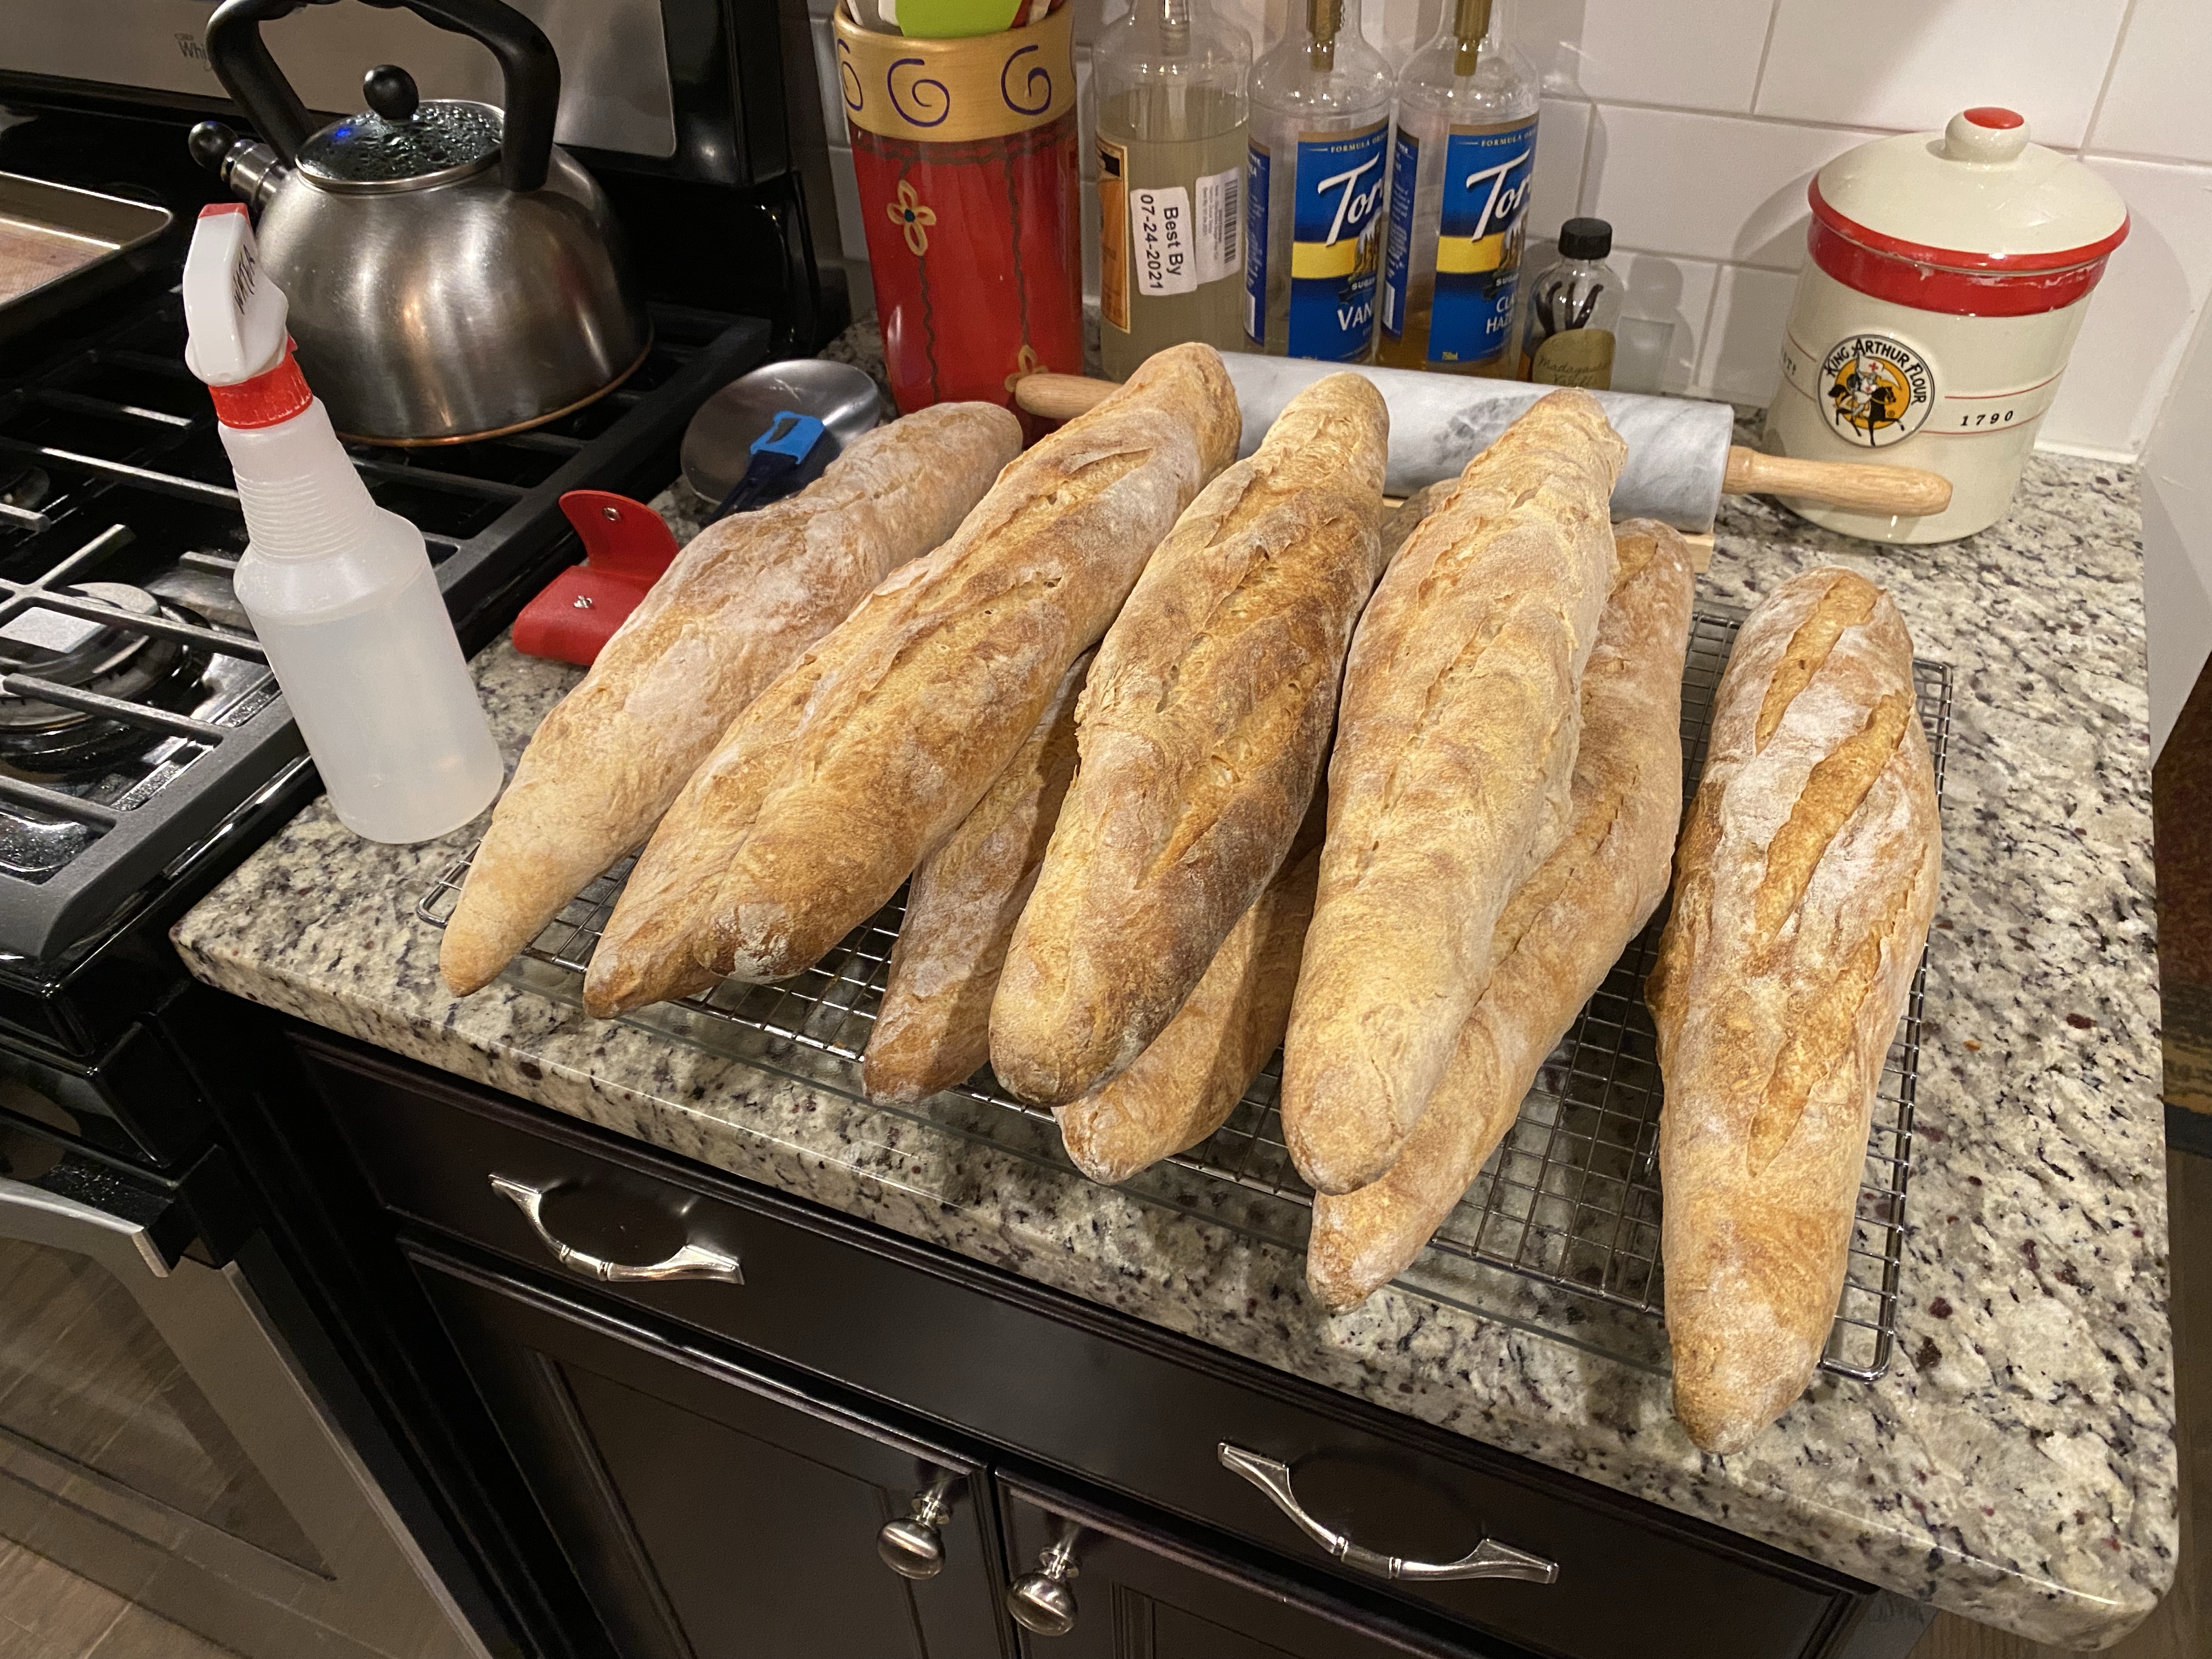
Today it is baguettes. I’m going to double my recipe and aim for 10 baguettes.
Finished Baguettes
My decision to double is mainly due to my tub size that I can fit into my proving box. I need to tightly control temperature if I want consistency in timing.
My thought is to bulk to just before double. Shape five loaves and get onto the Couche. I’ll separate out another five 45 mins delayed (but at ambient temp). Not thinking the impact will be significant…just trying to account for my staggered baking time given my oven size.
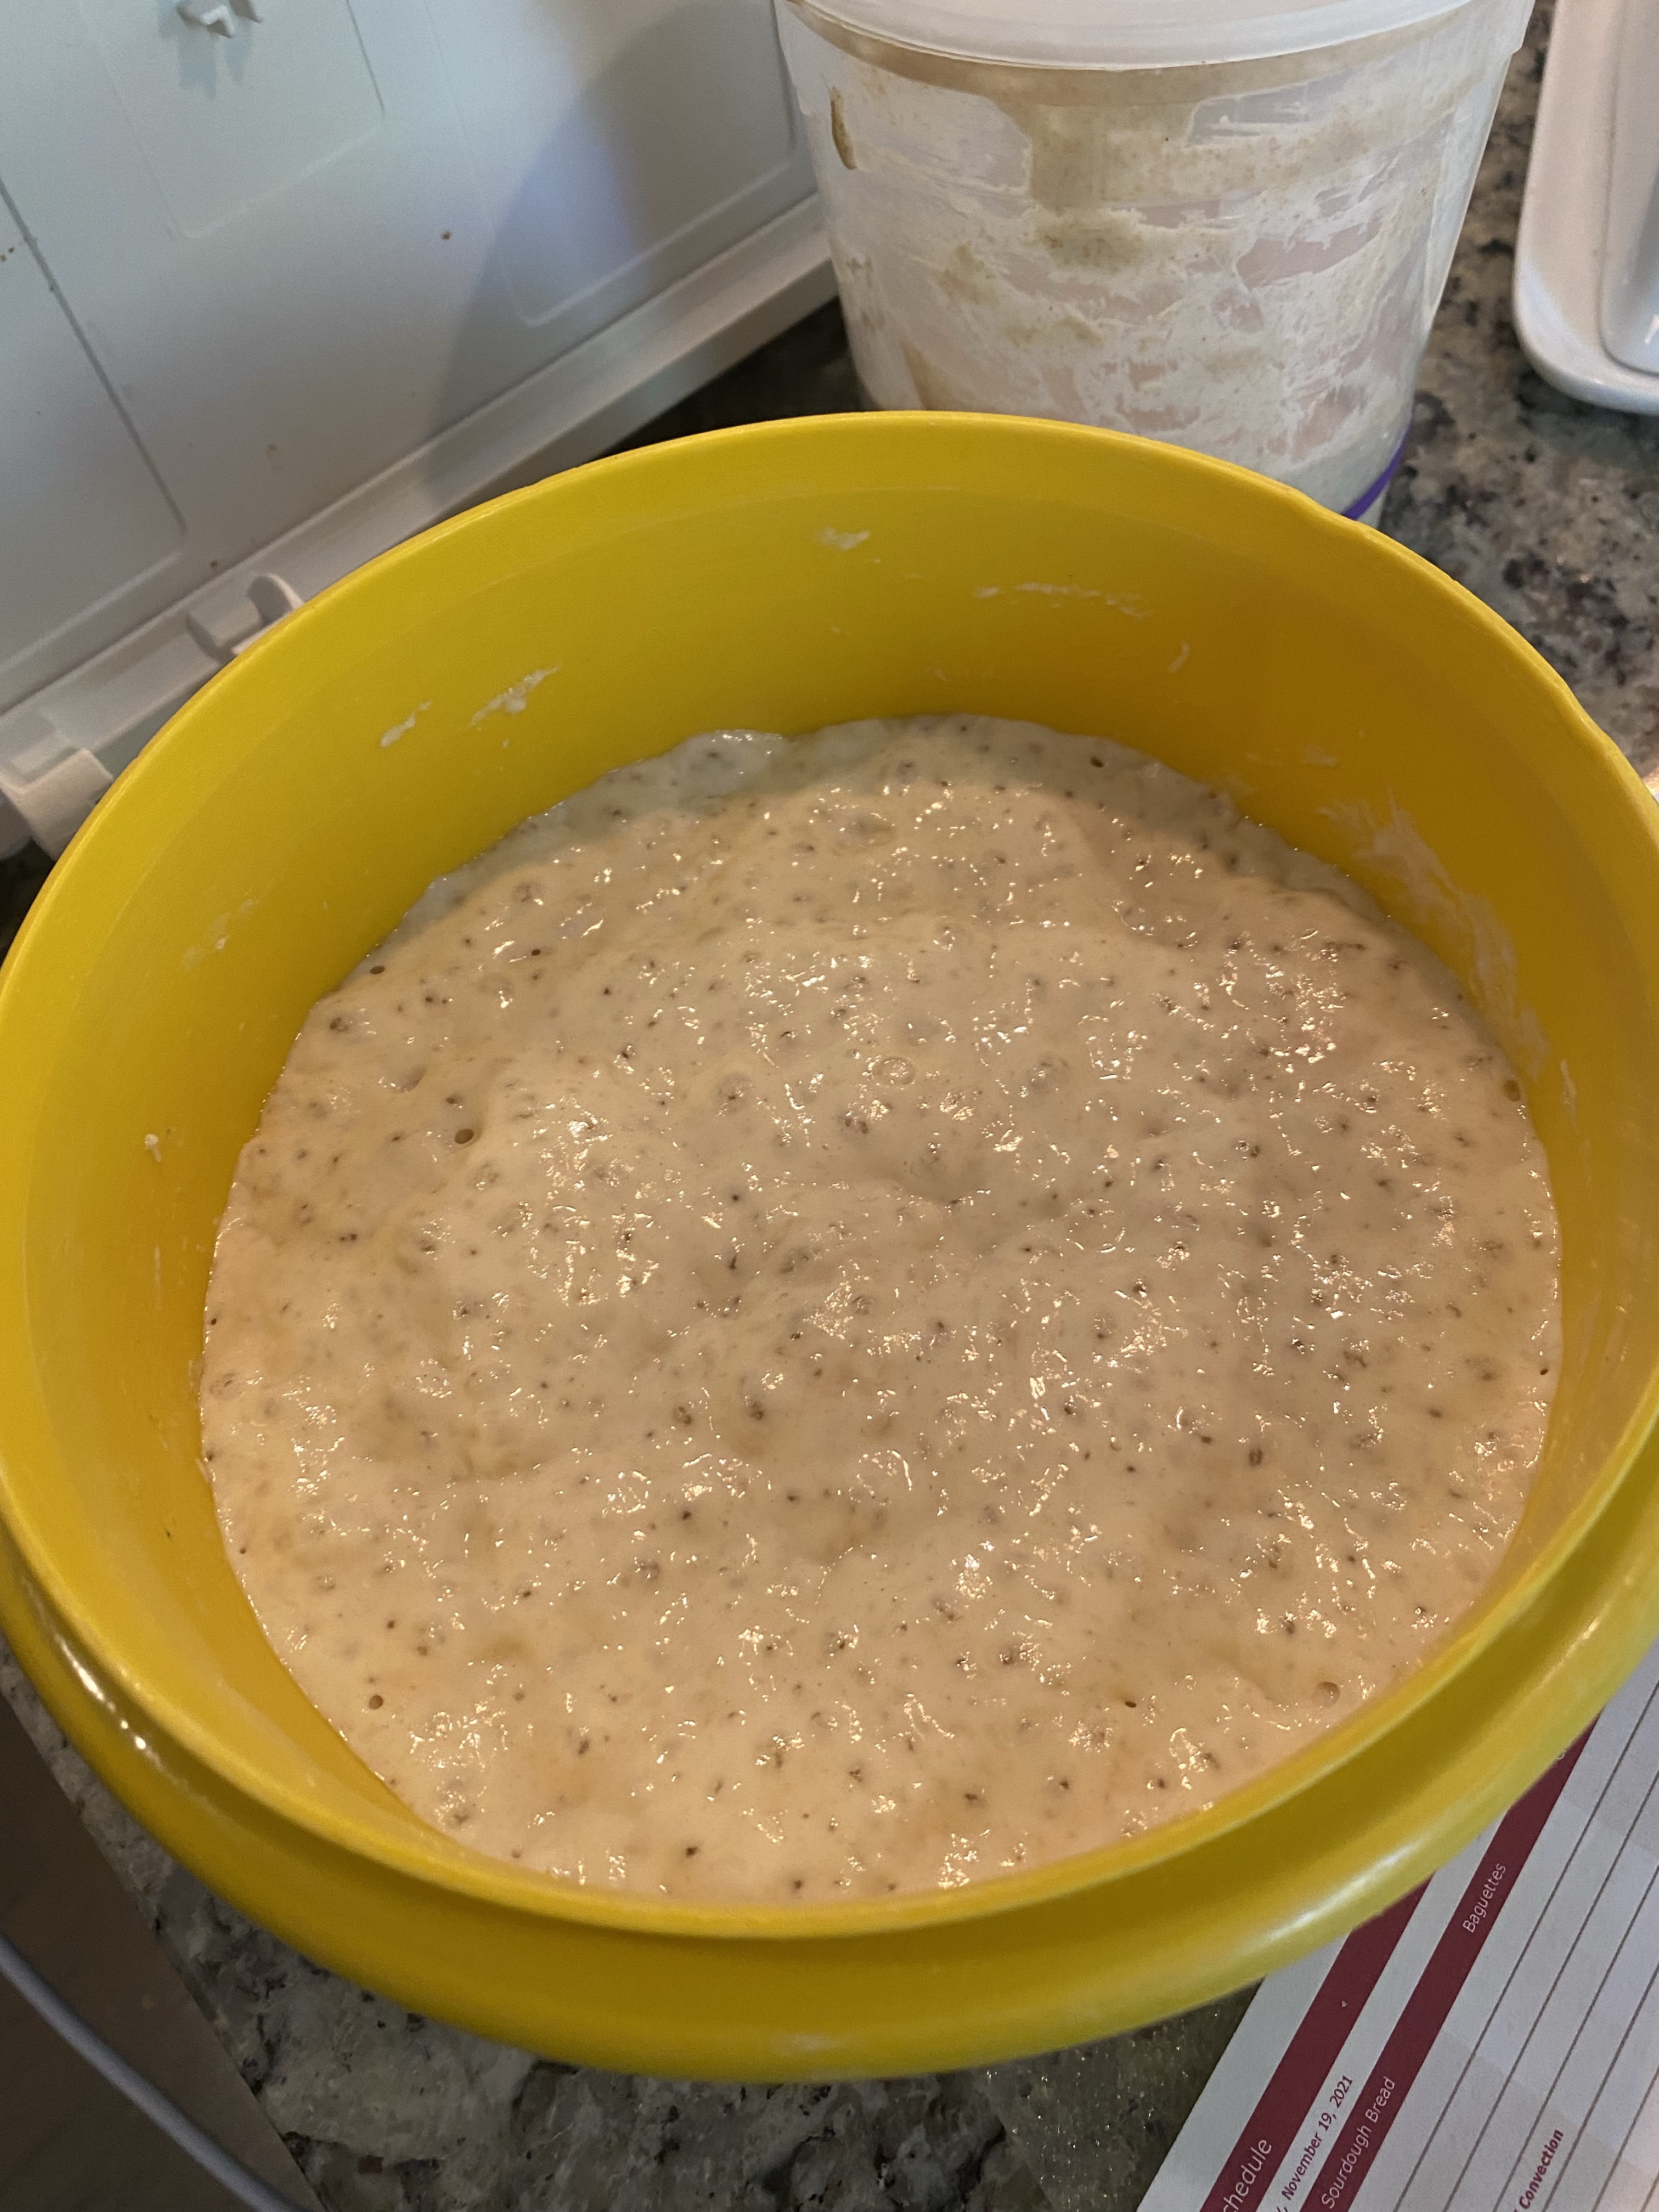
First step was to get my Leaven and Poolish going with different temps. Leaven at 82°F and Poolish at an ambient 73°F. Here is a gallery of them over time.
Starter Refreshed 0730
Poolish mixed 72°F
Leaven mixed 82°F
Poolish Growth
Lraven growing
Leaven and Poolish growth
About four hours later I began the autolyse on the flour. Mixed dry it was 72°F. I added 93°F water and mixed it came to 83°F. As expected it was shaggy at this point. I spritzed and covered for about 45 minutes.
Measuring 2X
Mixed dry at 72°F
Adding water to bring to 82°F
Mixed and spritzed
Autolyse
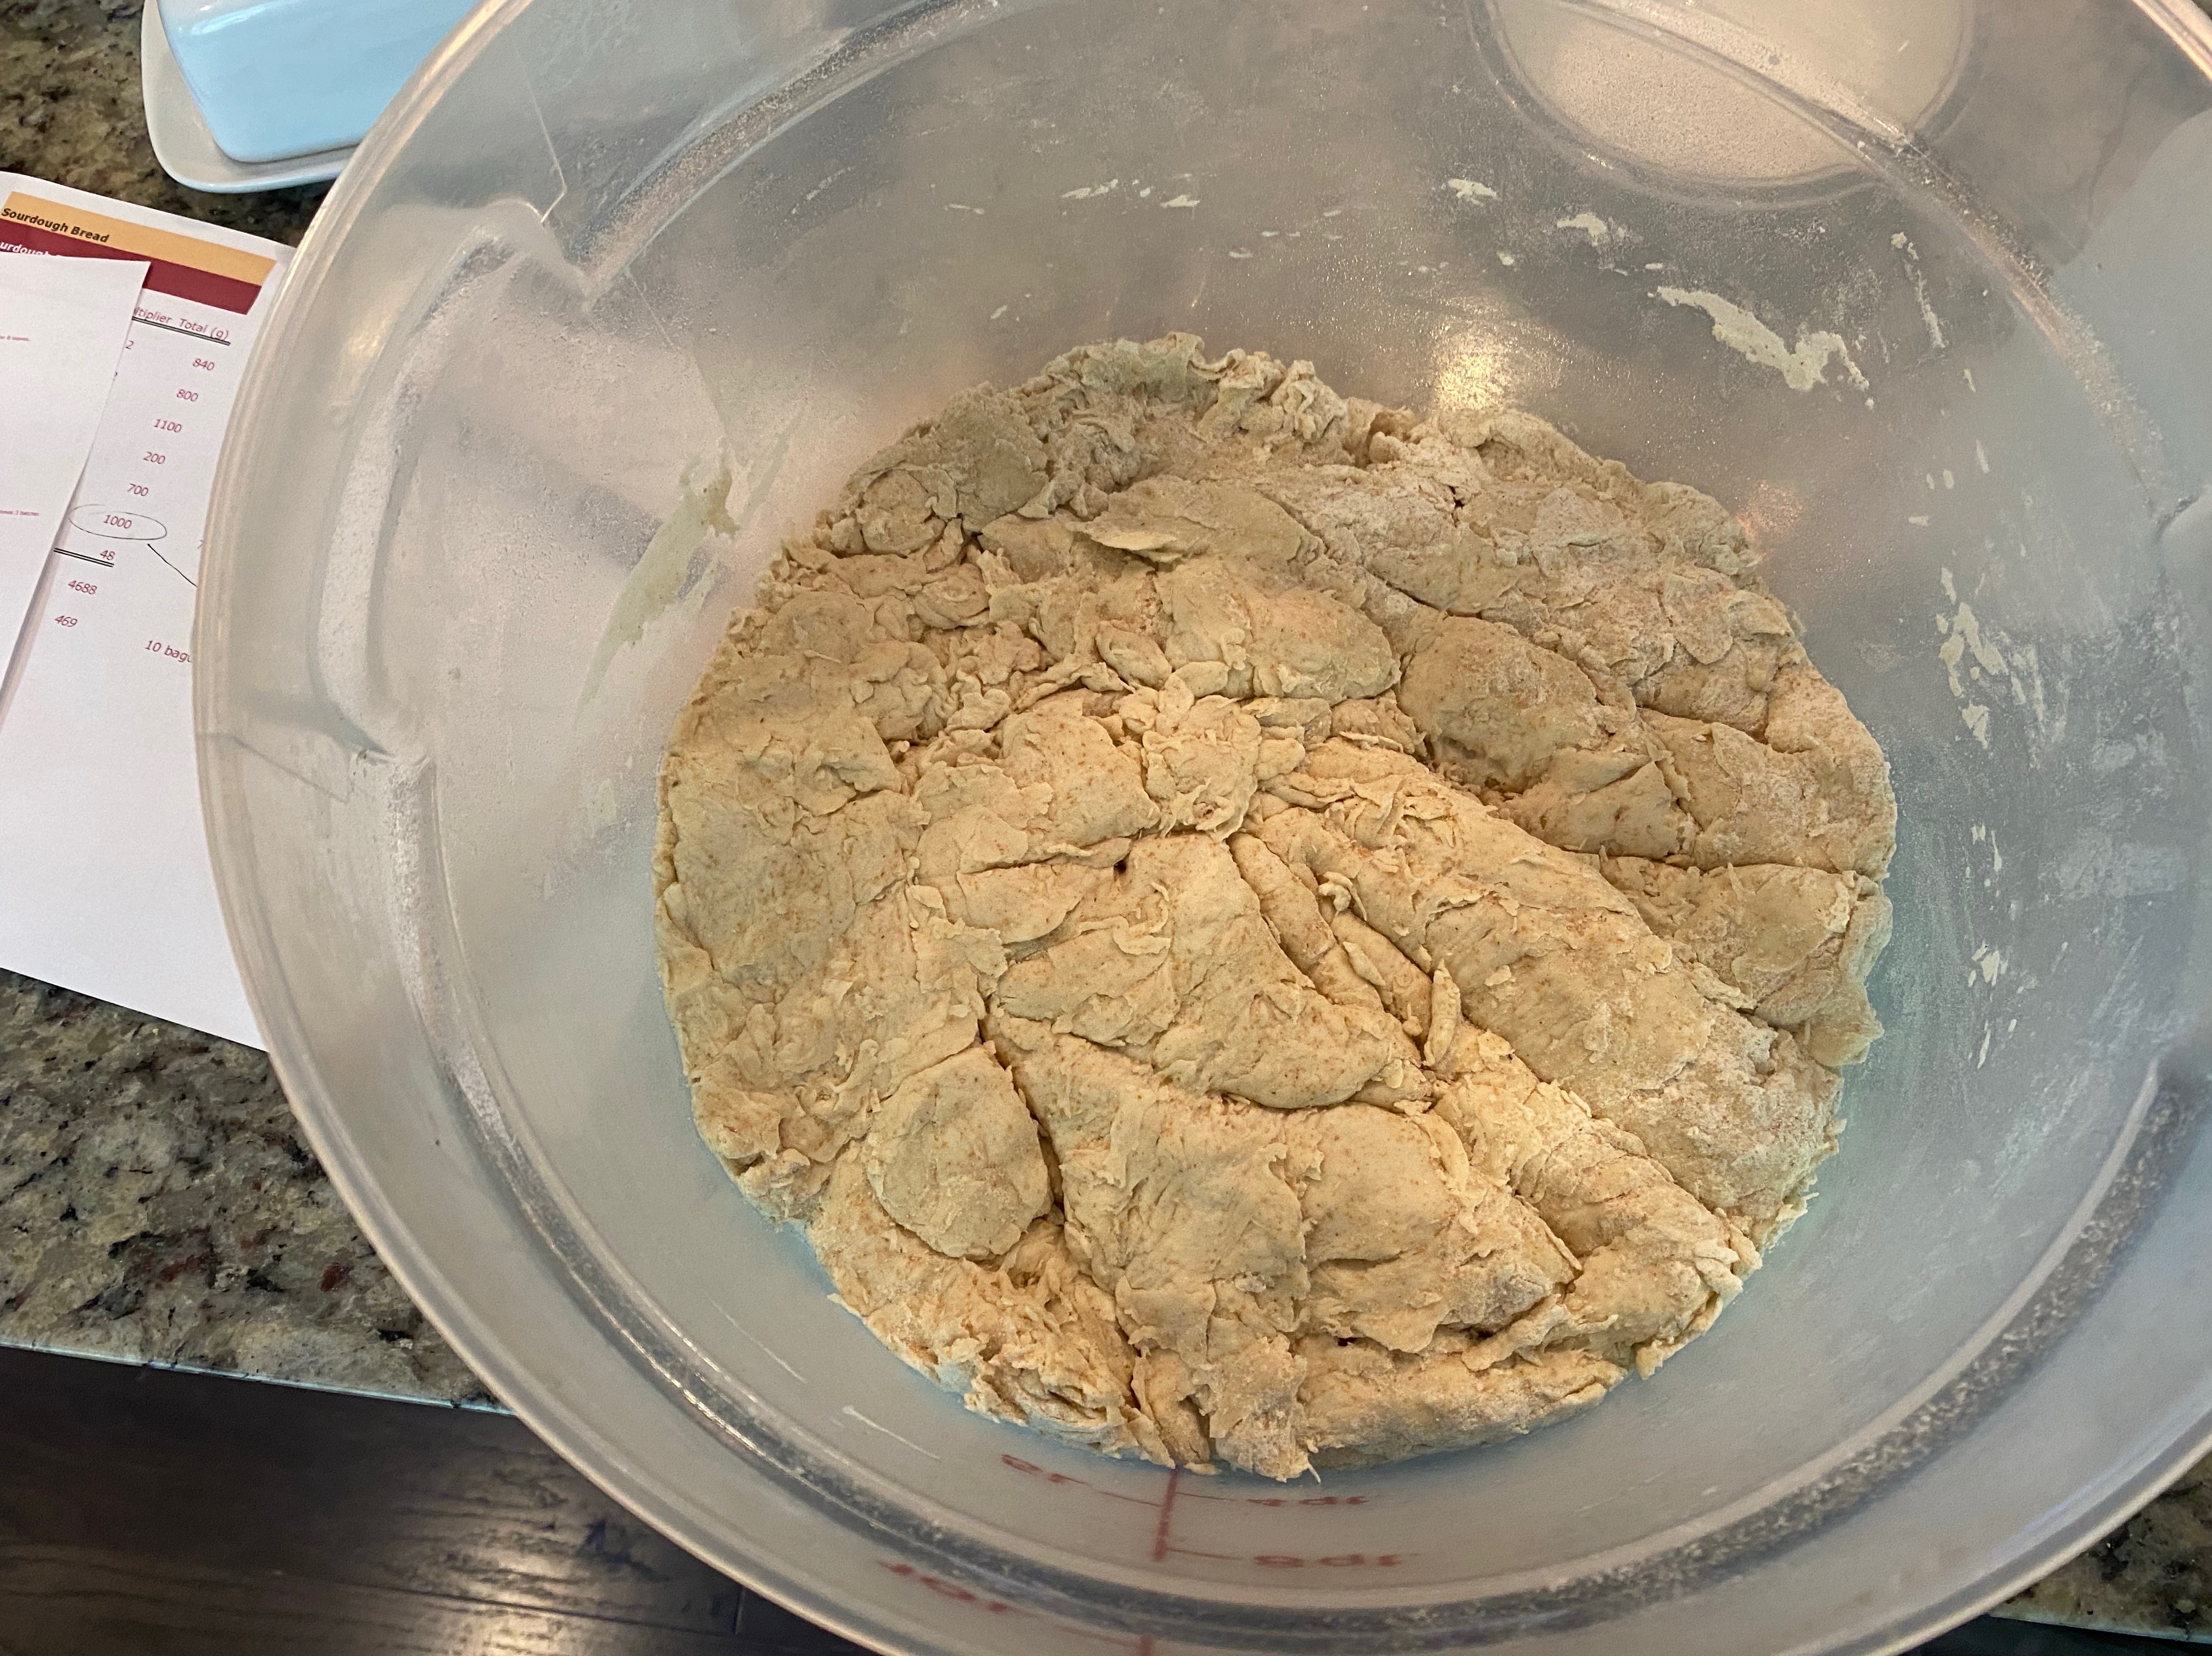
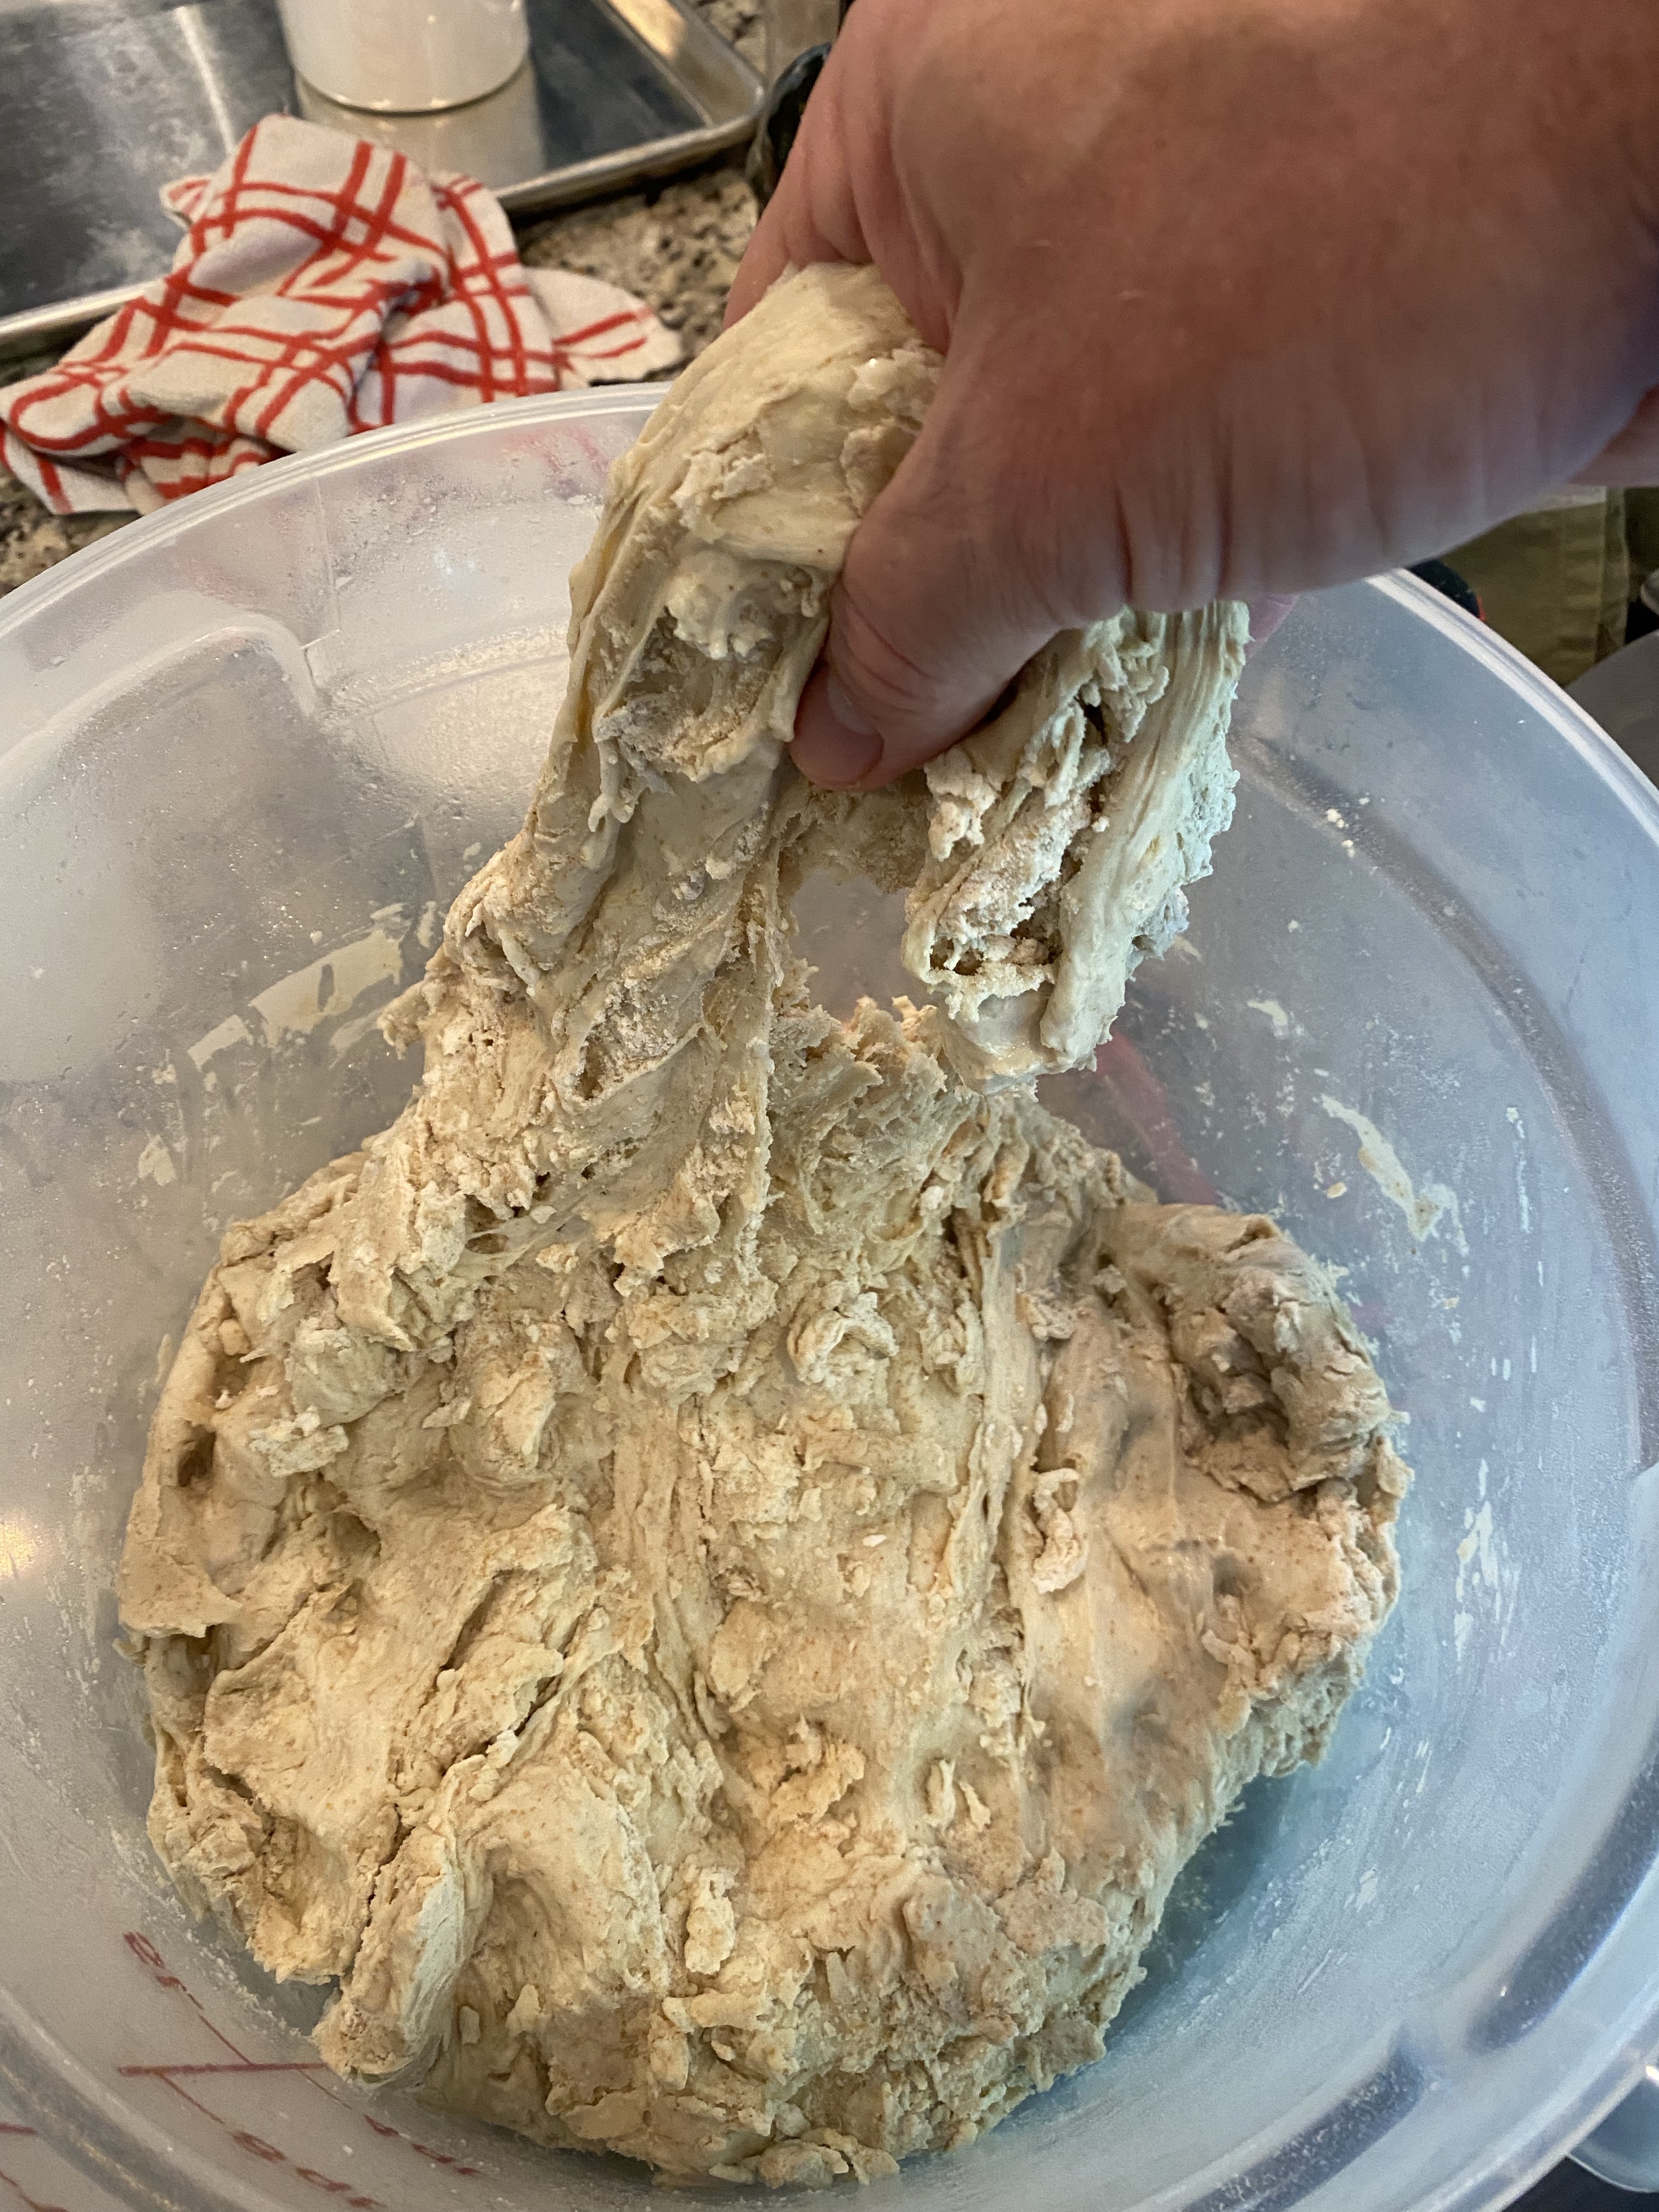
I added the Leaven and Poolish and squished in by hand. This was a bit more arduous. It took me about 10 minutes before I felt the dough to be consistent and not with a bunch of drier balls of dough. I just kept squishing through my finger working the lumps into smaller and smaller pieces. I’ll let time work it’s magic!
Waiting for 30 mins before adding salt.
Leaven doubled 82°F
Leaven bubbly
Poolish 3x
Poolish bubbly
Autolyse starting to stretch
Adding Poolish
Swishing in my hand
Mixed at 80°F
Scraped down and going into proving box
Squishing in Leaven and Poolish
I added my salt onto the top squished in trying for a consistency in the gritty feeling throughout the dough. Wasn’t expecting the gritty feeling to go away… just not in pockets
BTW in a number of the pics you’ll see some printed pages. I have my base recipe and method with scaled up amounts listed with notes on temps etc. I’ve also a schedule printed with half hour increments to give a sense of timing. As I go through the process I’m making additional notations.
About to add salt
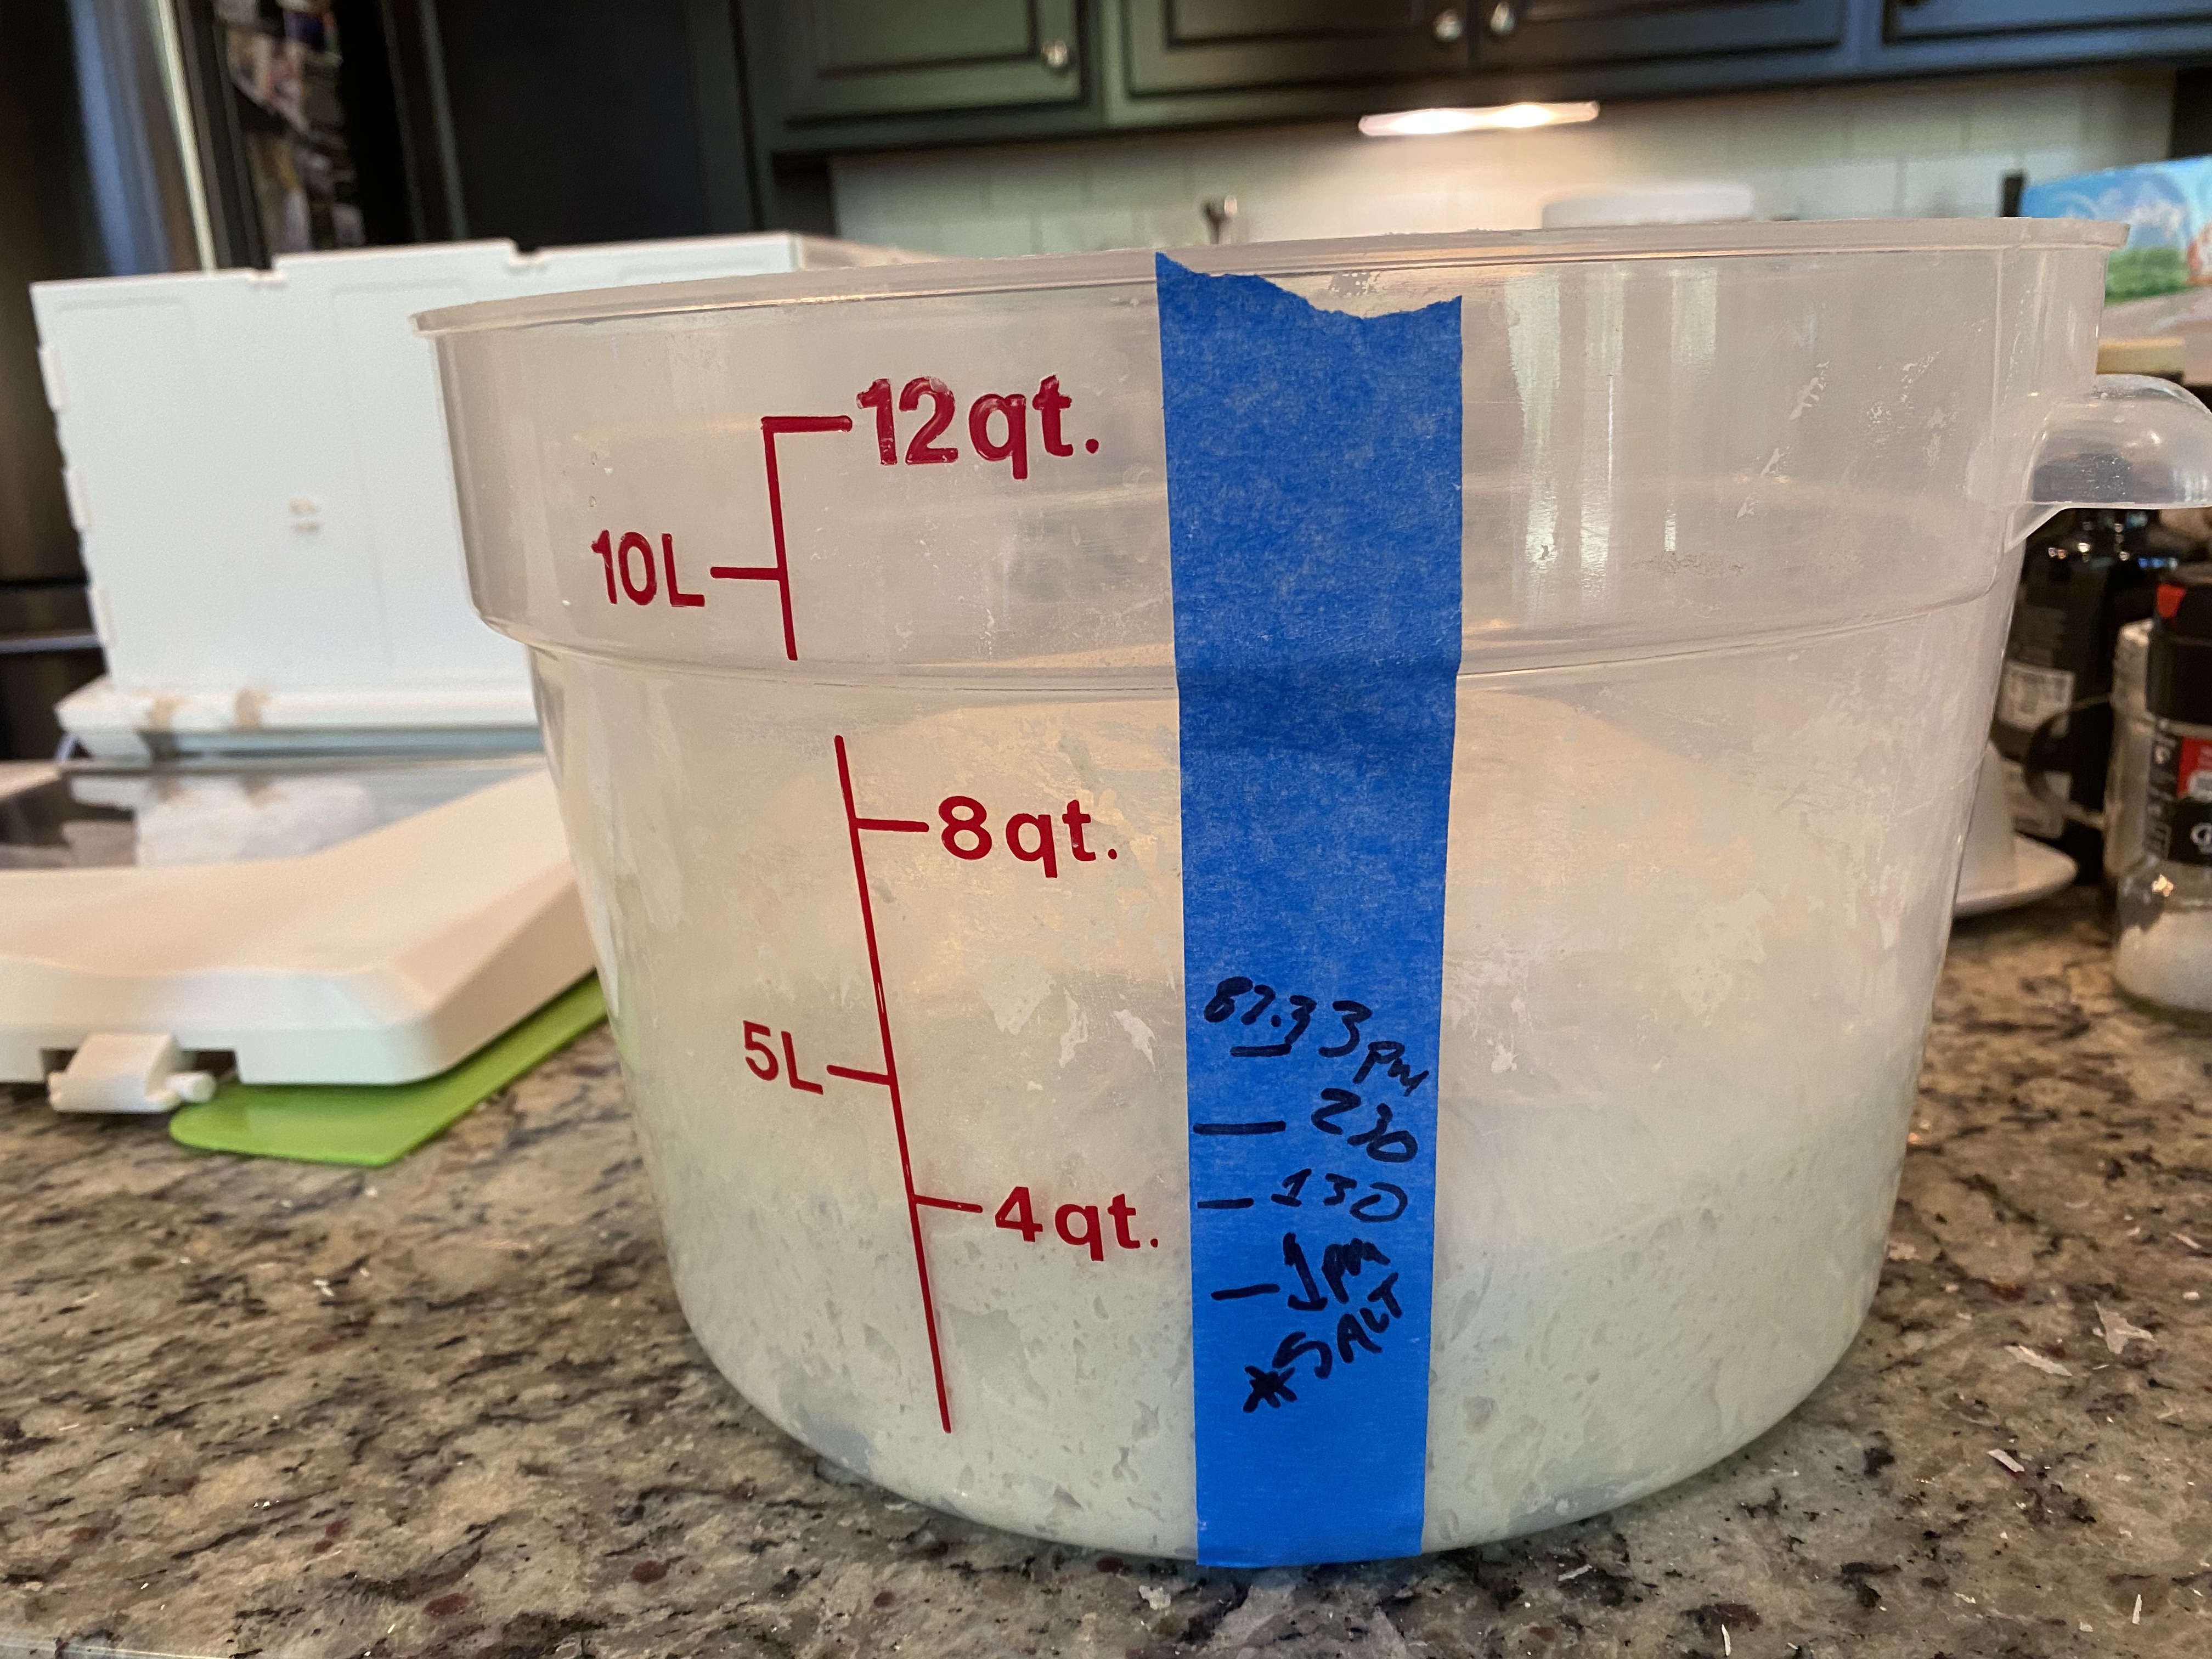
Salt mixed noting volume
Adding Salt / Noting Volume
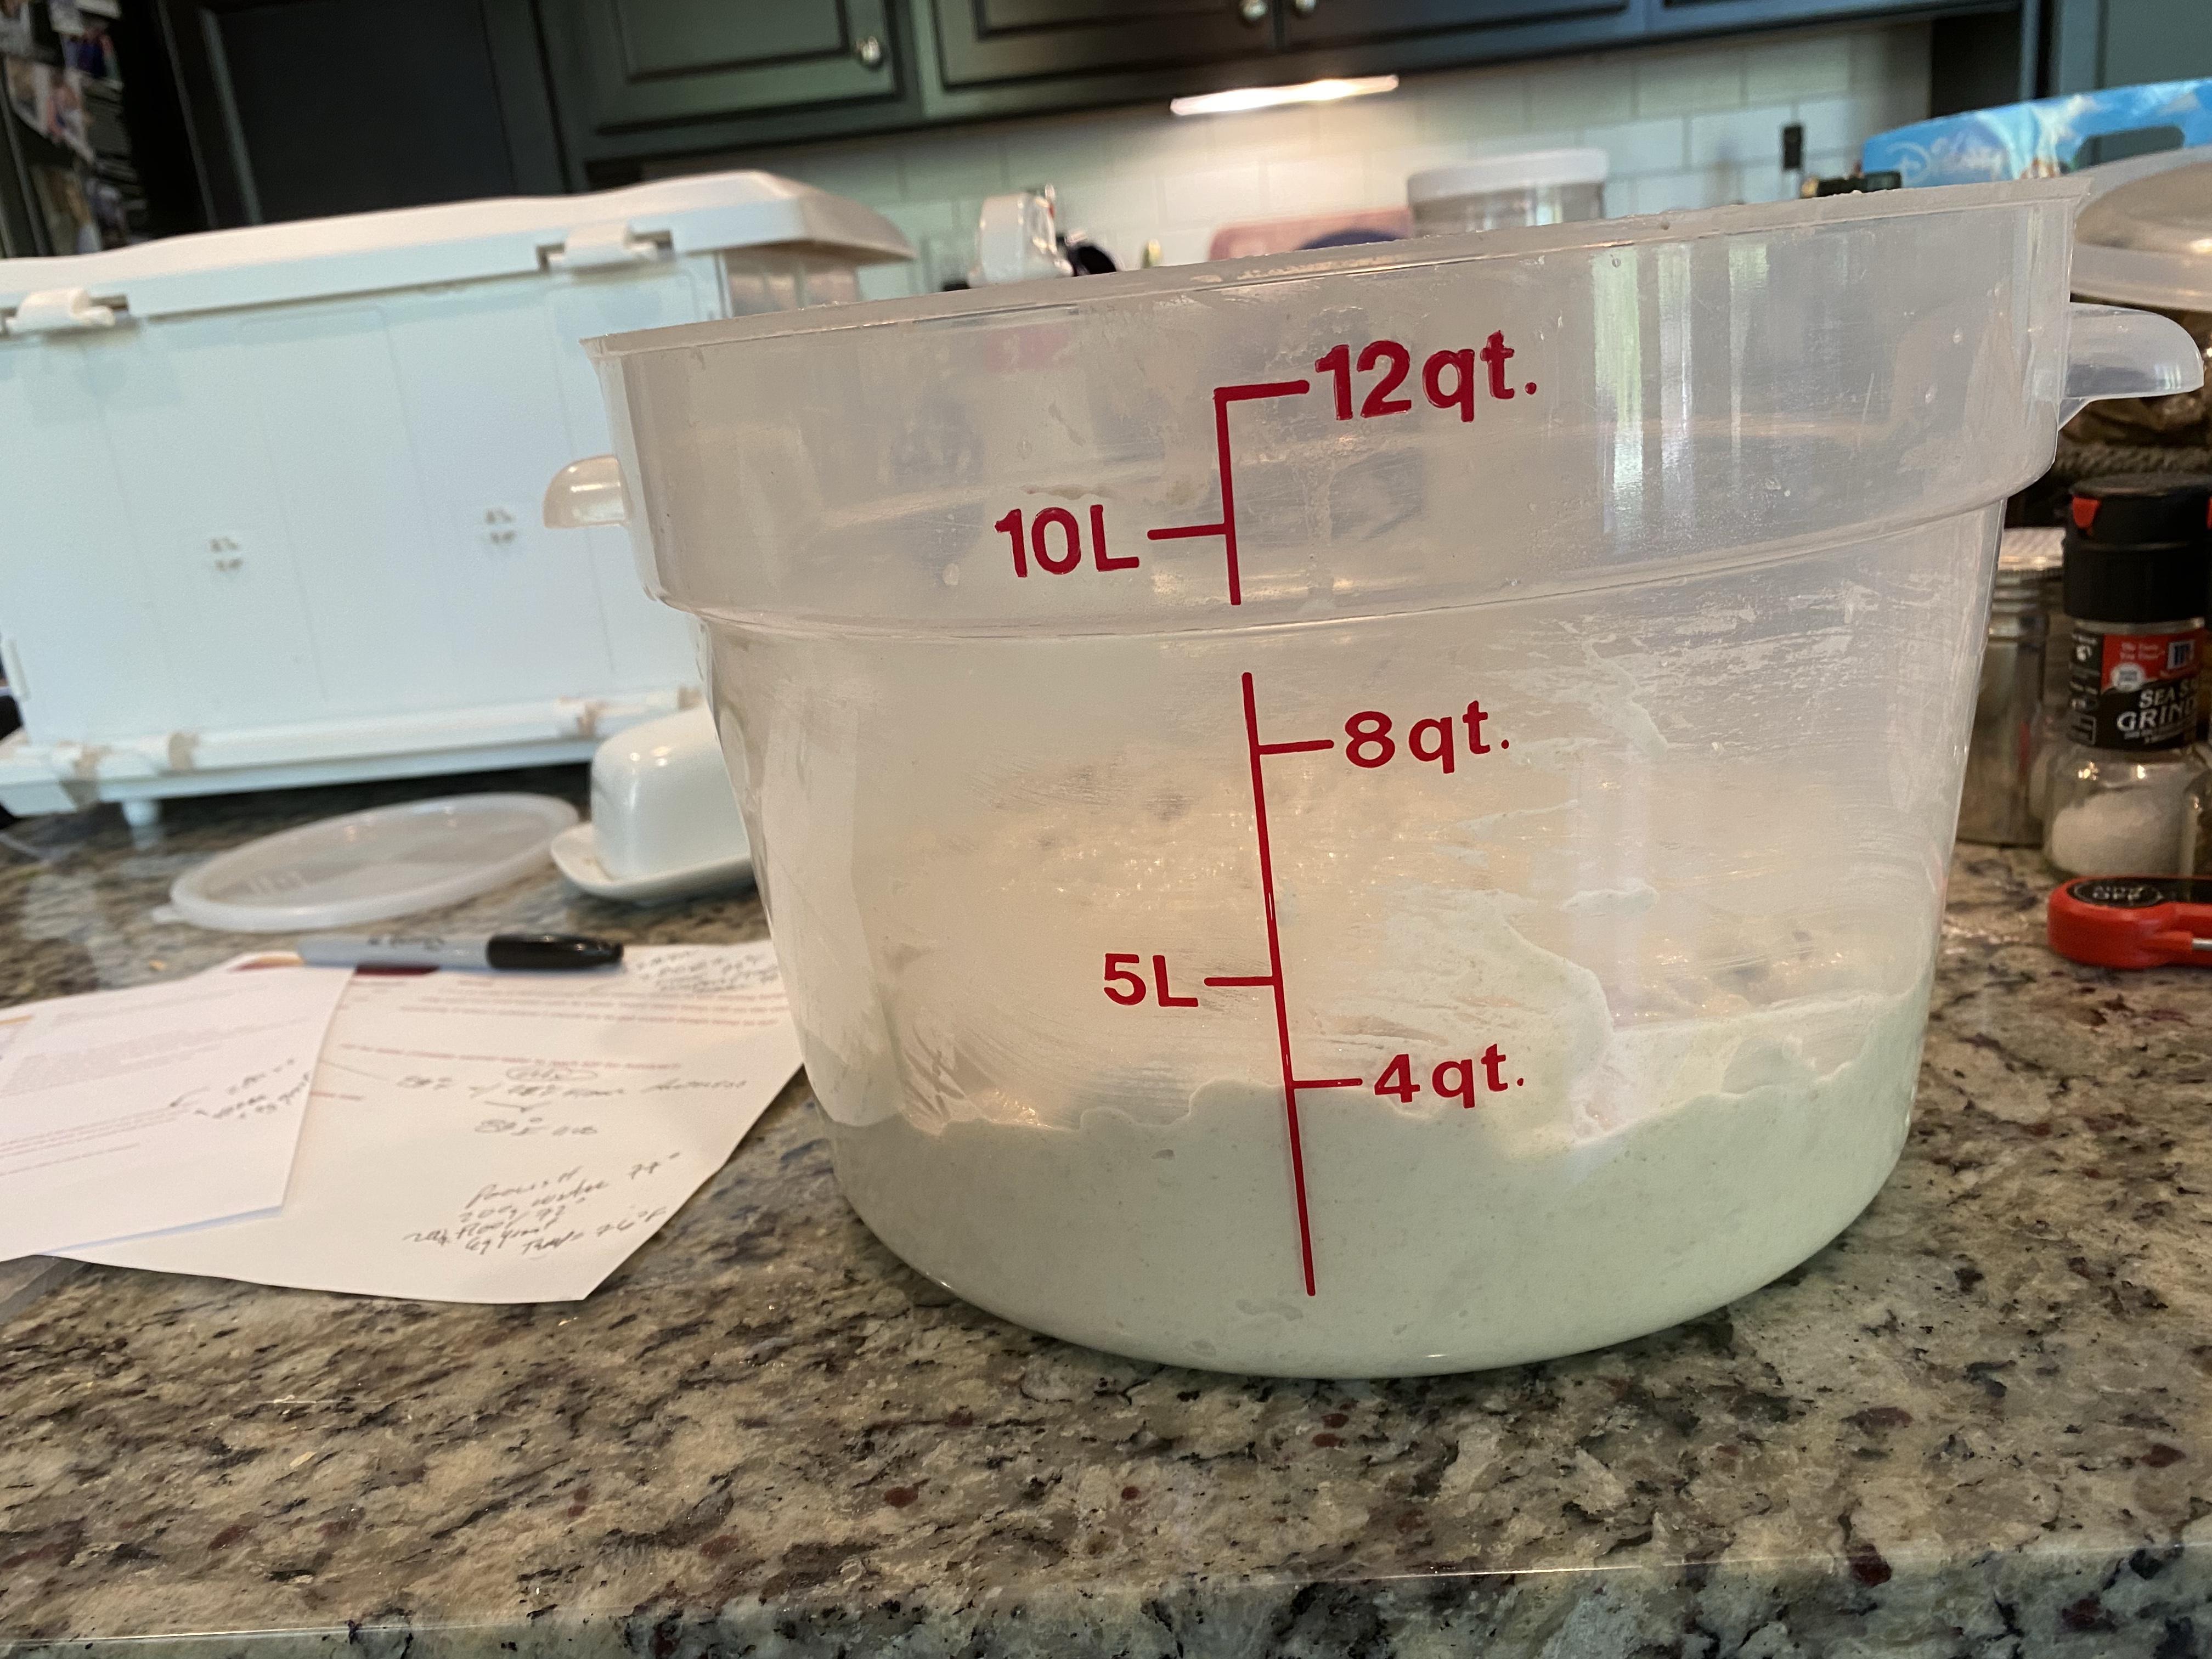
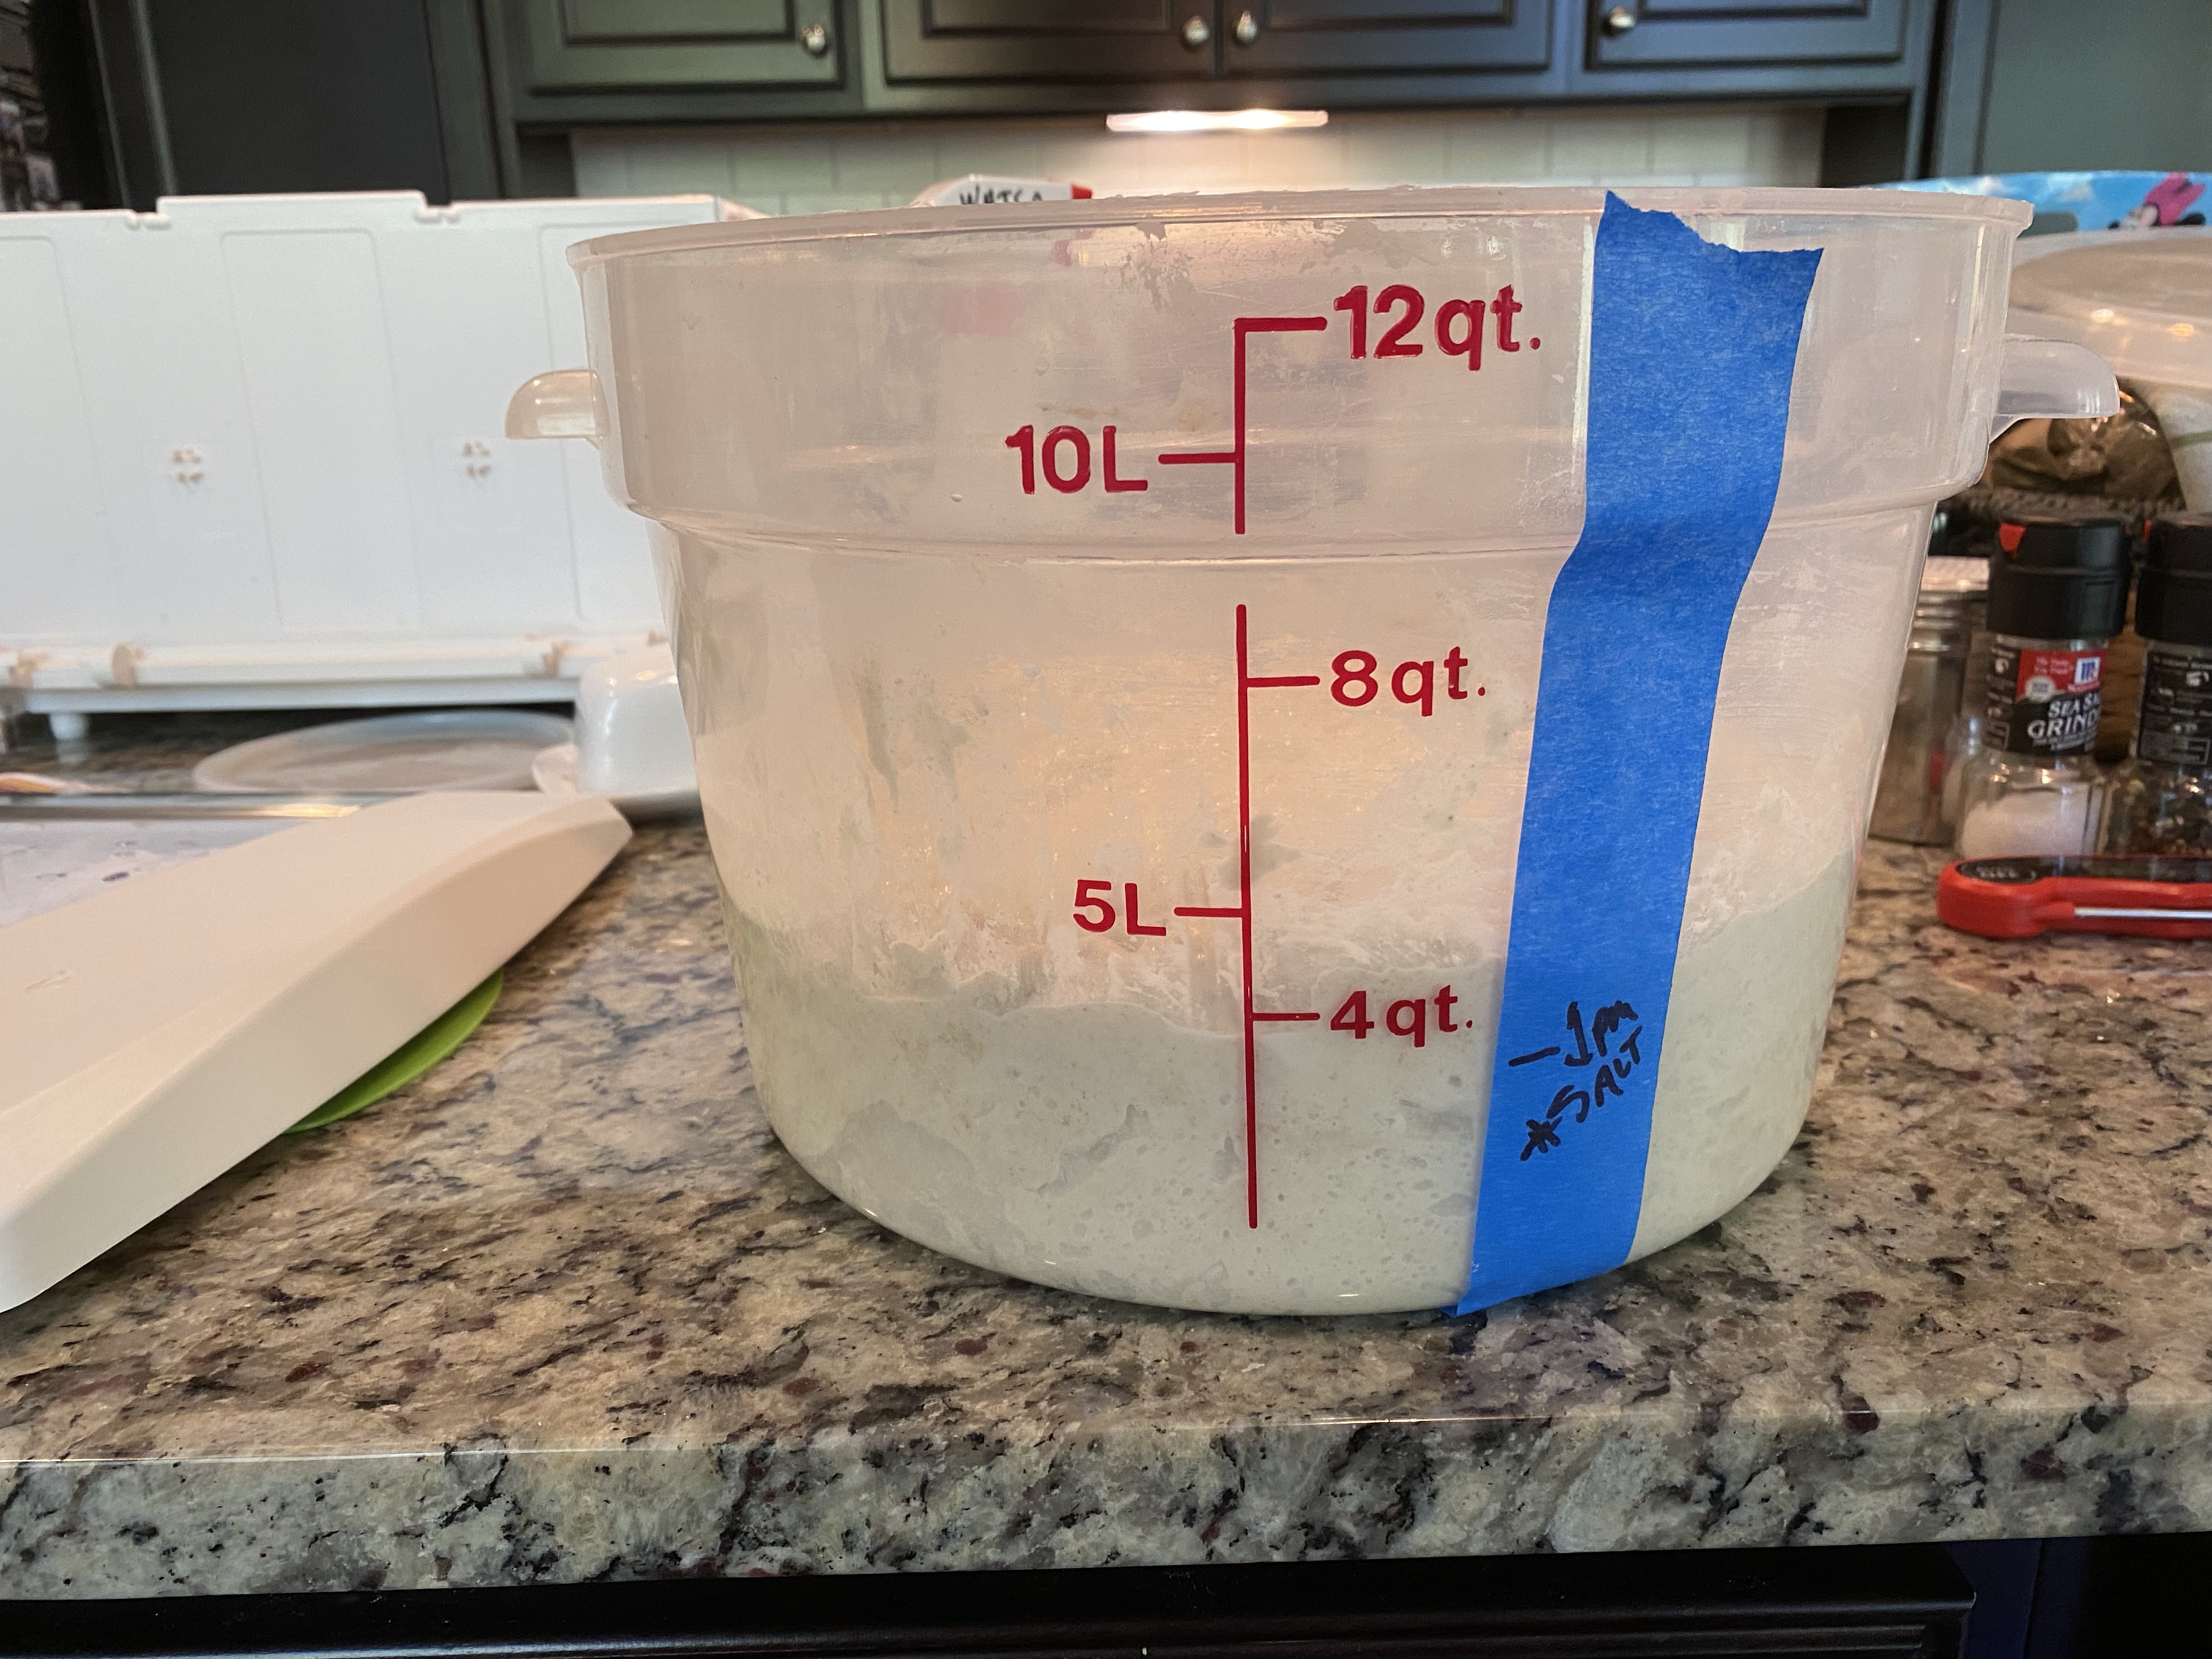
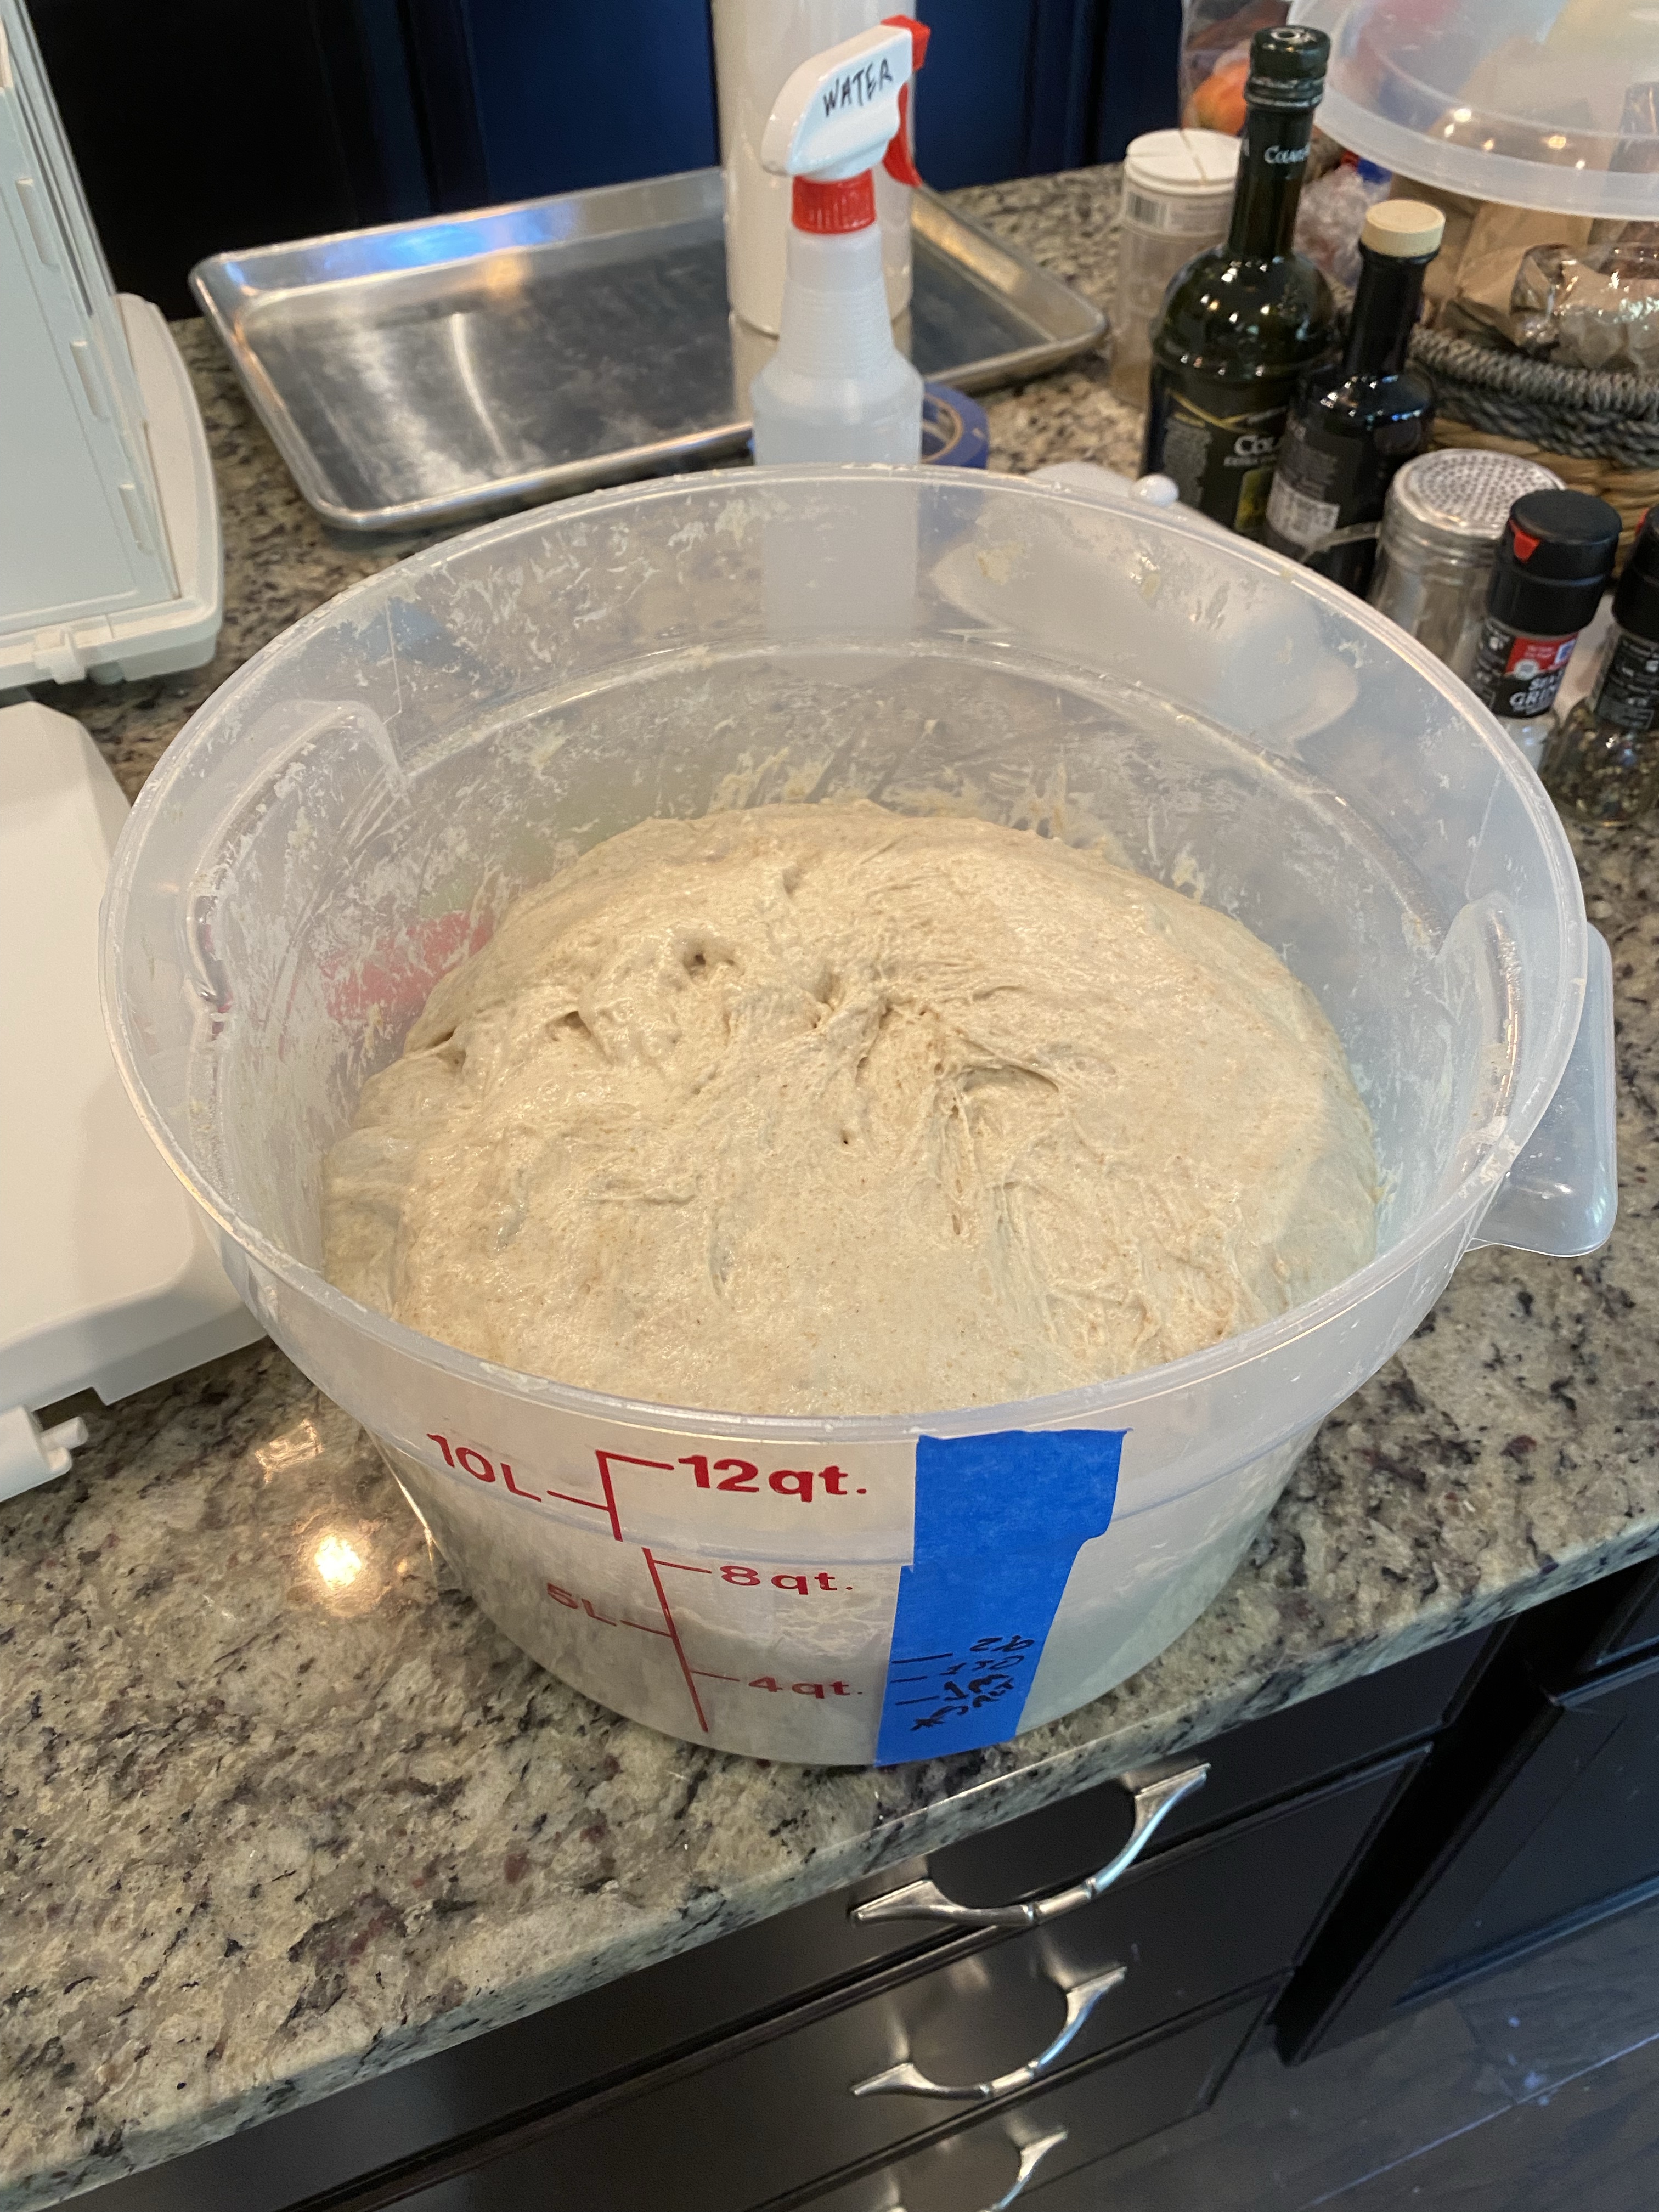
I will admit I’m looking with concern at my volume. Right now I’m seeing roughly 4L. I should have plenty of room for the volume to double to 8L+ without spilling out the top. dough temp is holding just above 81°F in my box.
1st Coil Fold
Back in Proving Box
Coil Fold #1
Coil fold #2 was about 45 minutes later due to a conference call.
Before Coil Fold #2
Checking volume growth
Coil Fold #2 Completed
Coil Fold #2
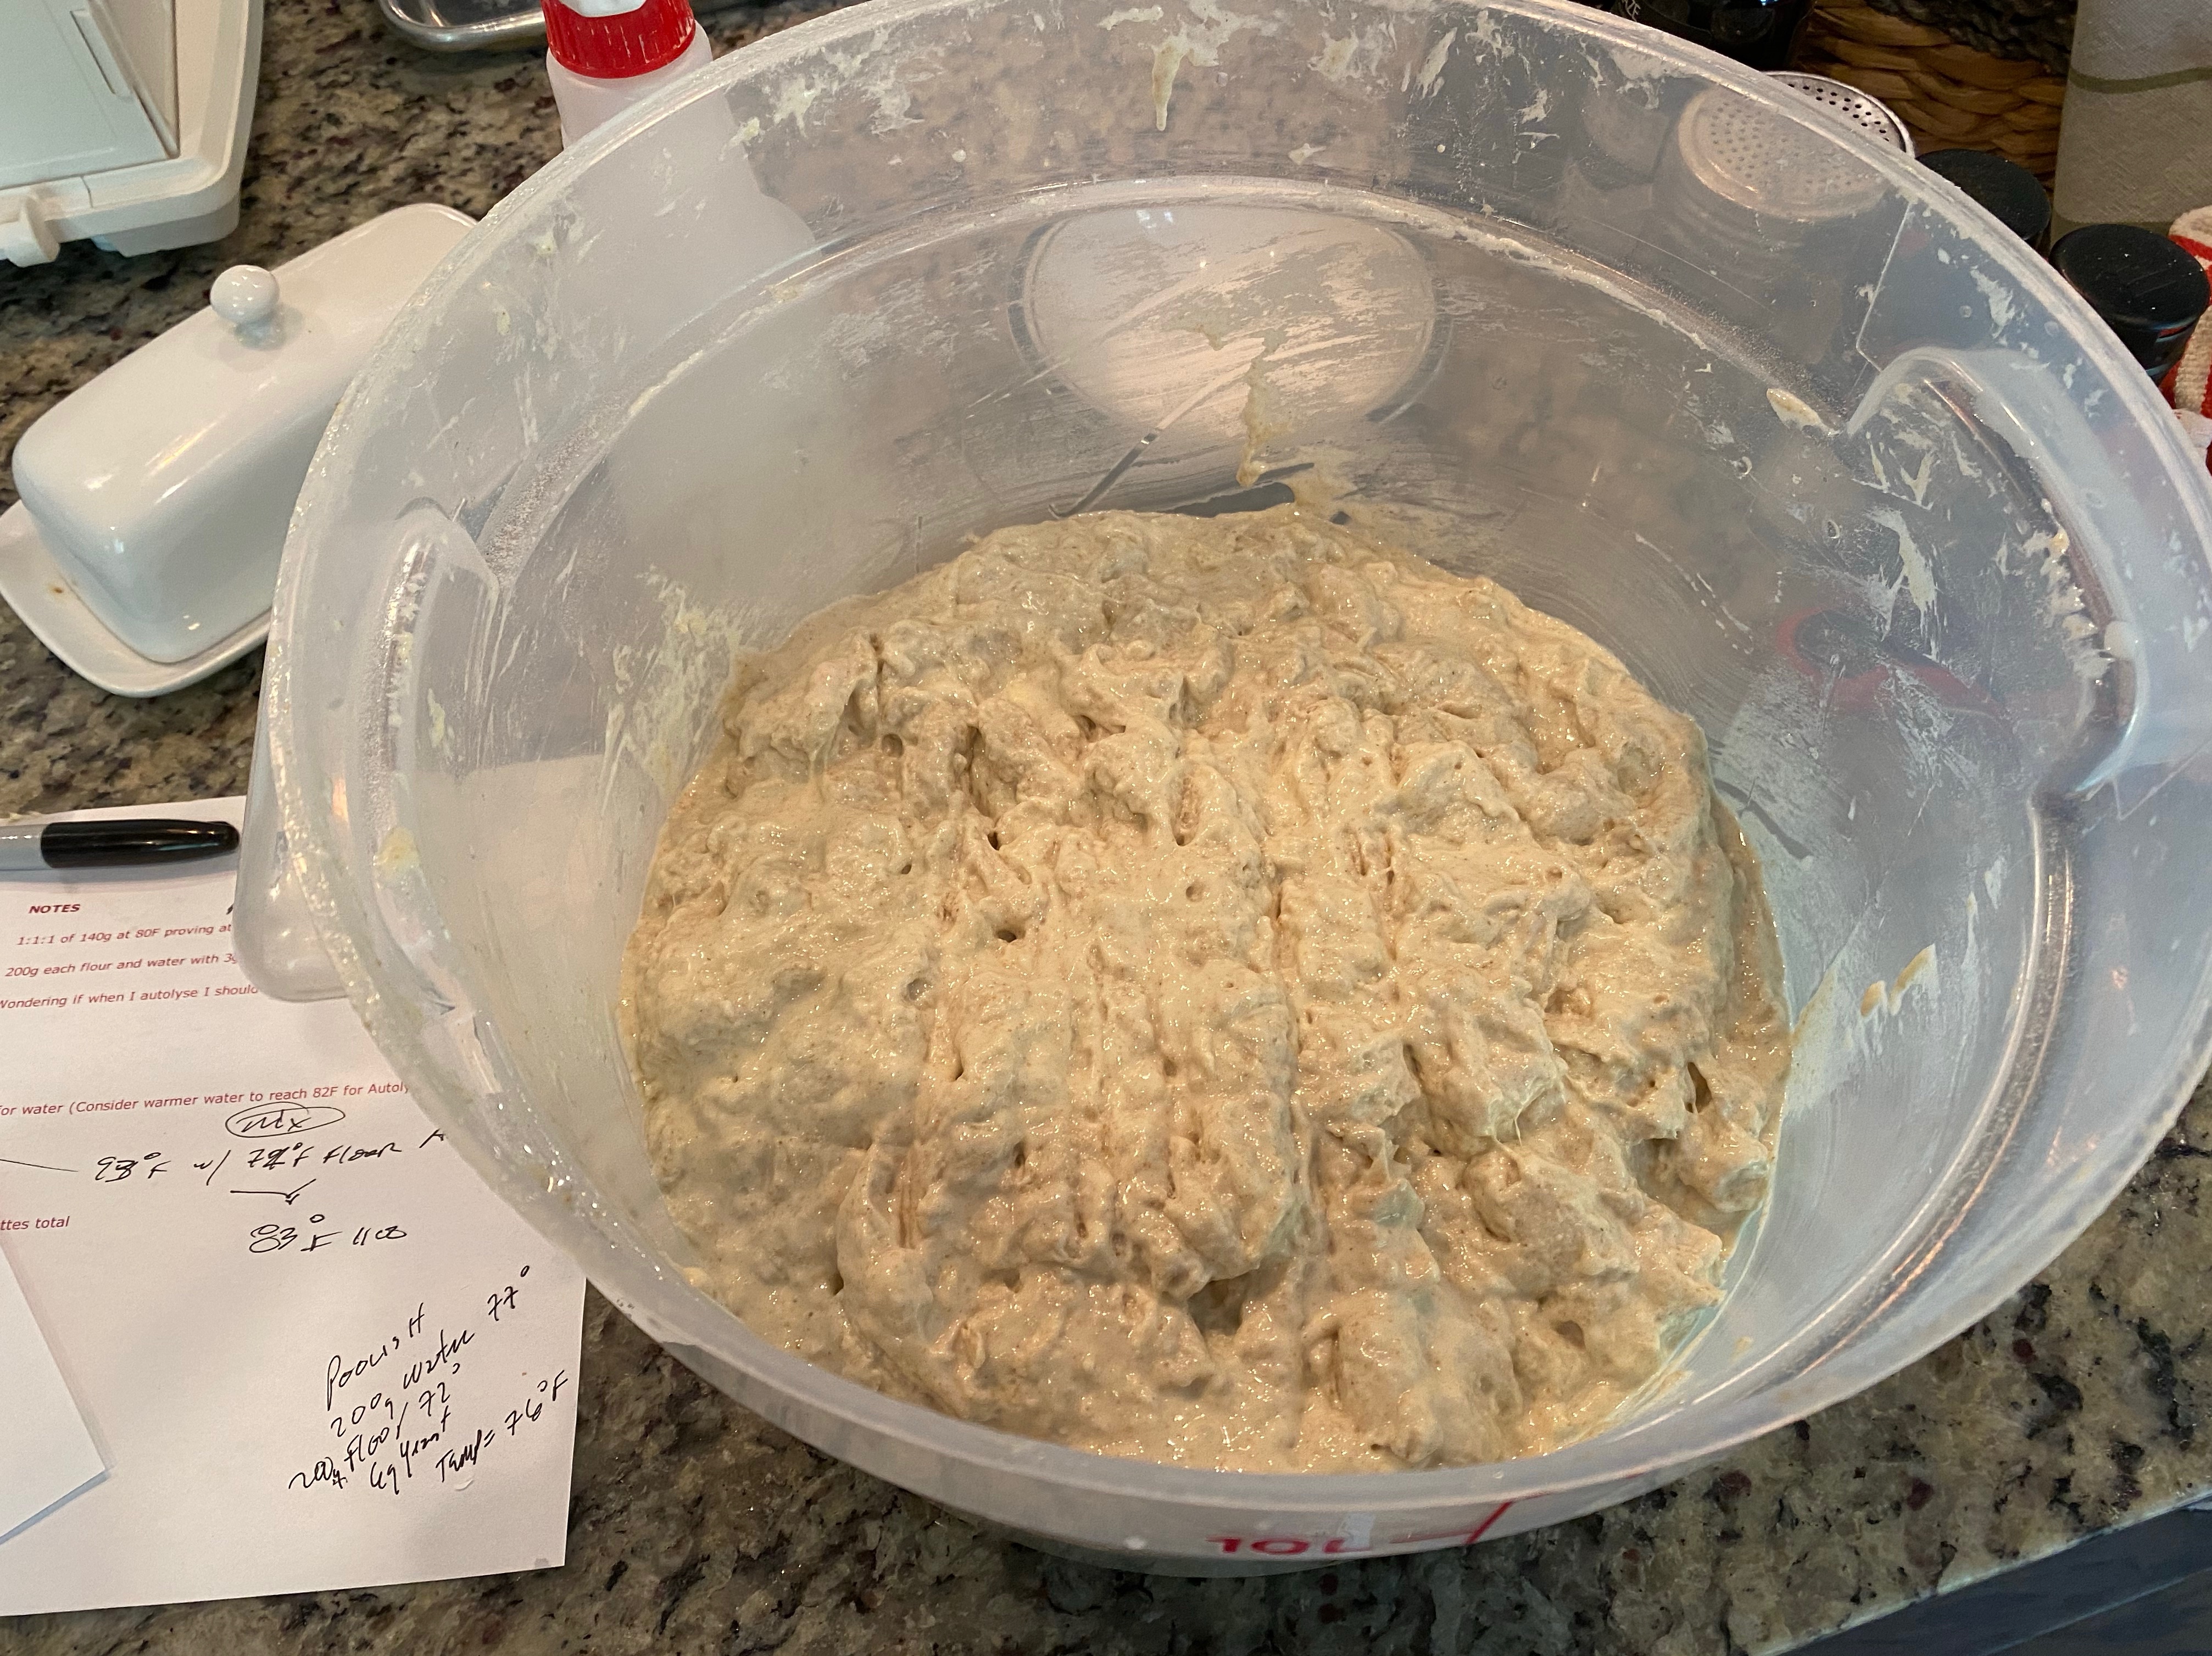
Performed Coil Fold #3 a bit earlier than desired due to client calls. Volume is growing nicely.
Volume Increasing
Coil Fold #3
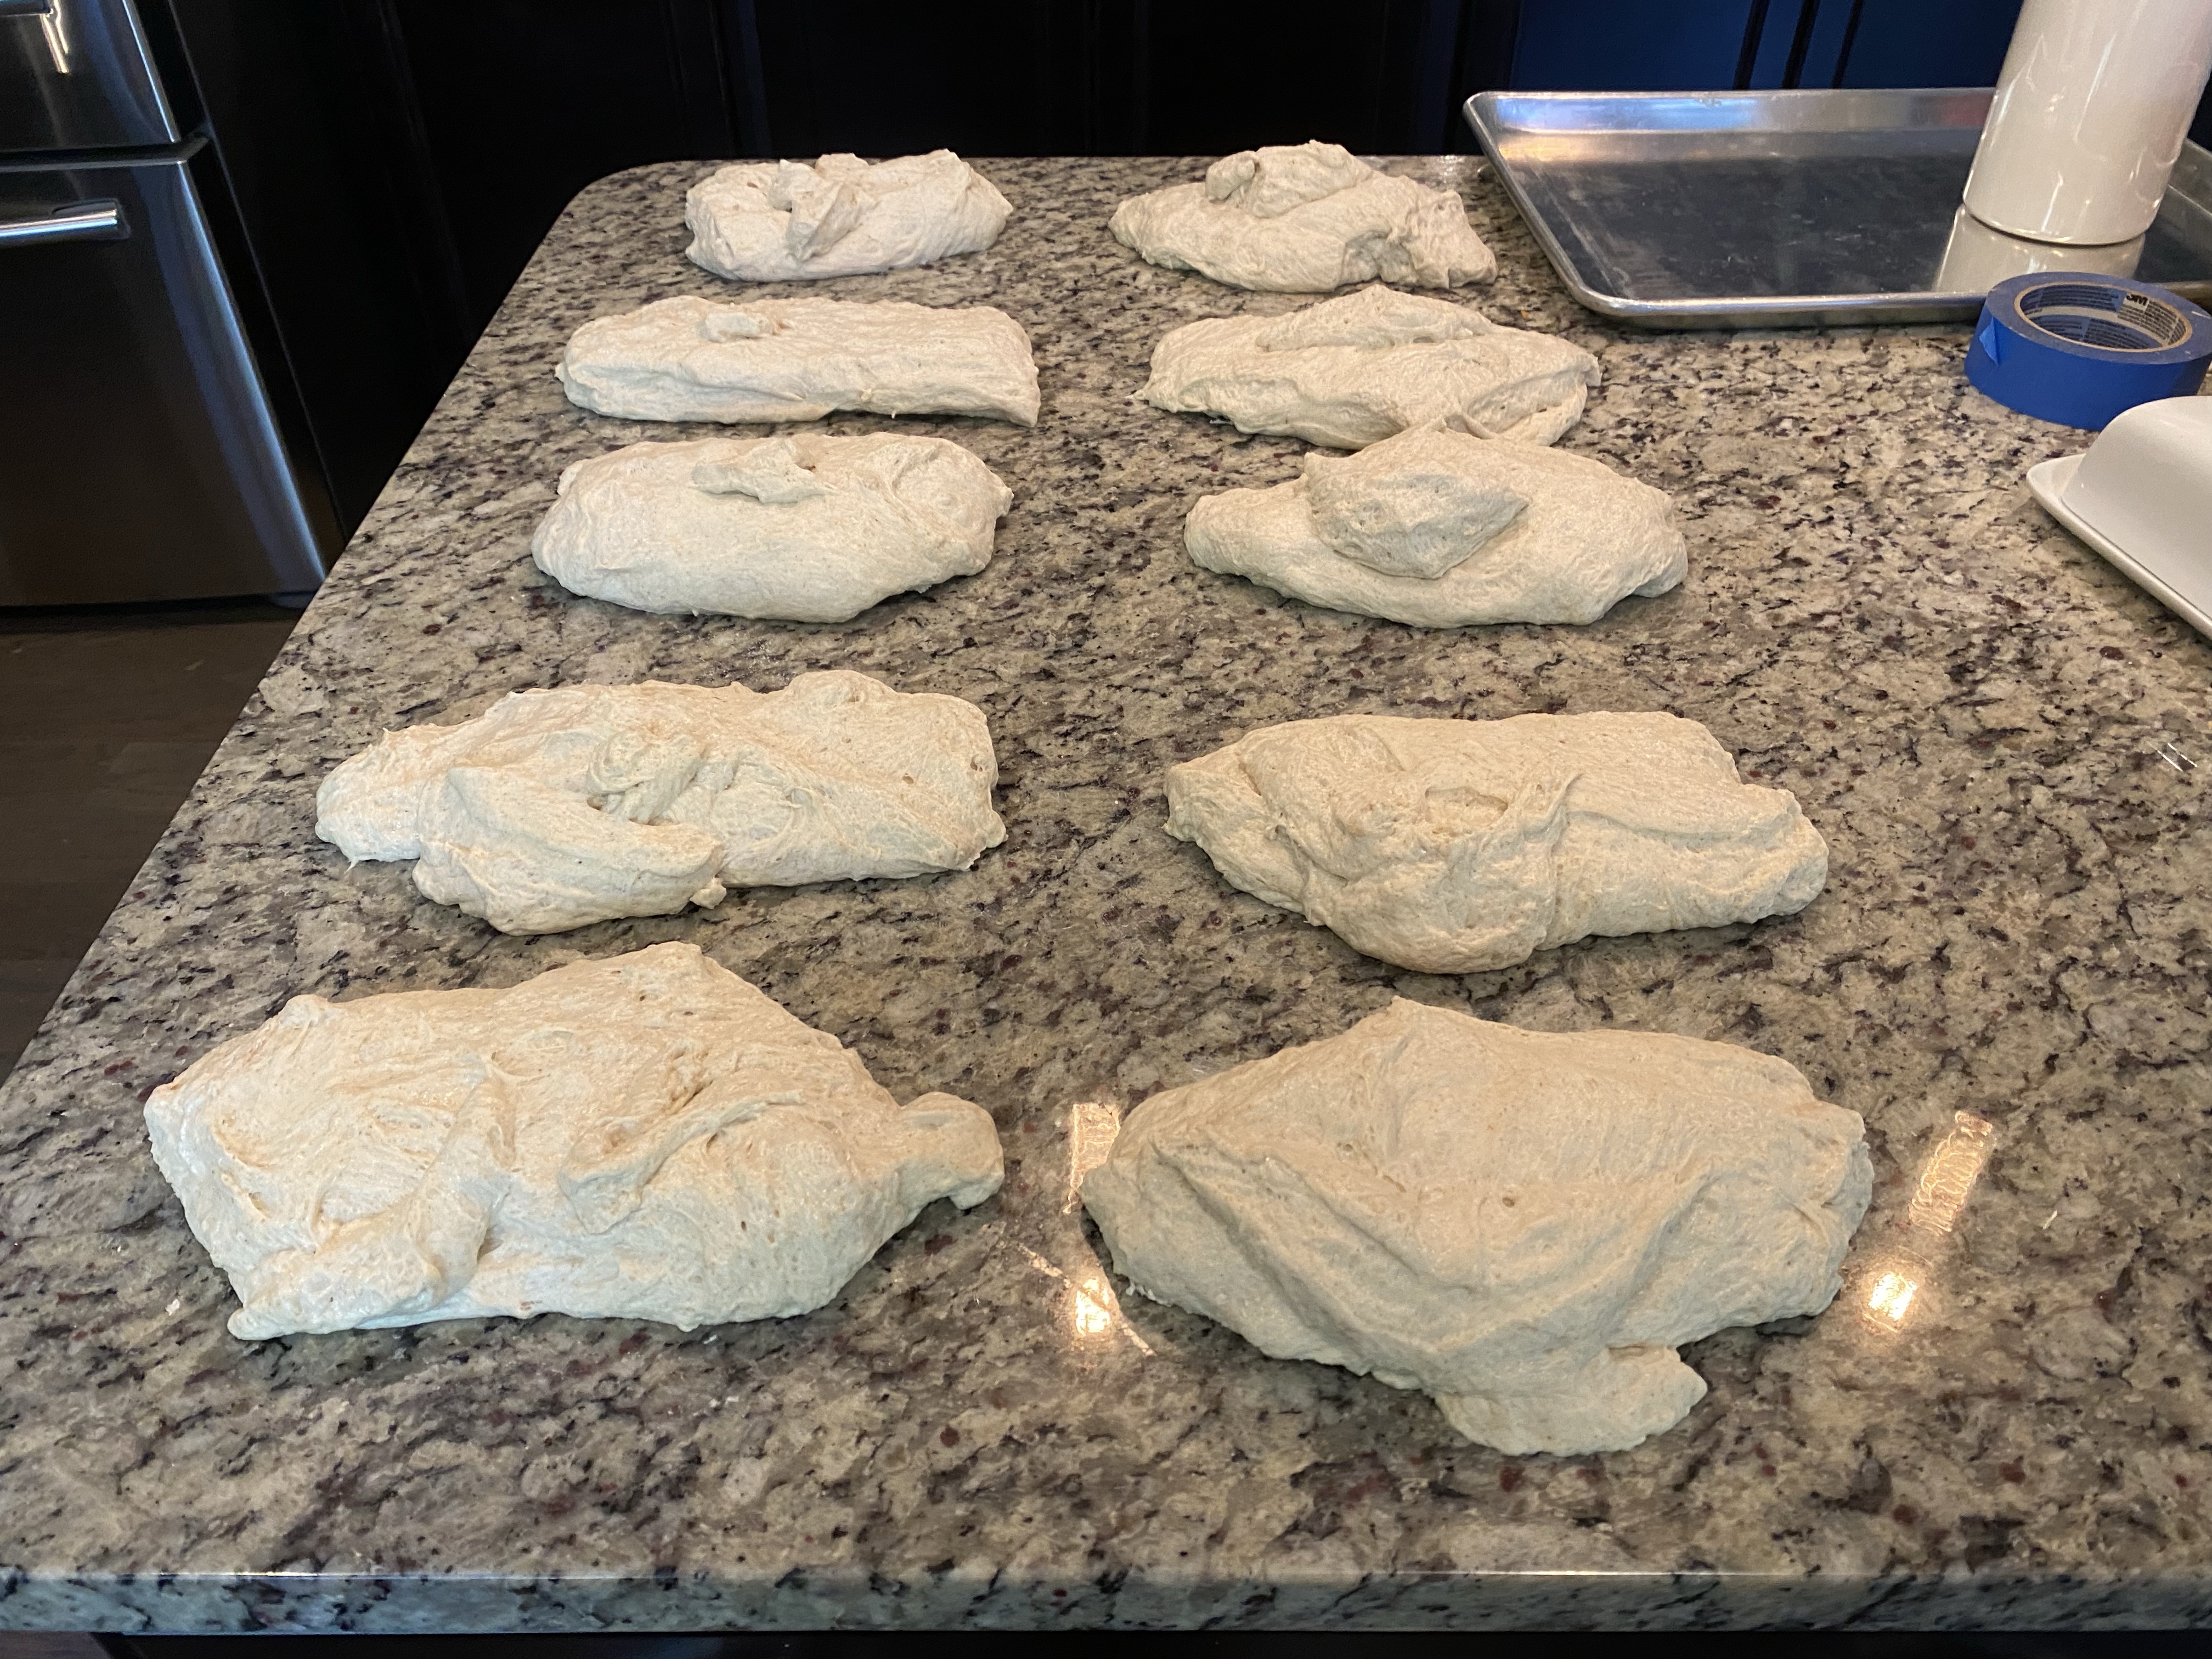
The dough doubled in size about the time I thought on my schedule. I divided into ten loaves. Somewhere my math is in error so I’ll have to review my scaling spreadsheet.
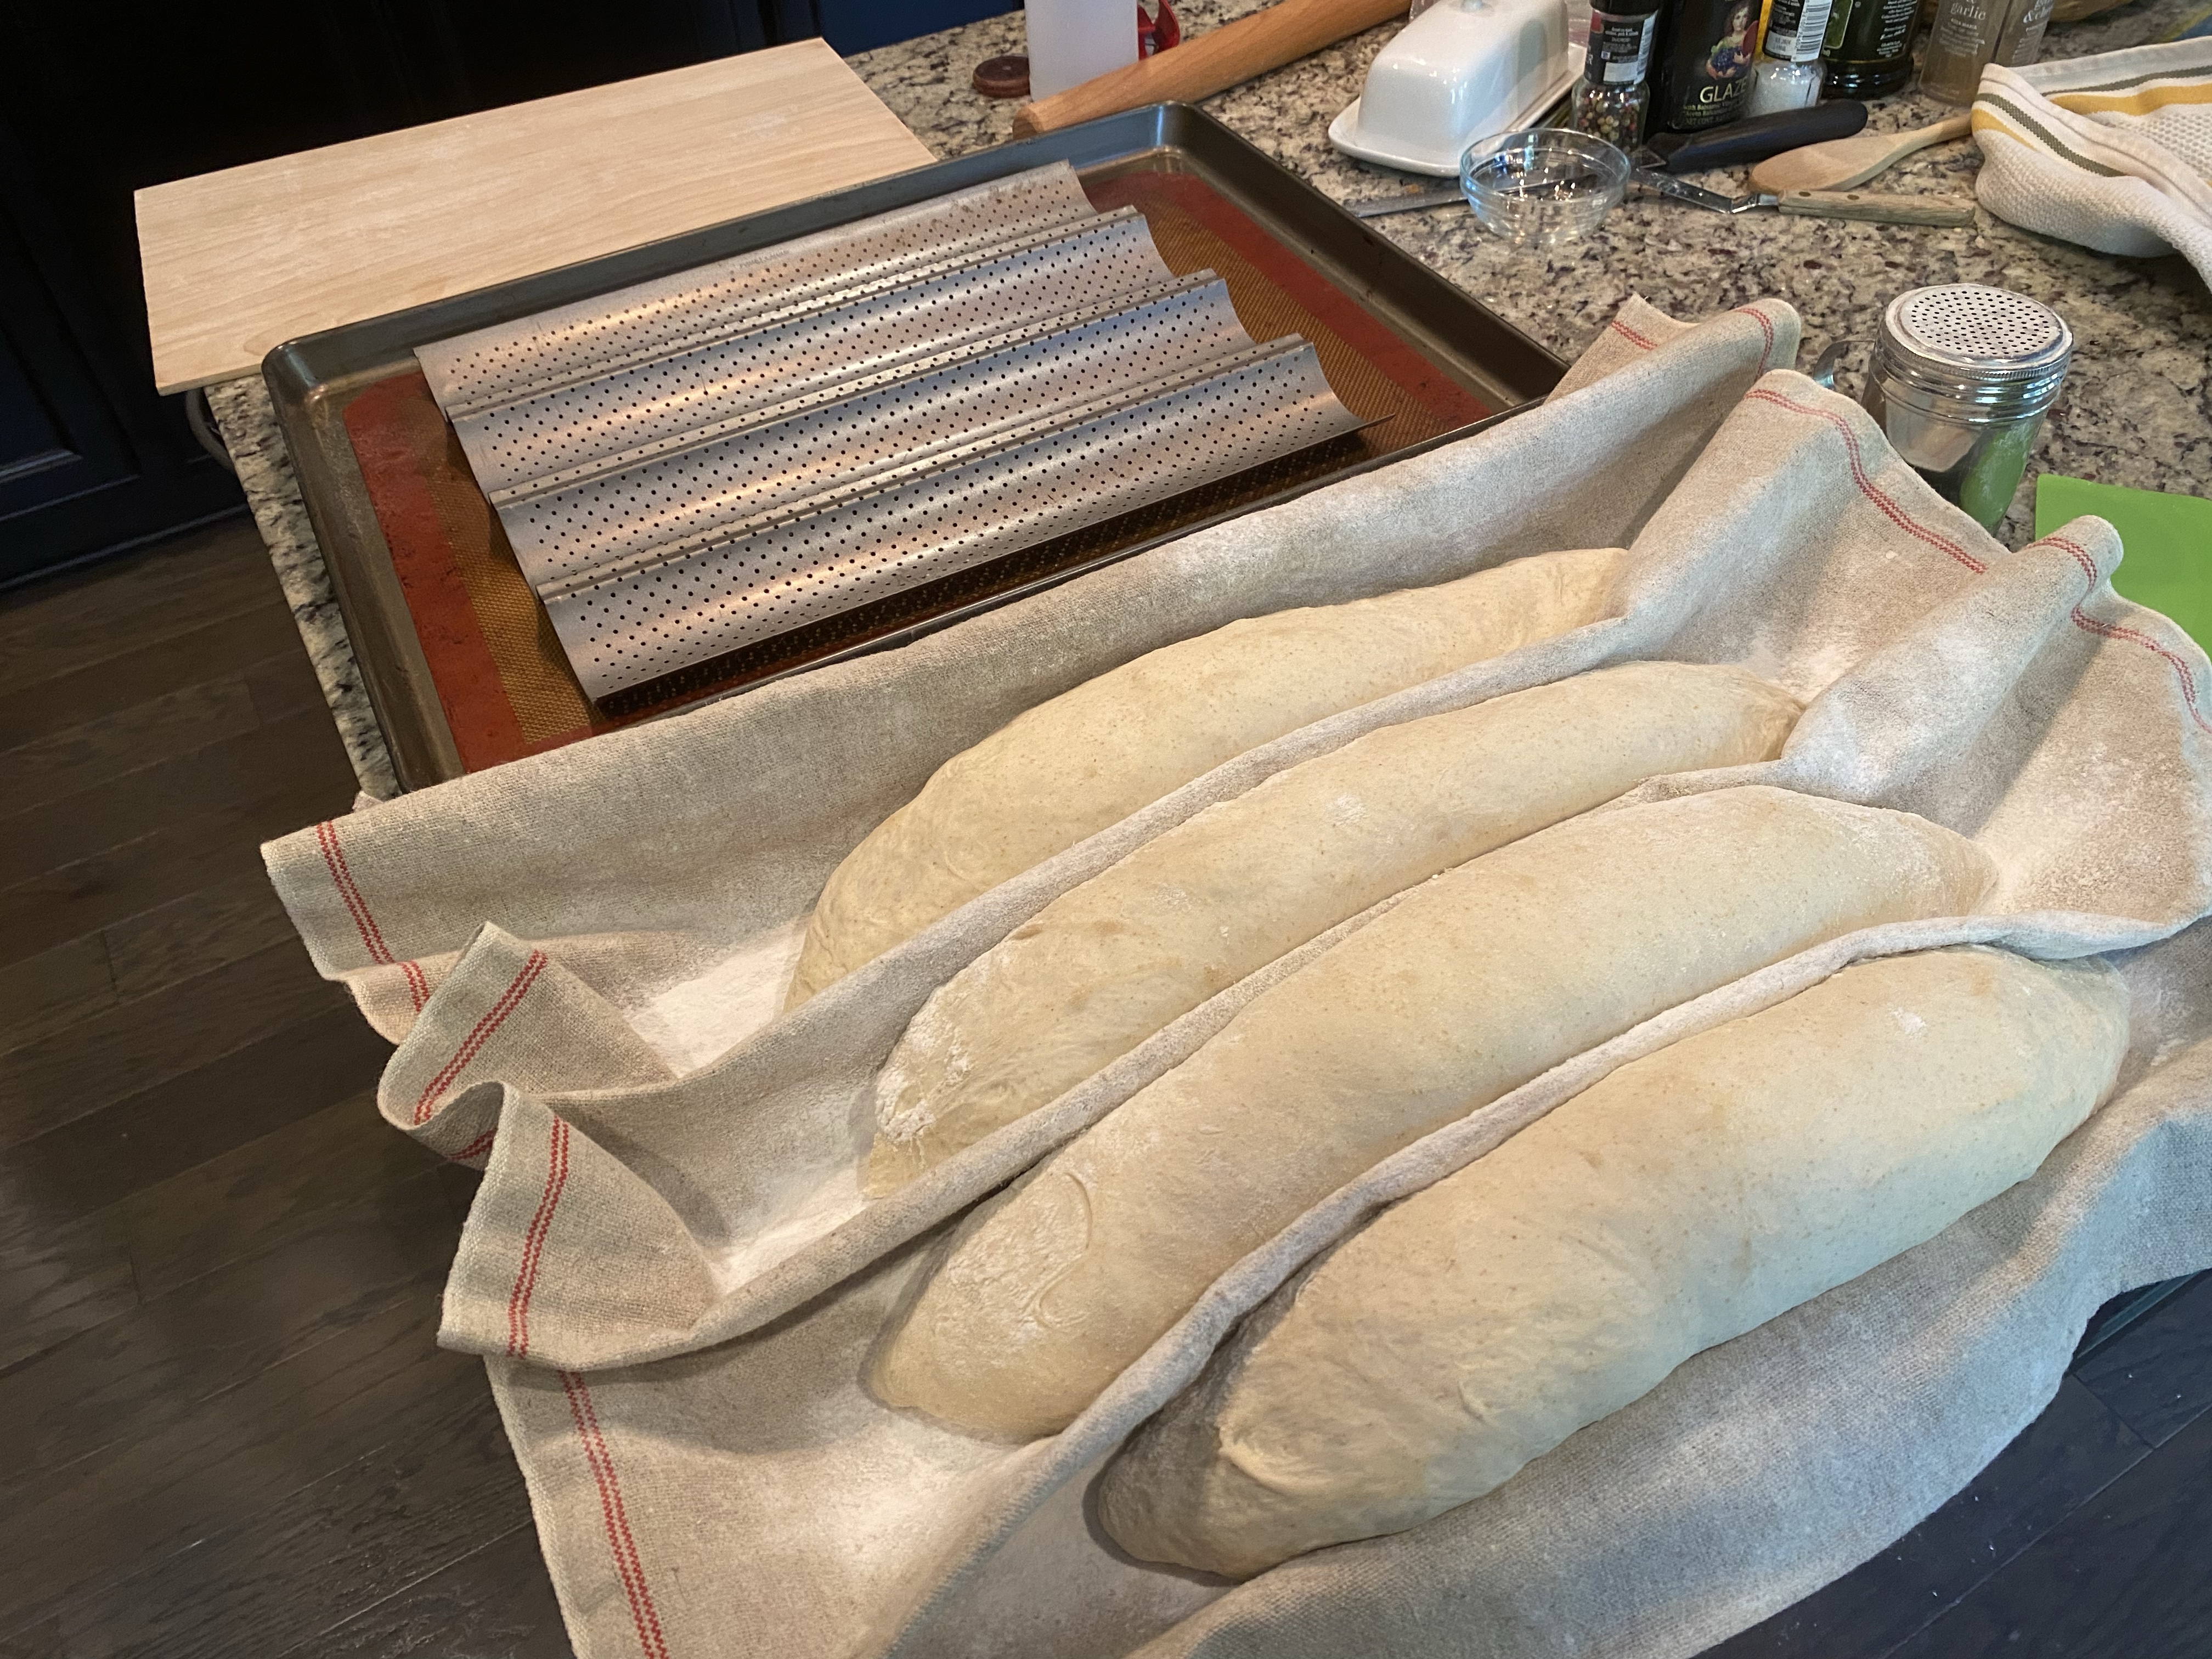
I divided the dough, let bench rest a bit then shaped and placed into the Couche. I made liberal use of rice flour. Five loaves in each. good thing my new Couches arrived from Amazon!
Divided dough
On batch in the Couche
Dividing and proving in Couche
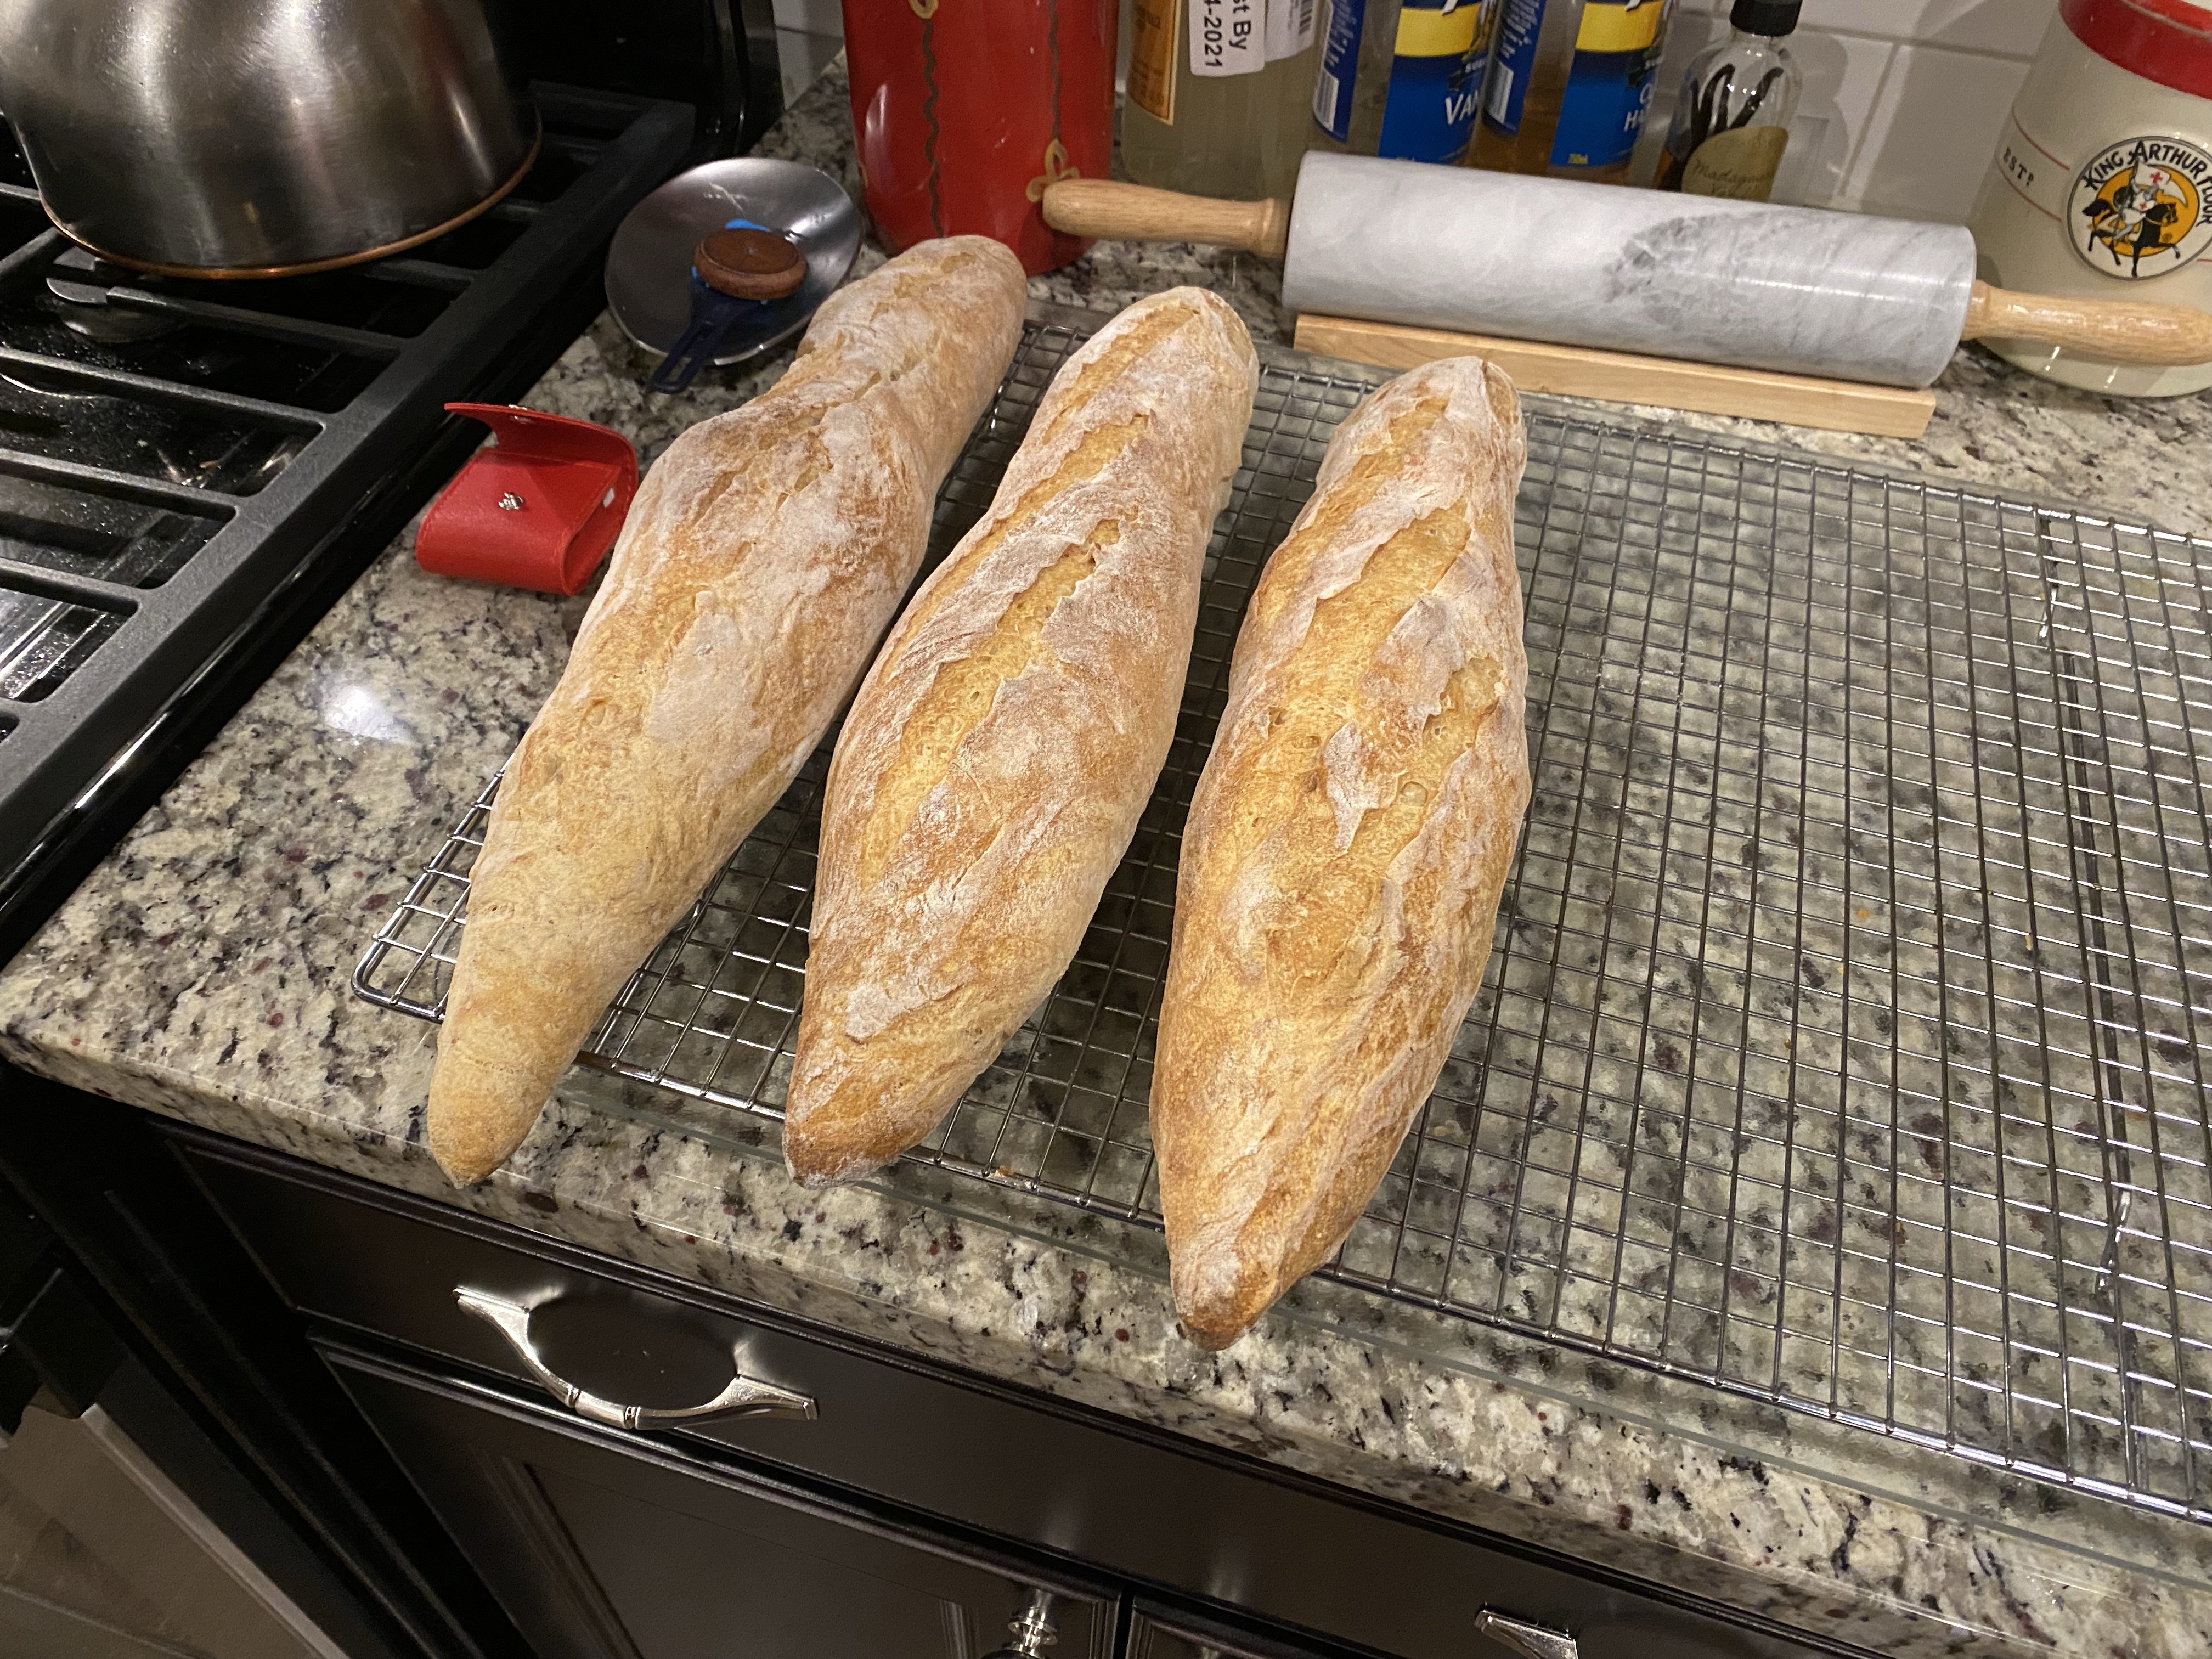
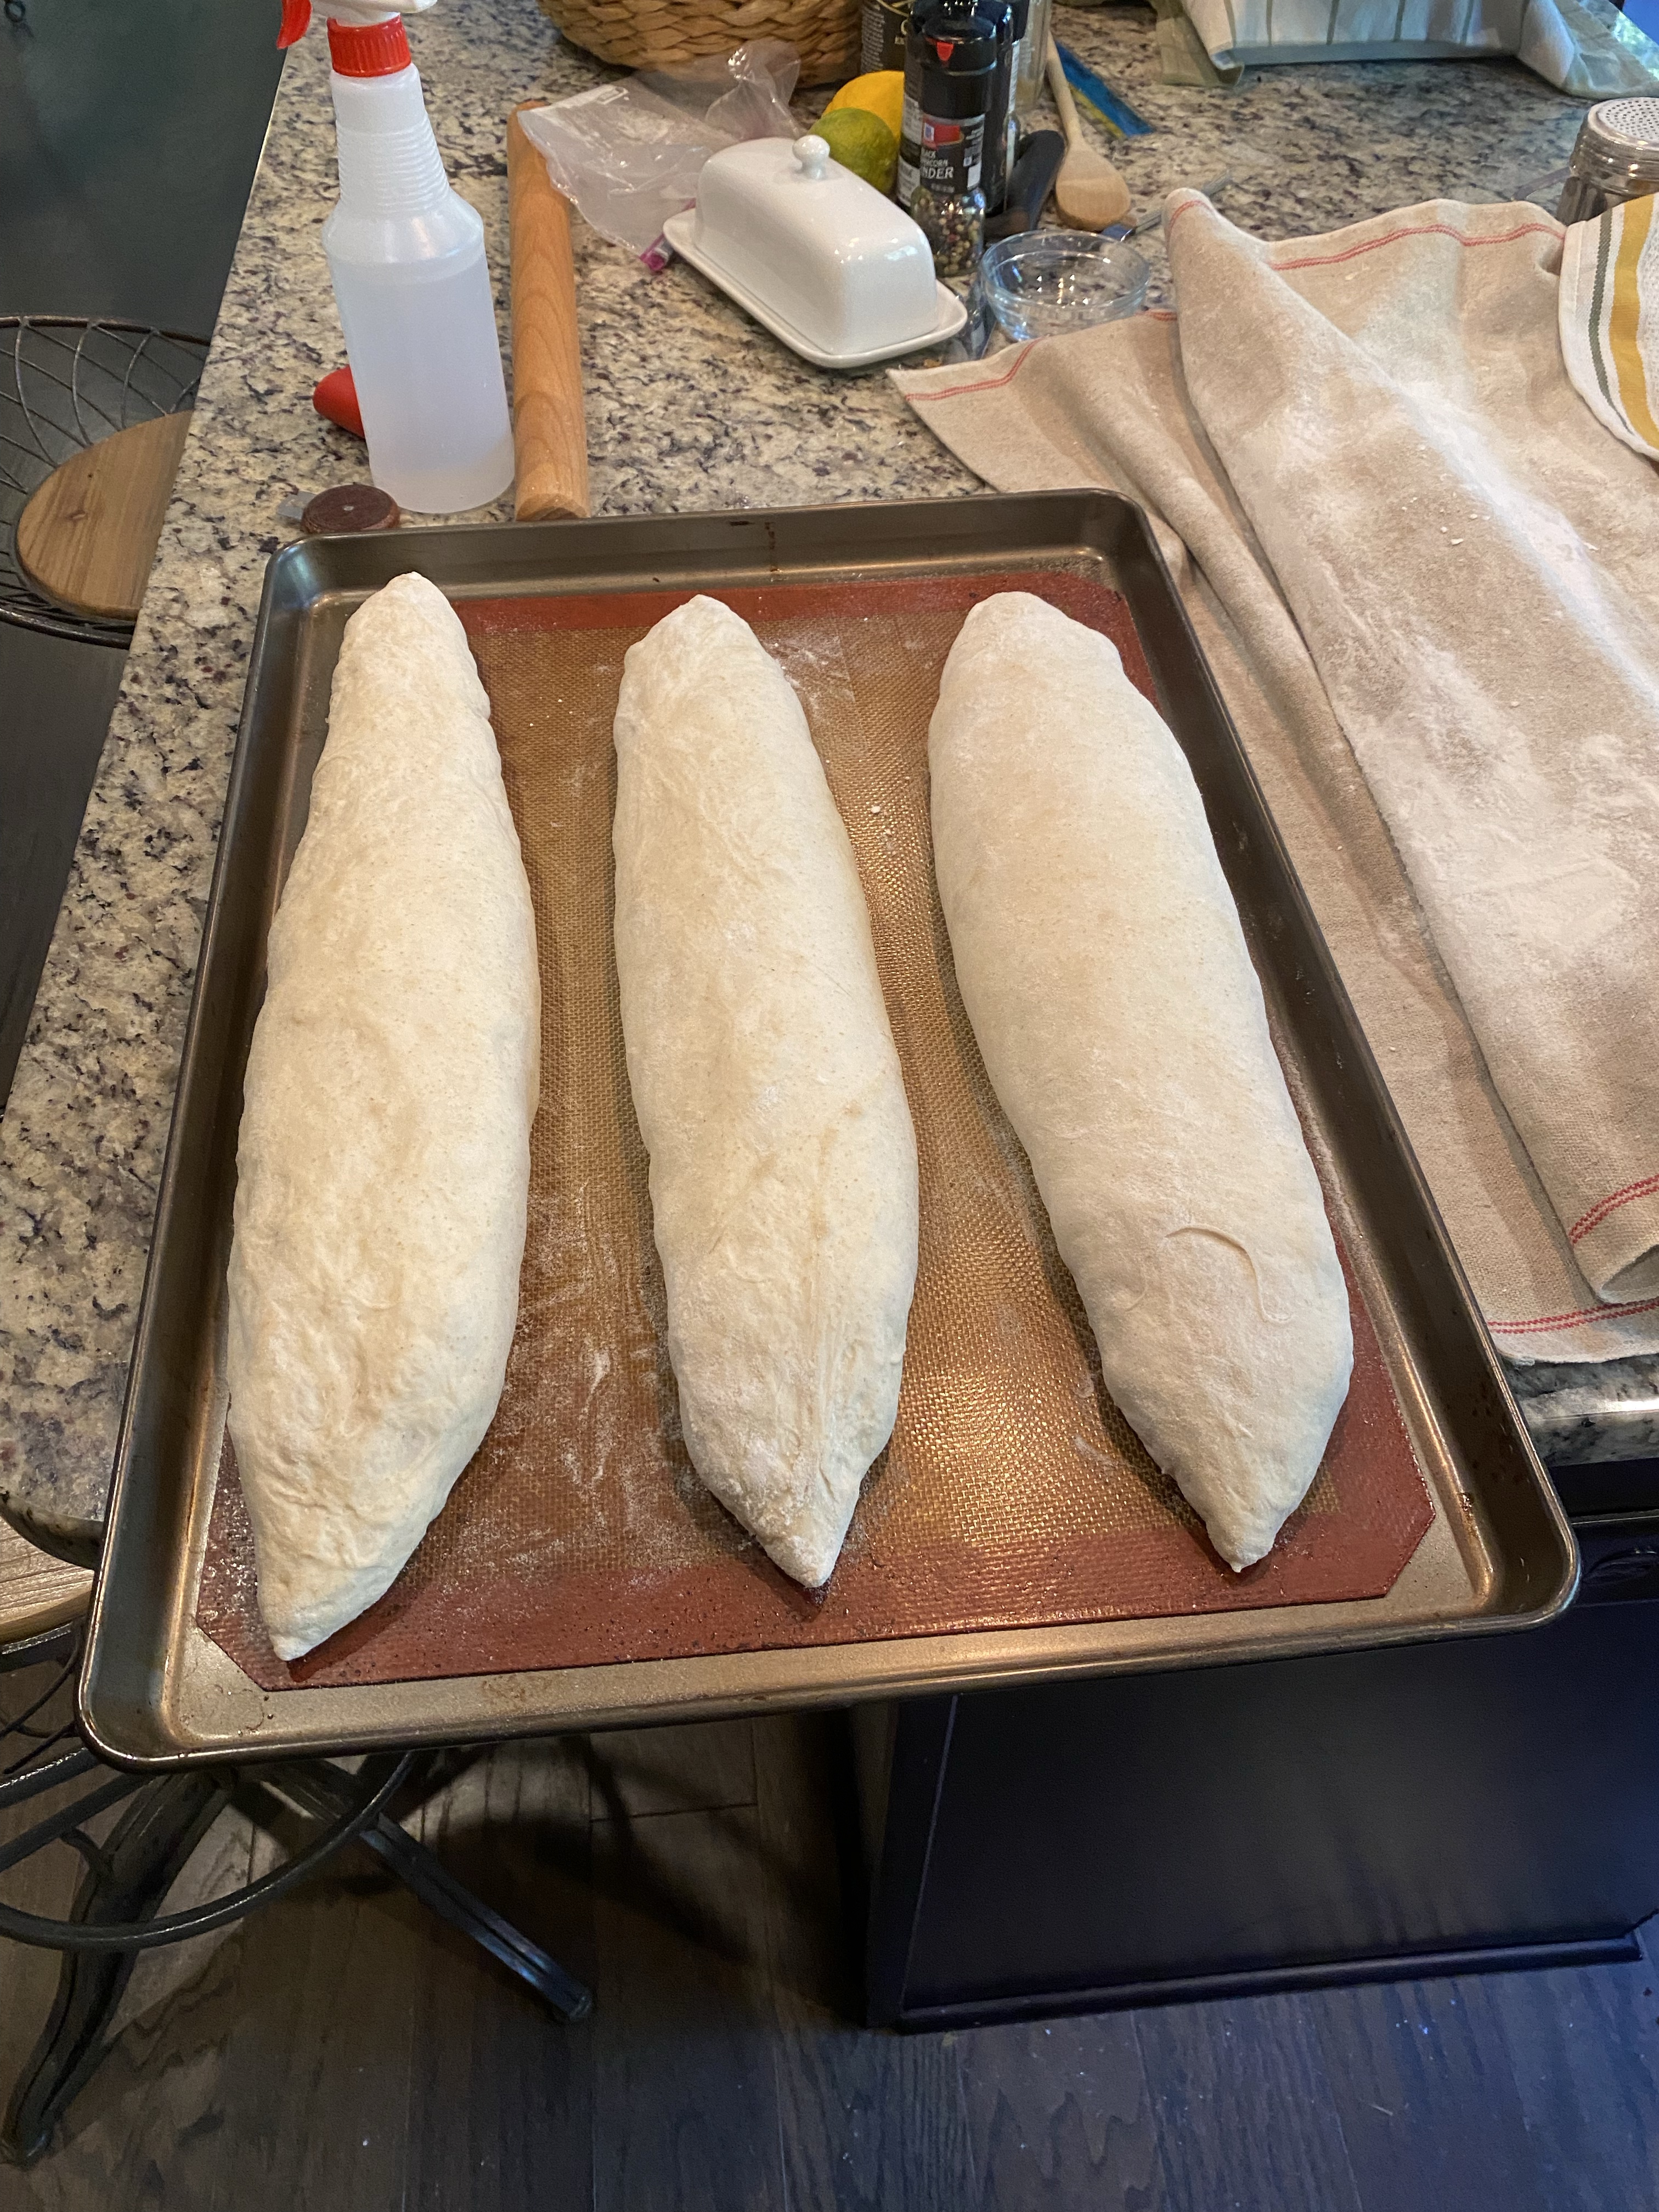
I just finished four rounds of baking. Three with 3 baguettes and a last single one for 10 total baguettes. Proud of getting them done!
First off…rice flour is the bomb!! No loaves sticking to the Couche! Really pleased.
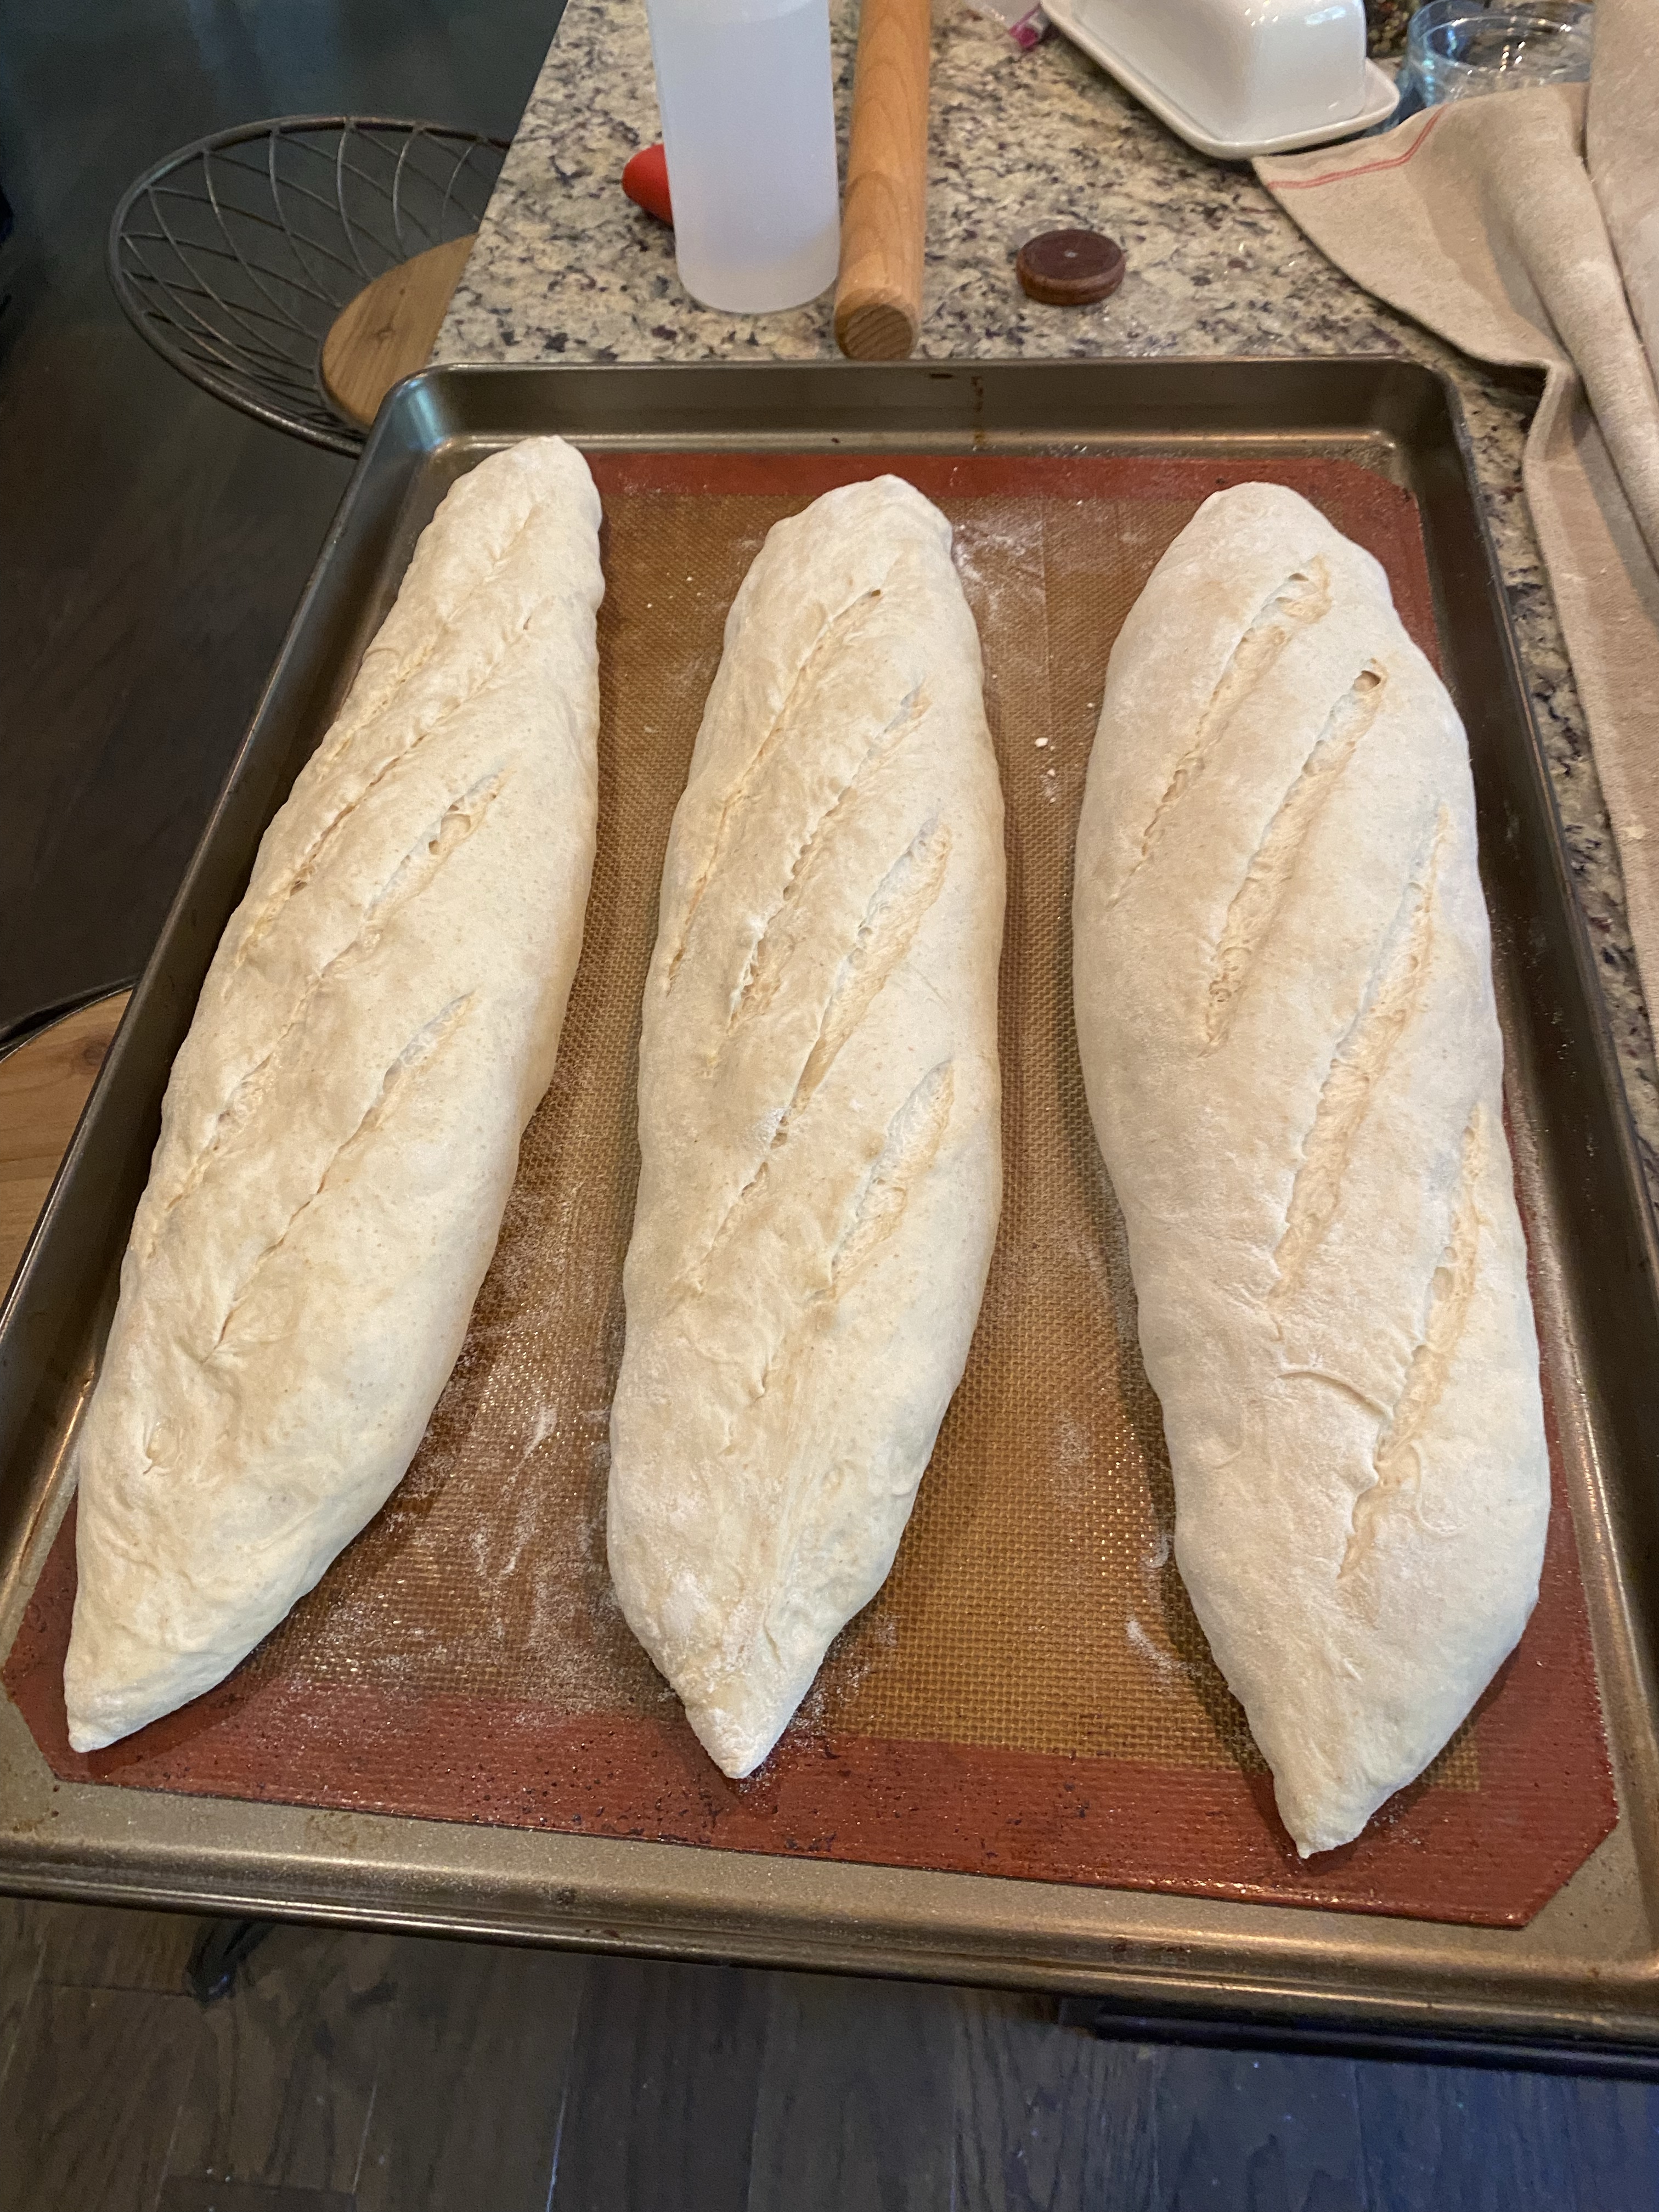
Baked at 450°F (no fan) for 30 minutes with stream and then for another 15-20 minutes at 425°F without steam.
Thinking I may bake just a bit longer during the non-steam portion. Maybe make them a bit darker. Need to also look at my scoring technique.
1st Batch
2nd Batch
3rd Batch
Done!!
Baguettes Baking
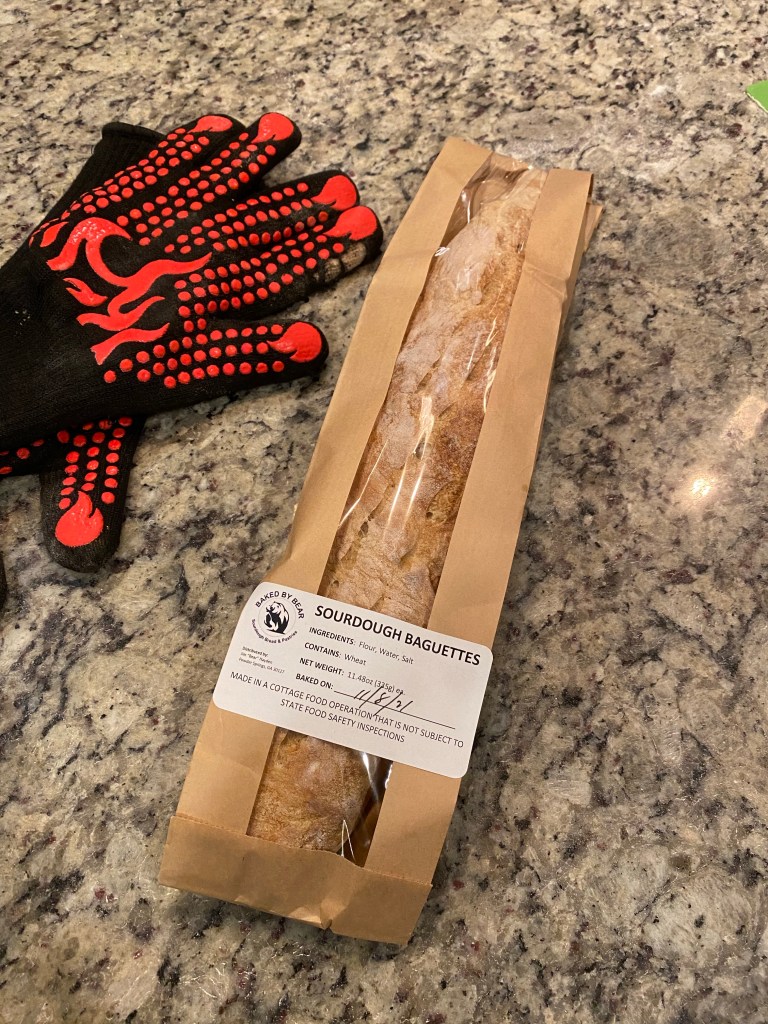
My other experiment is with my packaging. I ordered some bags with windows and put in some cottage industry labels. Pleased with how they look!
Packaging Test
Overall a successful experiment! Glad I did this by itself and not trying to bake bread and croissants all at the same time. Learned a lot that’s for sure!
In previous posts I mentioned that I’m experimenting with “scaling up”. I’m exploring the “ What has to be true for THAT to be true?” question I constantly ask myself when working through problems.
In this particular instance I’m wondering about ramping up croissant baking.
Croissants proving by the fire
Today’s experiment is covering a number of things:
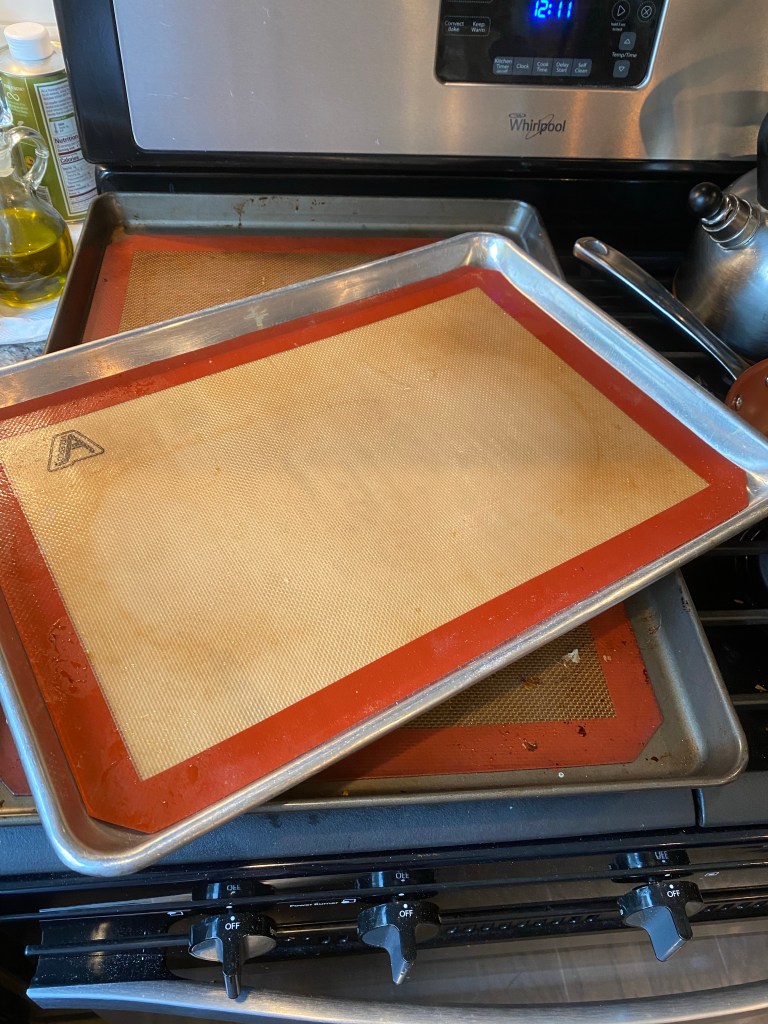
First, I’m working on my proving method. One of the Sourdough Bakers I really admire mentioned that his proving for sourdough croissants is done at 82°F with 80% humidity. I don’t have that ability per say but I’ve got my croissants at 82°F (with obvious humidity) in the bag.
Second, I’d like to scale to 3 batches (36 croissants) from one (12 croissants). To do that I need to place 9 croissants on my 2/3 size sheet trays. My experiment today is to do that and see if I have any tweaks needed to temps or time. This is due to the larger tray being a bigger “heat sink” than my smaller 1/4 size sheet tray.
The reason why I chose tripling my batch size is due to the process of lamination. I feel like I can cycle thru three batches and not impact my current timing in my method.
I’ve not yet achieved the honeycomb crumb I desire. Been trying hard over the past year. The baker I’ve been following mentioned he had thought lamination was the biggest factor in getting that crumb structure. However, he’s come to believe it’s actually that final proof. Largely this is due to the croissant not being a good conductor of heat. It takes awhile for the interior to prove fully.
The impact of your method to that point is clearly important. Low quality butter won’t be stable as you prove at that temperature and duration. Poor dough (gluten) strength will cause surface tears in the lamination.
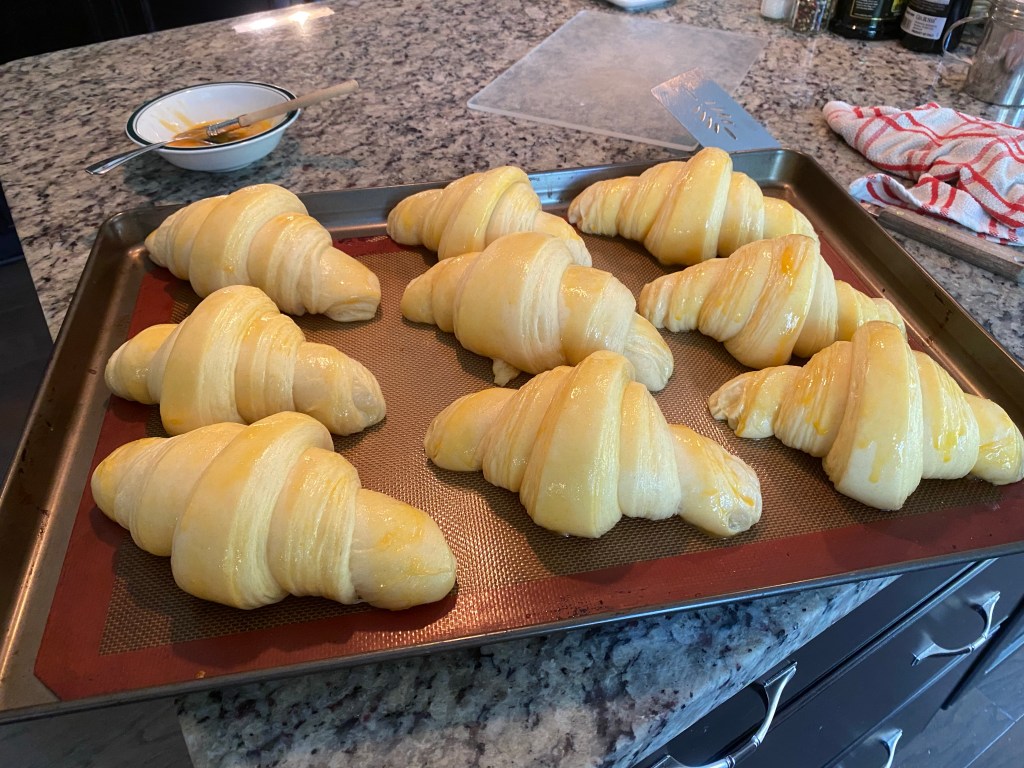
Here is what my croissants look like at 4.5 hours of proving. Similar time to what I’ve done previously but at a more consistent 82°F in front of my fireplace.
Proved, Egg washed and about to bake
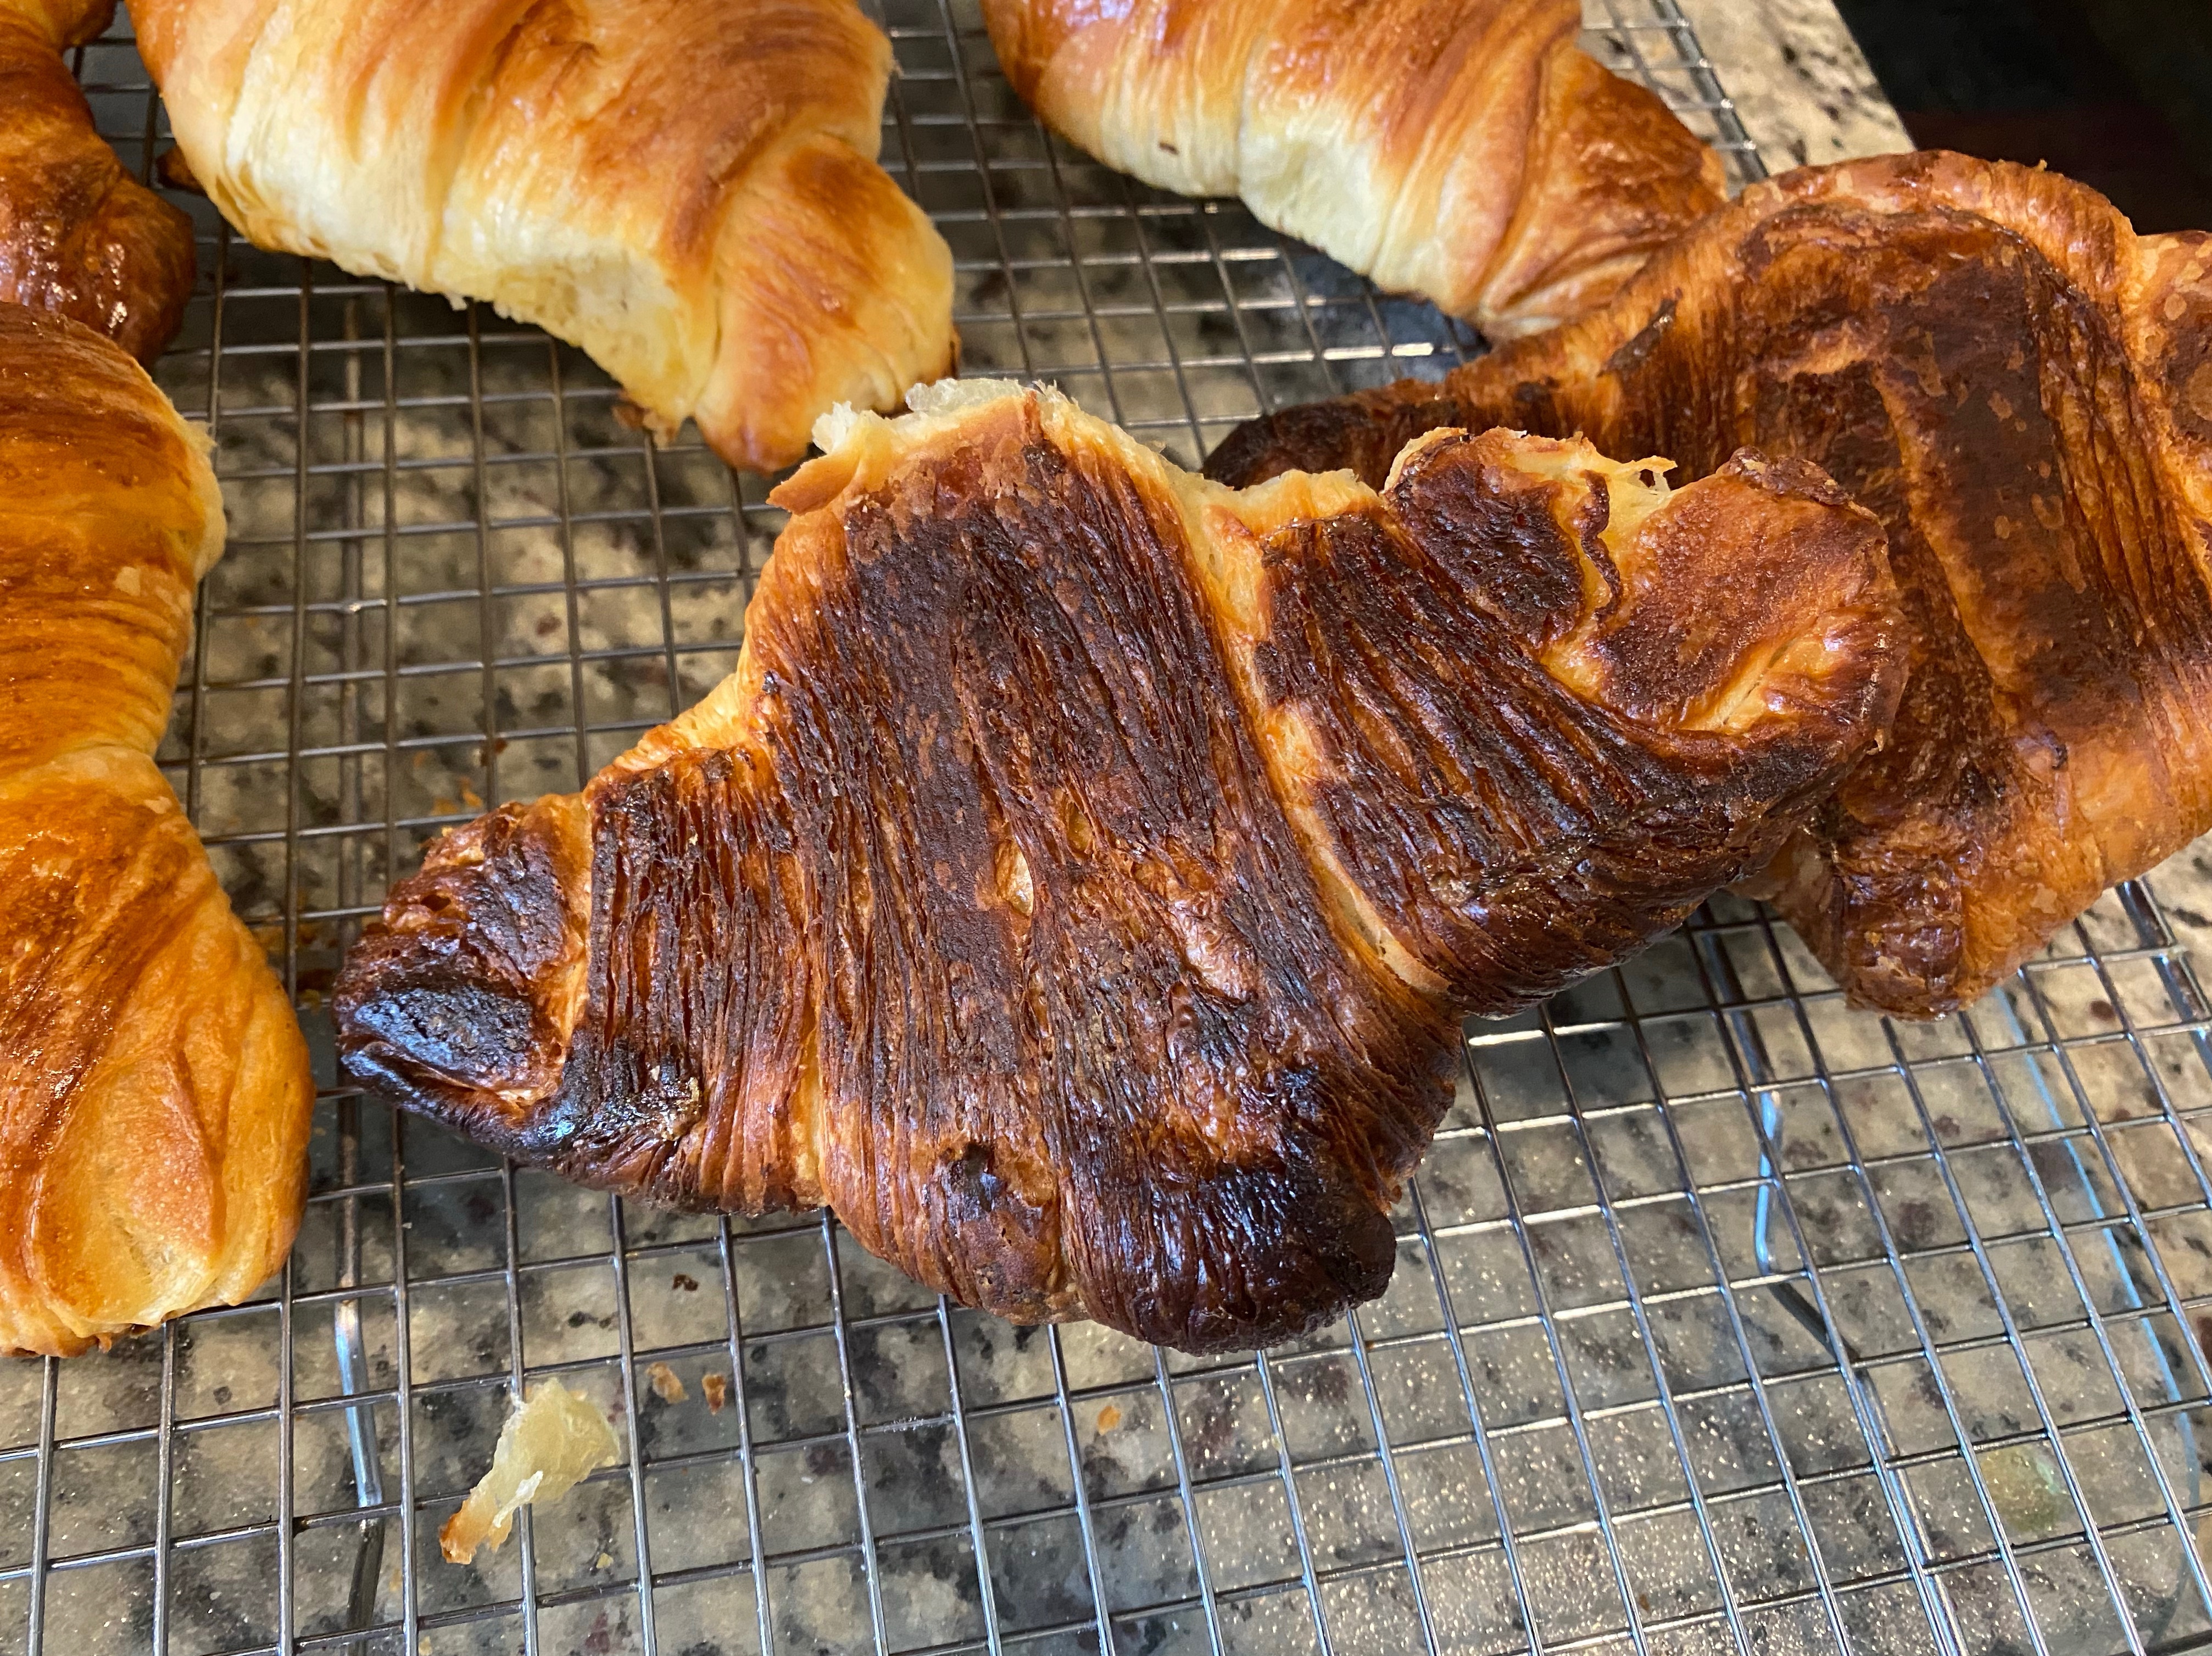
I baked at my normal 385°F convection for 14.5 minutes. Nice golden brown on top but more done on the bottom than I prefer. The second tray I’m doing for 13 minutes at the same temperature and I’ll check.
Baked and cooling
Darker than I desire
Just a bit too toasted!
First batch with larger sheet pan
My second tray was baked on my normal 1/4 size sheet tray. The temp and everything is the same as my normal method. It may/may not actually be a good check. I think I may need to just check the larger tray at 13 minutes and dial it in when I try doing more in my next batch.
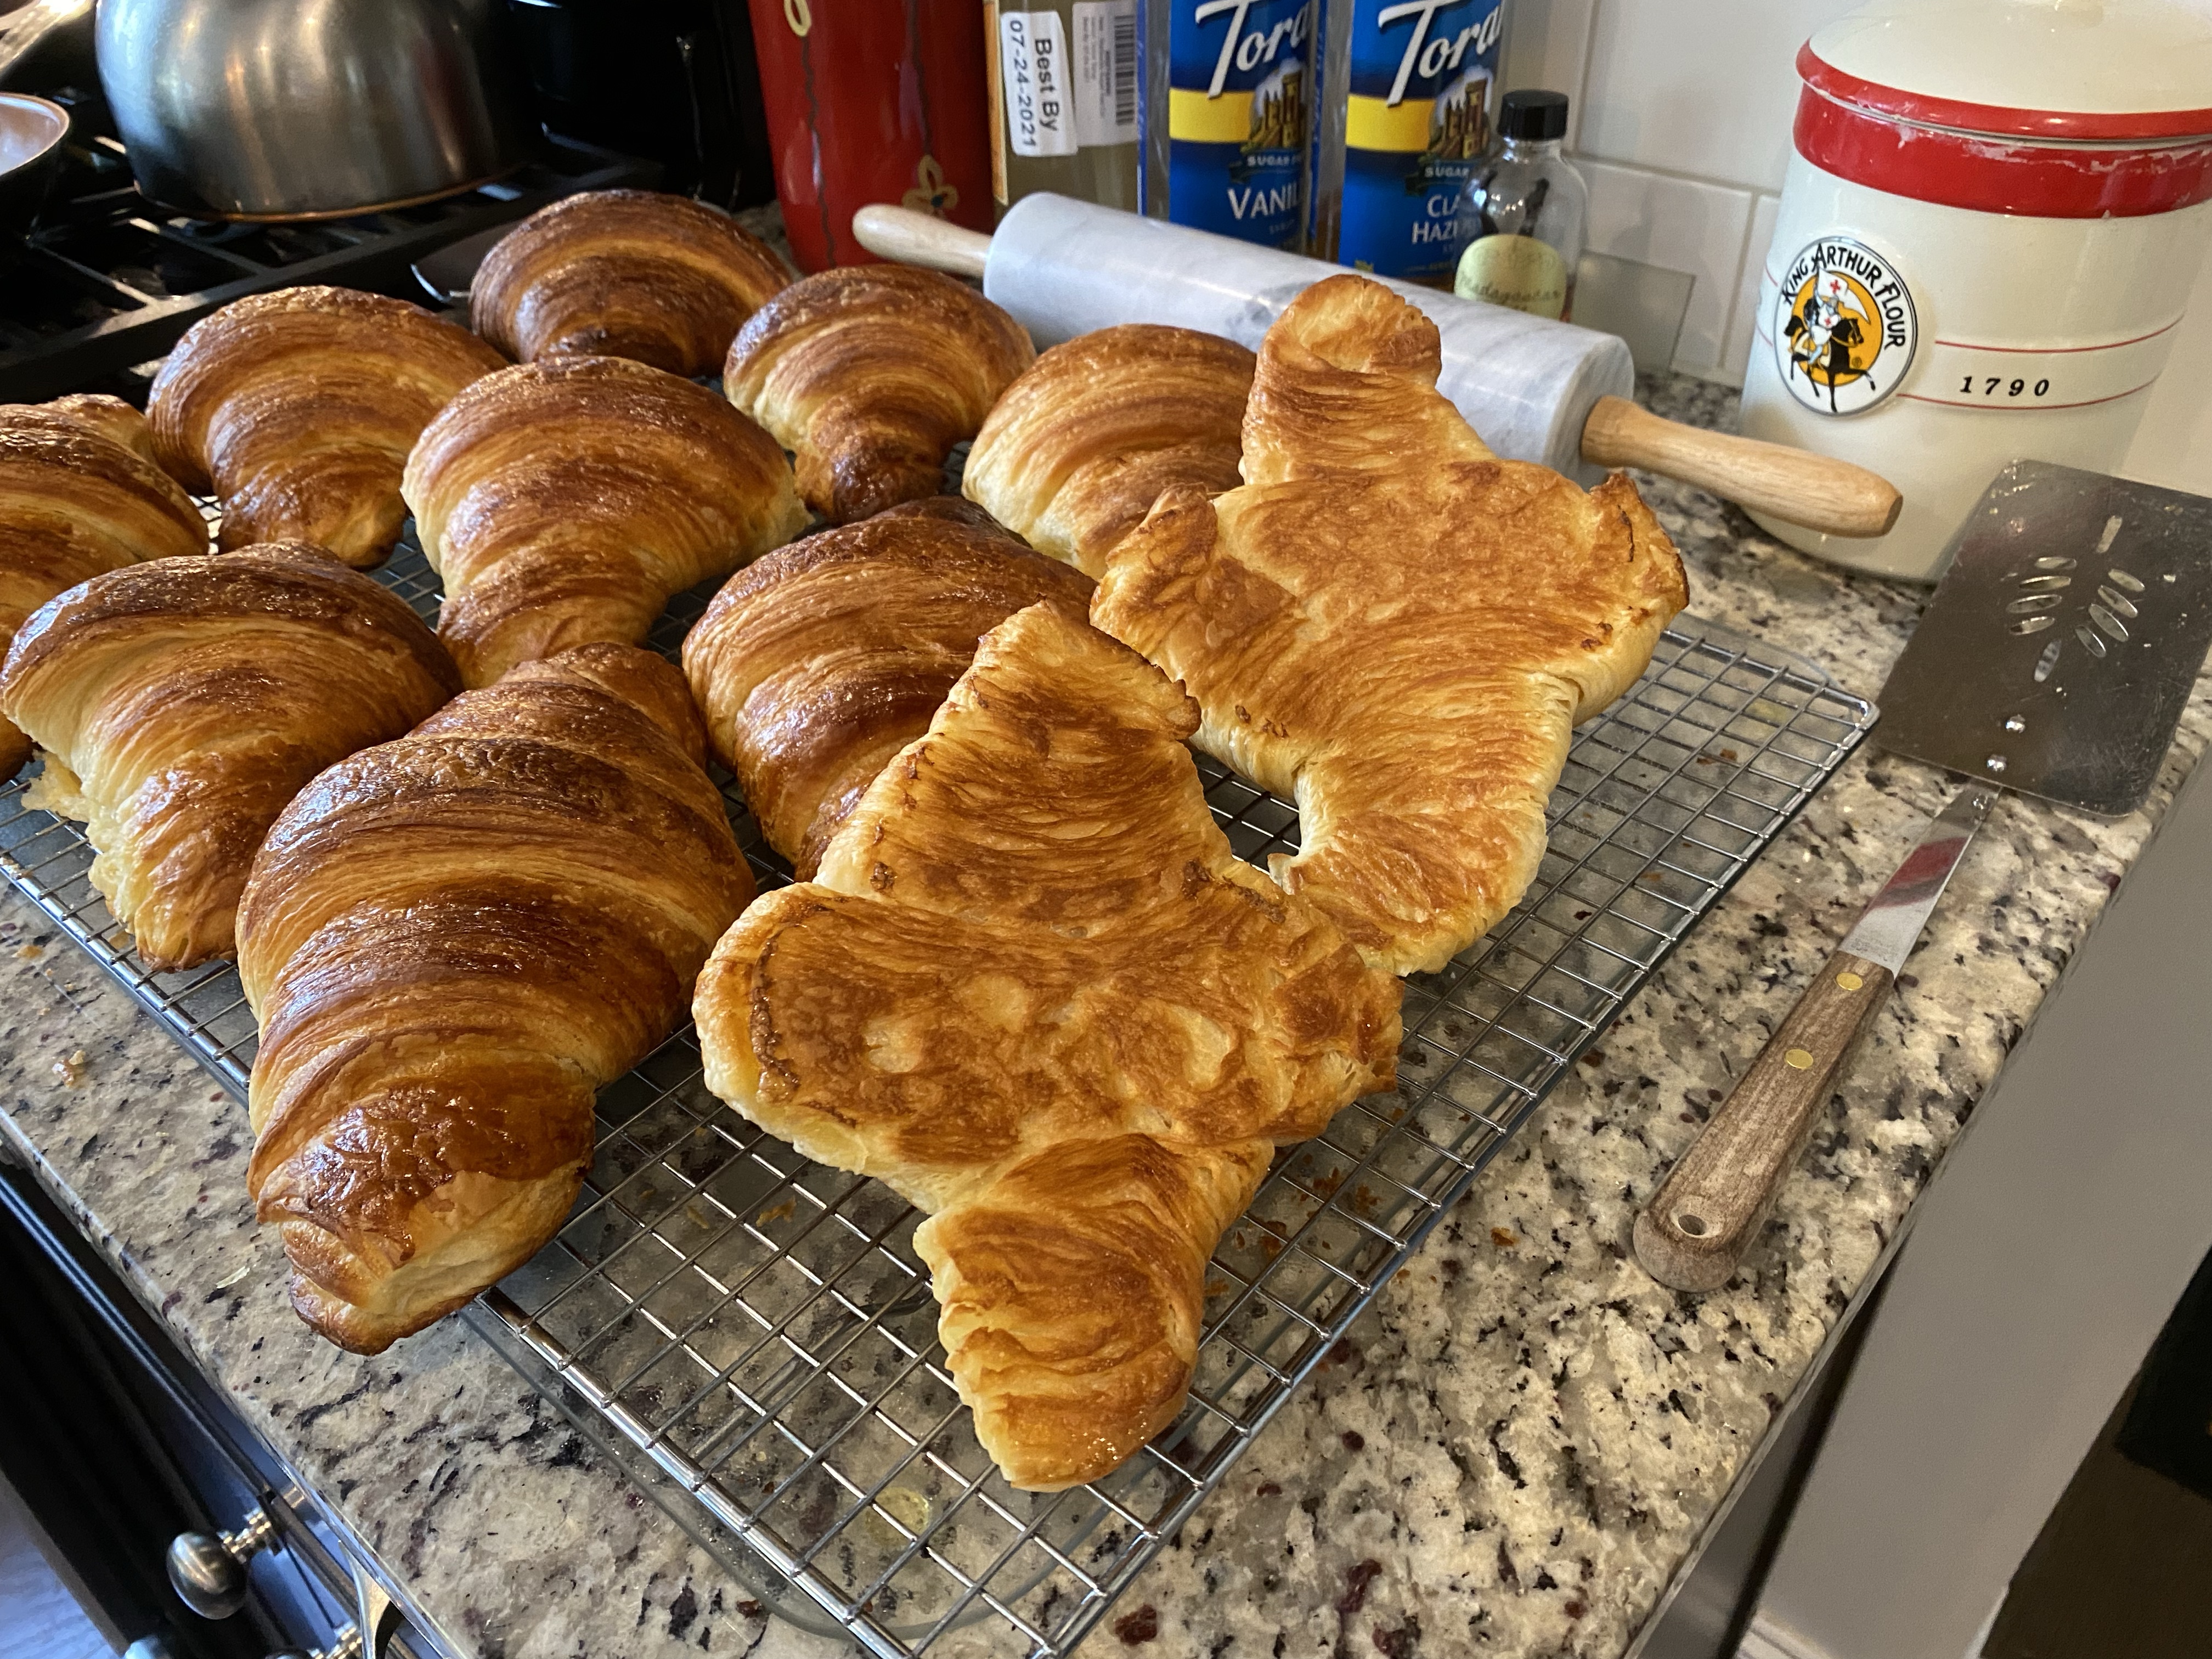
Here are some pics from the second tray:
Two on right from second tray
Better coloring
Second tray results/shorter bake time
No appreciable residual butter in the trays so the butter held up / didn’t melt out of croissants as they proved! Yay!
Virtually zero residual butter in trays
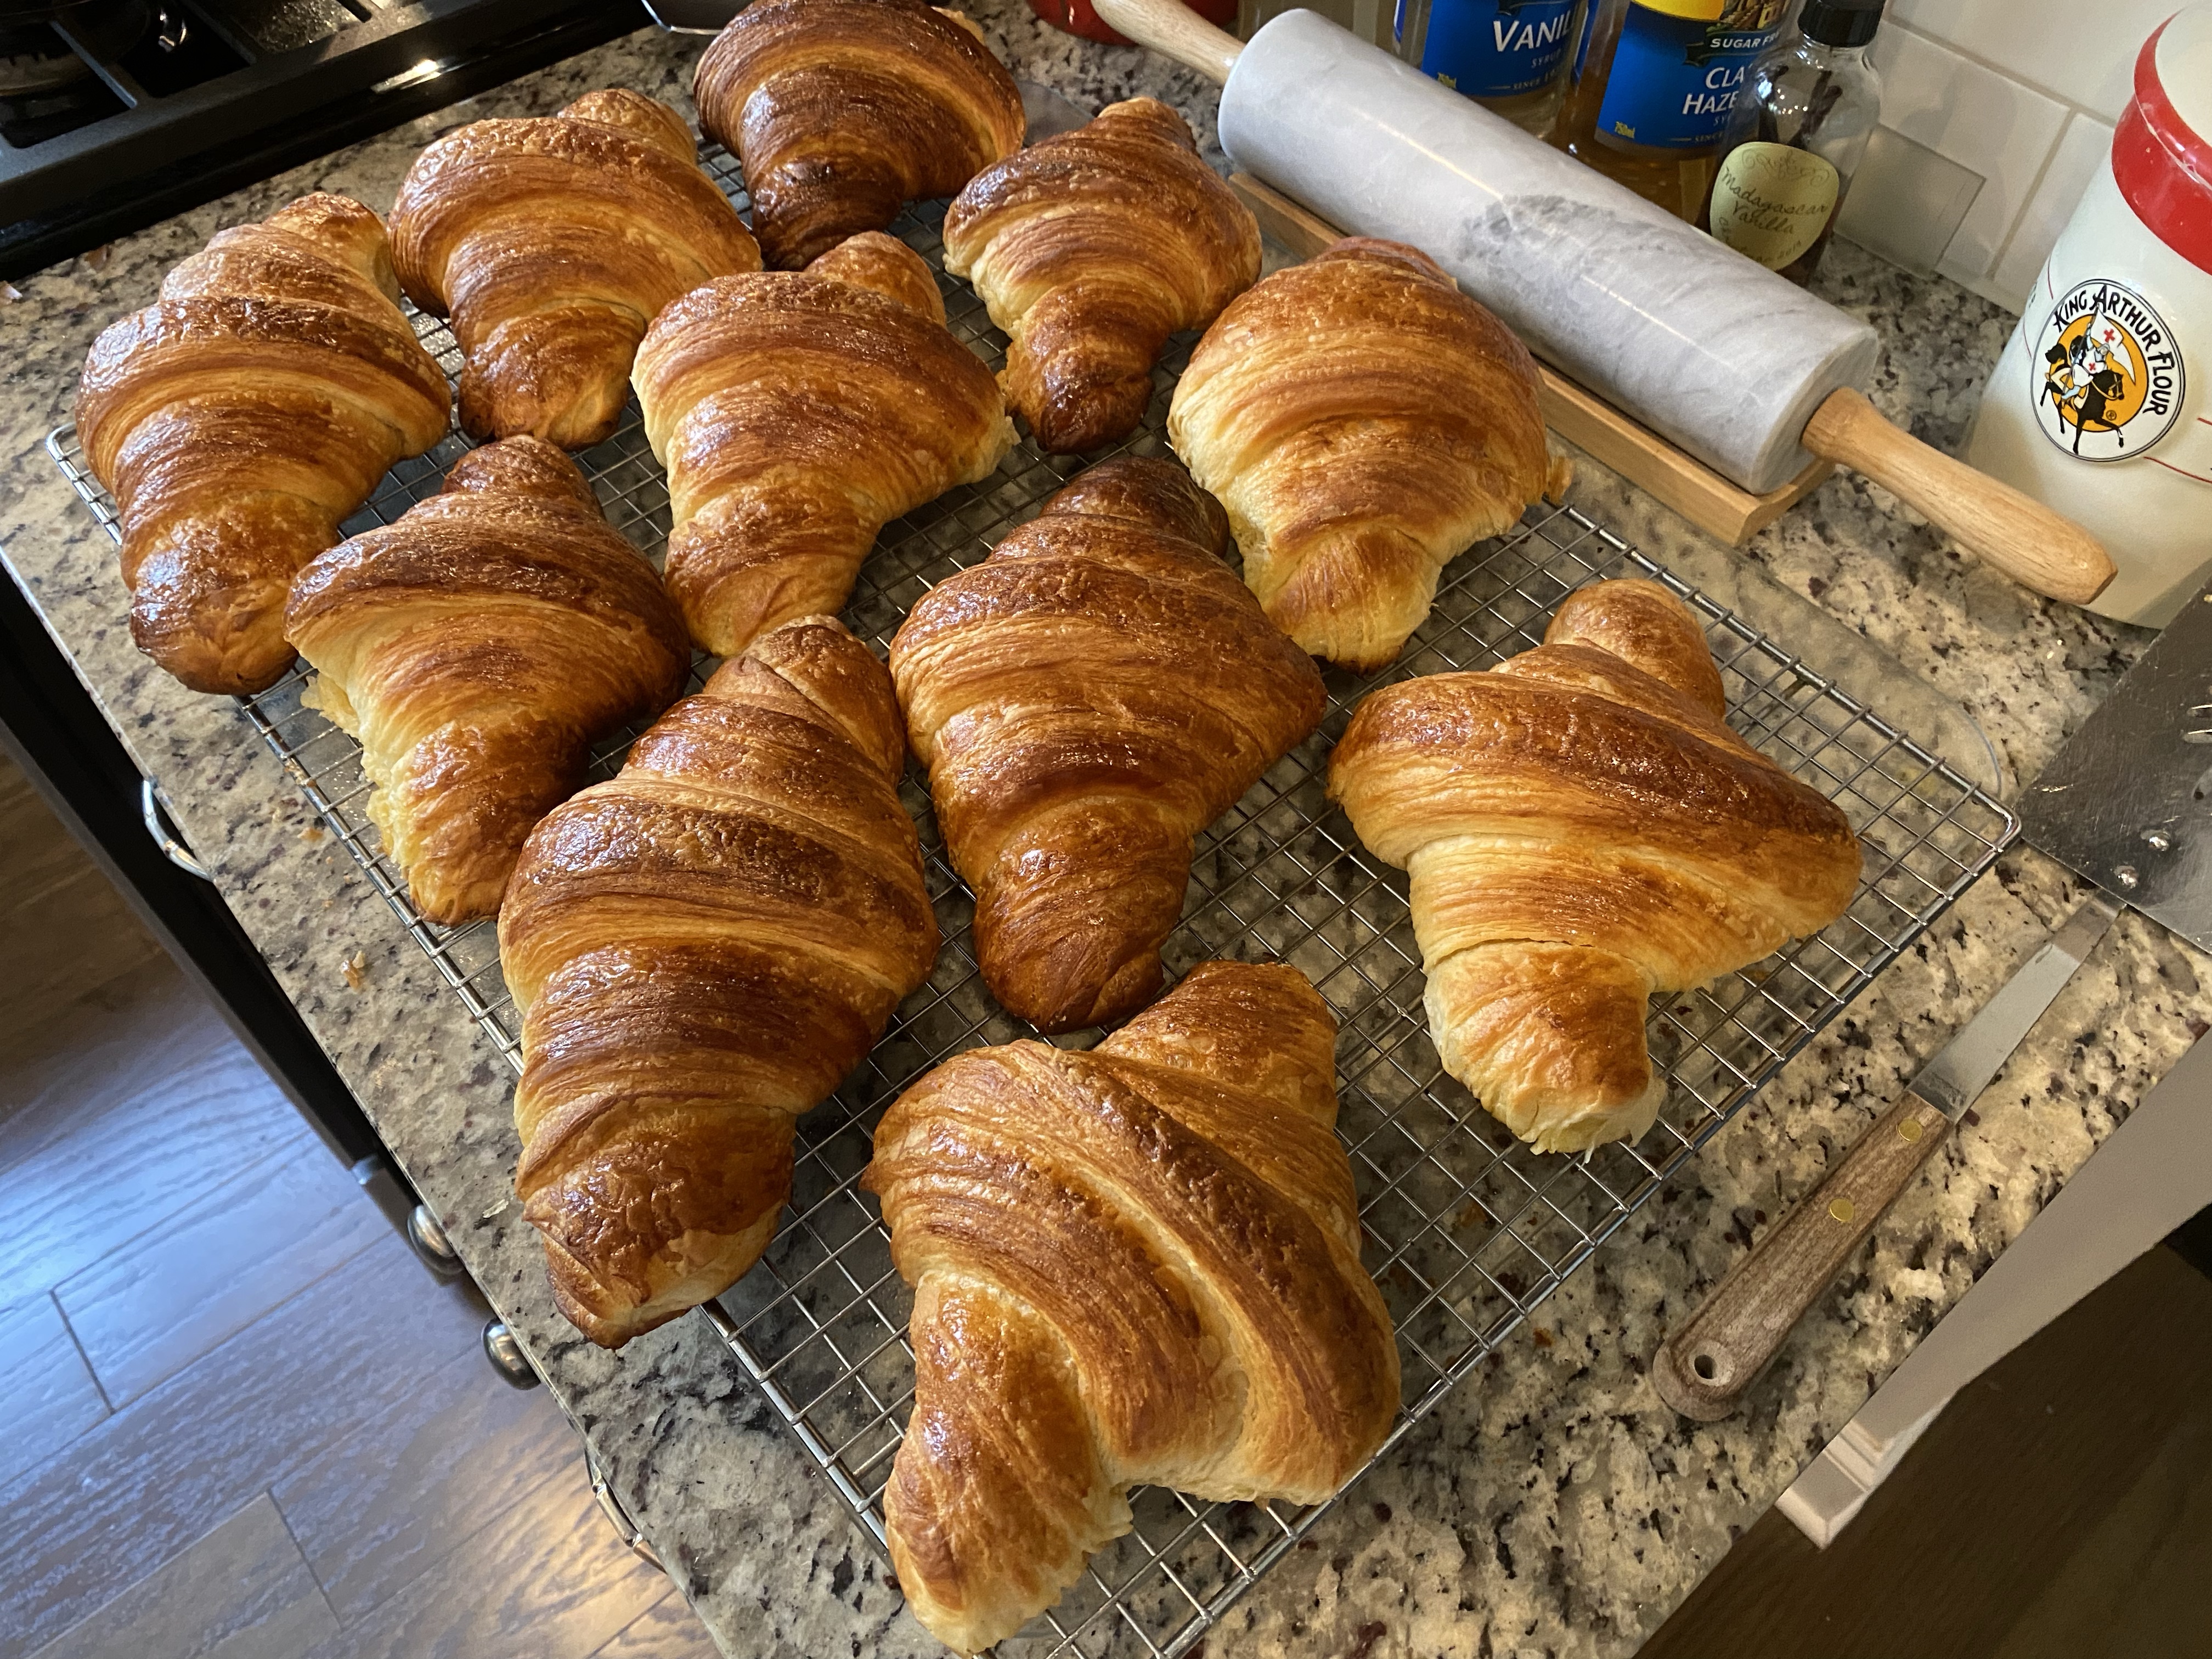
Here’s how they came out!
Results!
Still not my desired honeycomb but not bad! I’ll keep on experimenting!
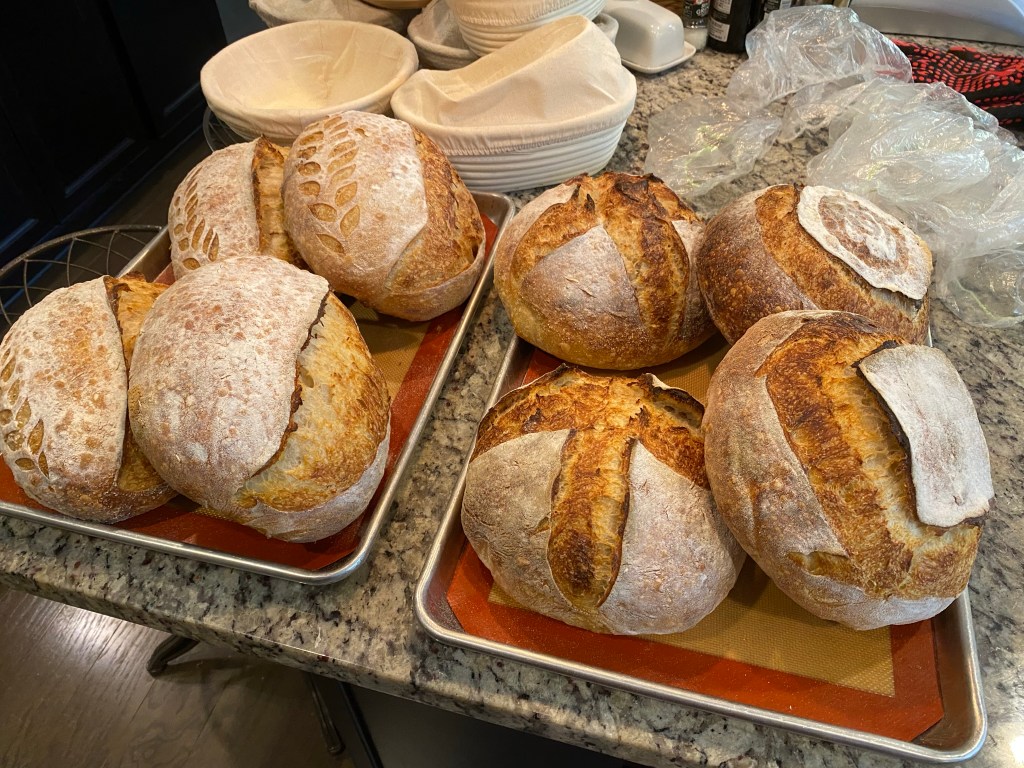
Baked the four loaves of sourdough bread today vice my normal two.
Sourdough loaves baked
Things that I noted in baking the two batches of loaves:
Rice flour is the bomb! Makes my loaves less inclined to stick to the bannetons
Can’t preheat the lids for the second batch – not enough space in my oven
Baking at 420°F convection for 25 minutes plus 20 more minutes lid off makes for a richer crust color than 35 mins lid on plus 5 minutes lid off
No real difference in the loaf results when comparing batches
Proving was took a while even though it was in my proving box. Therefore, scaling to 6-8 loaves might prove difficult because I can’t fit a tub that large into my box. My kitchen temp is lower which will make proving take even longer!
Overall this was a successful test. I’ll have to look at the crumb later once I cut into them. They don’t look much different than my other loaves so I’m not expecting anything earth shattering.
Now to think about “what has to be true?” If I want to double and try 8 loaves!
I decided that I’d try scaling up my bake and try four loaves instead of my normal two. I’ve a friend that wanted me to bring some bread to an event. As I think about this I’m always asking myself “What has to be true for THAT to be true?”
Starting 2X batch of leaven
It started with me making 2x my normal batch of leaven.
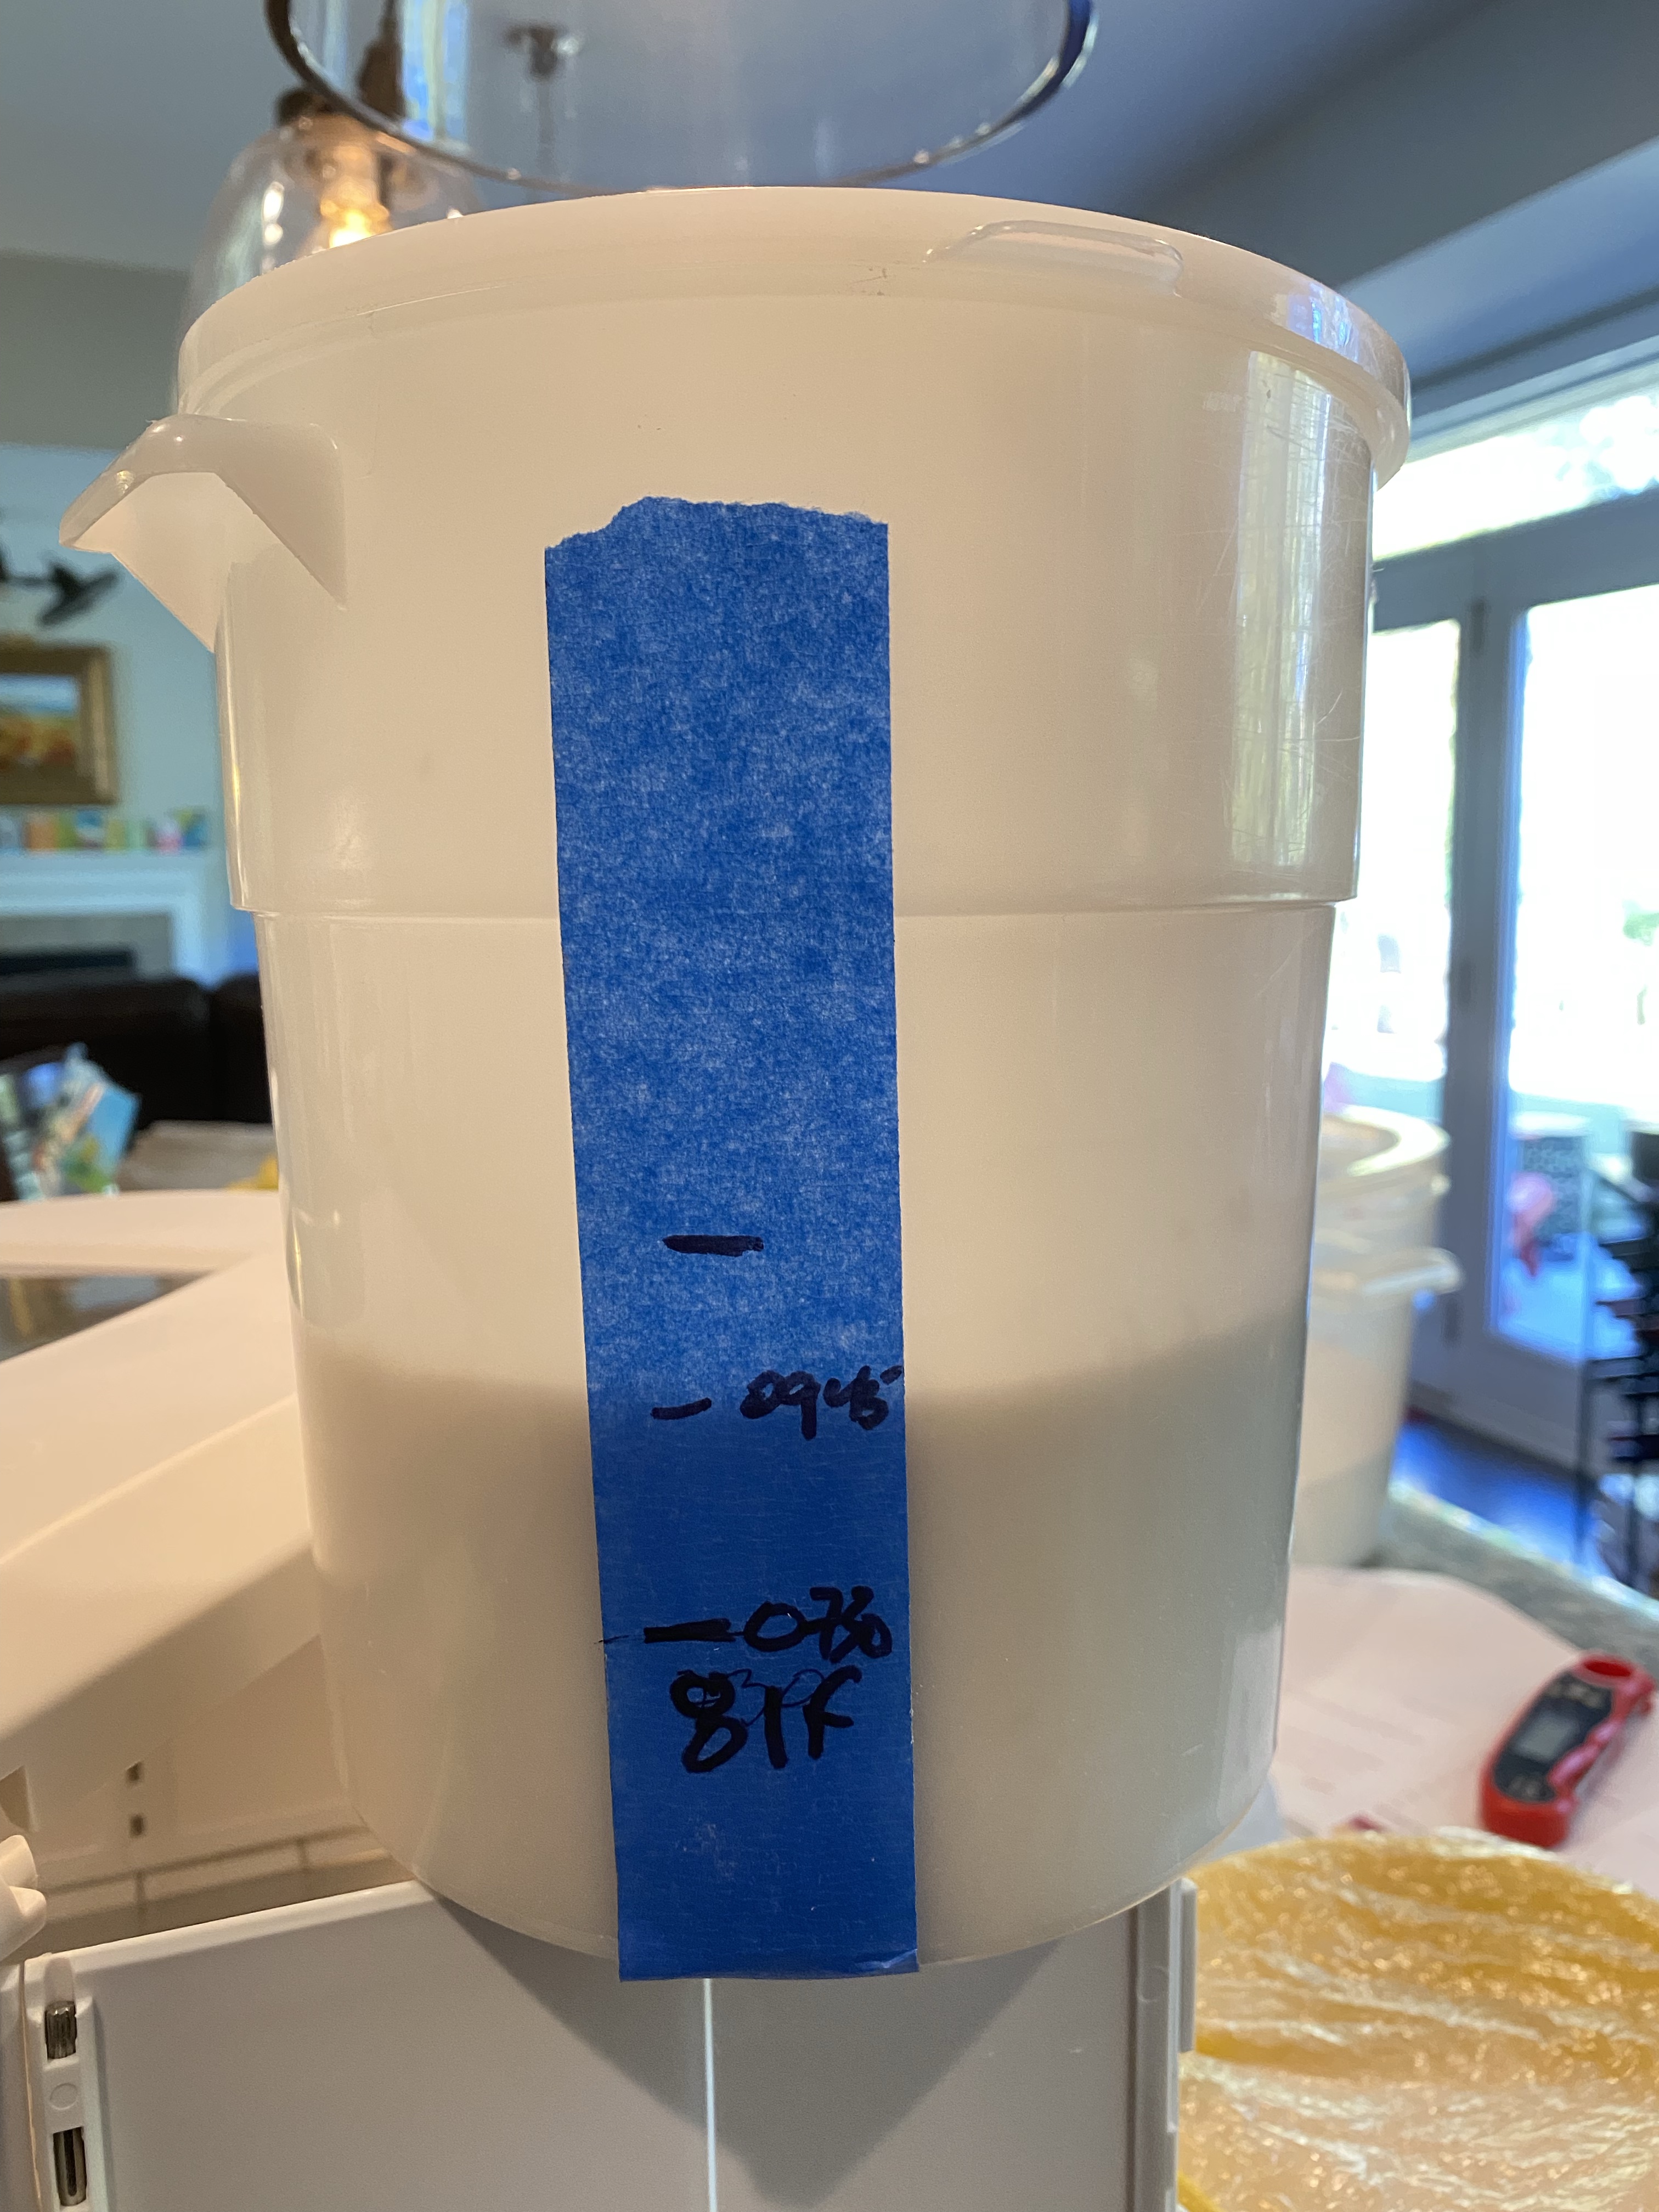
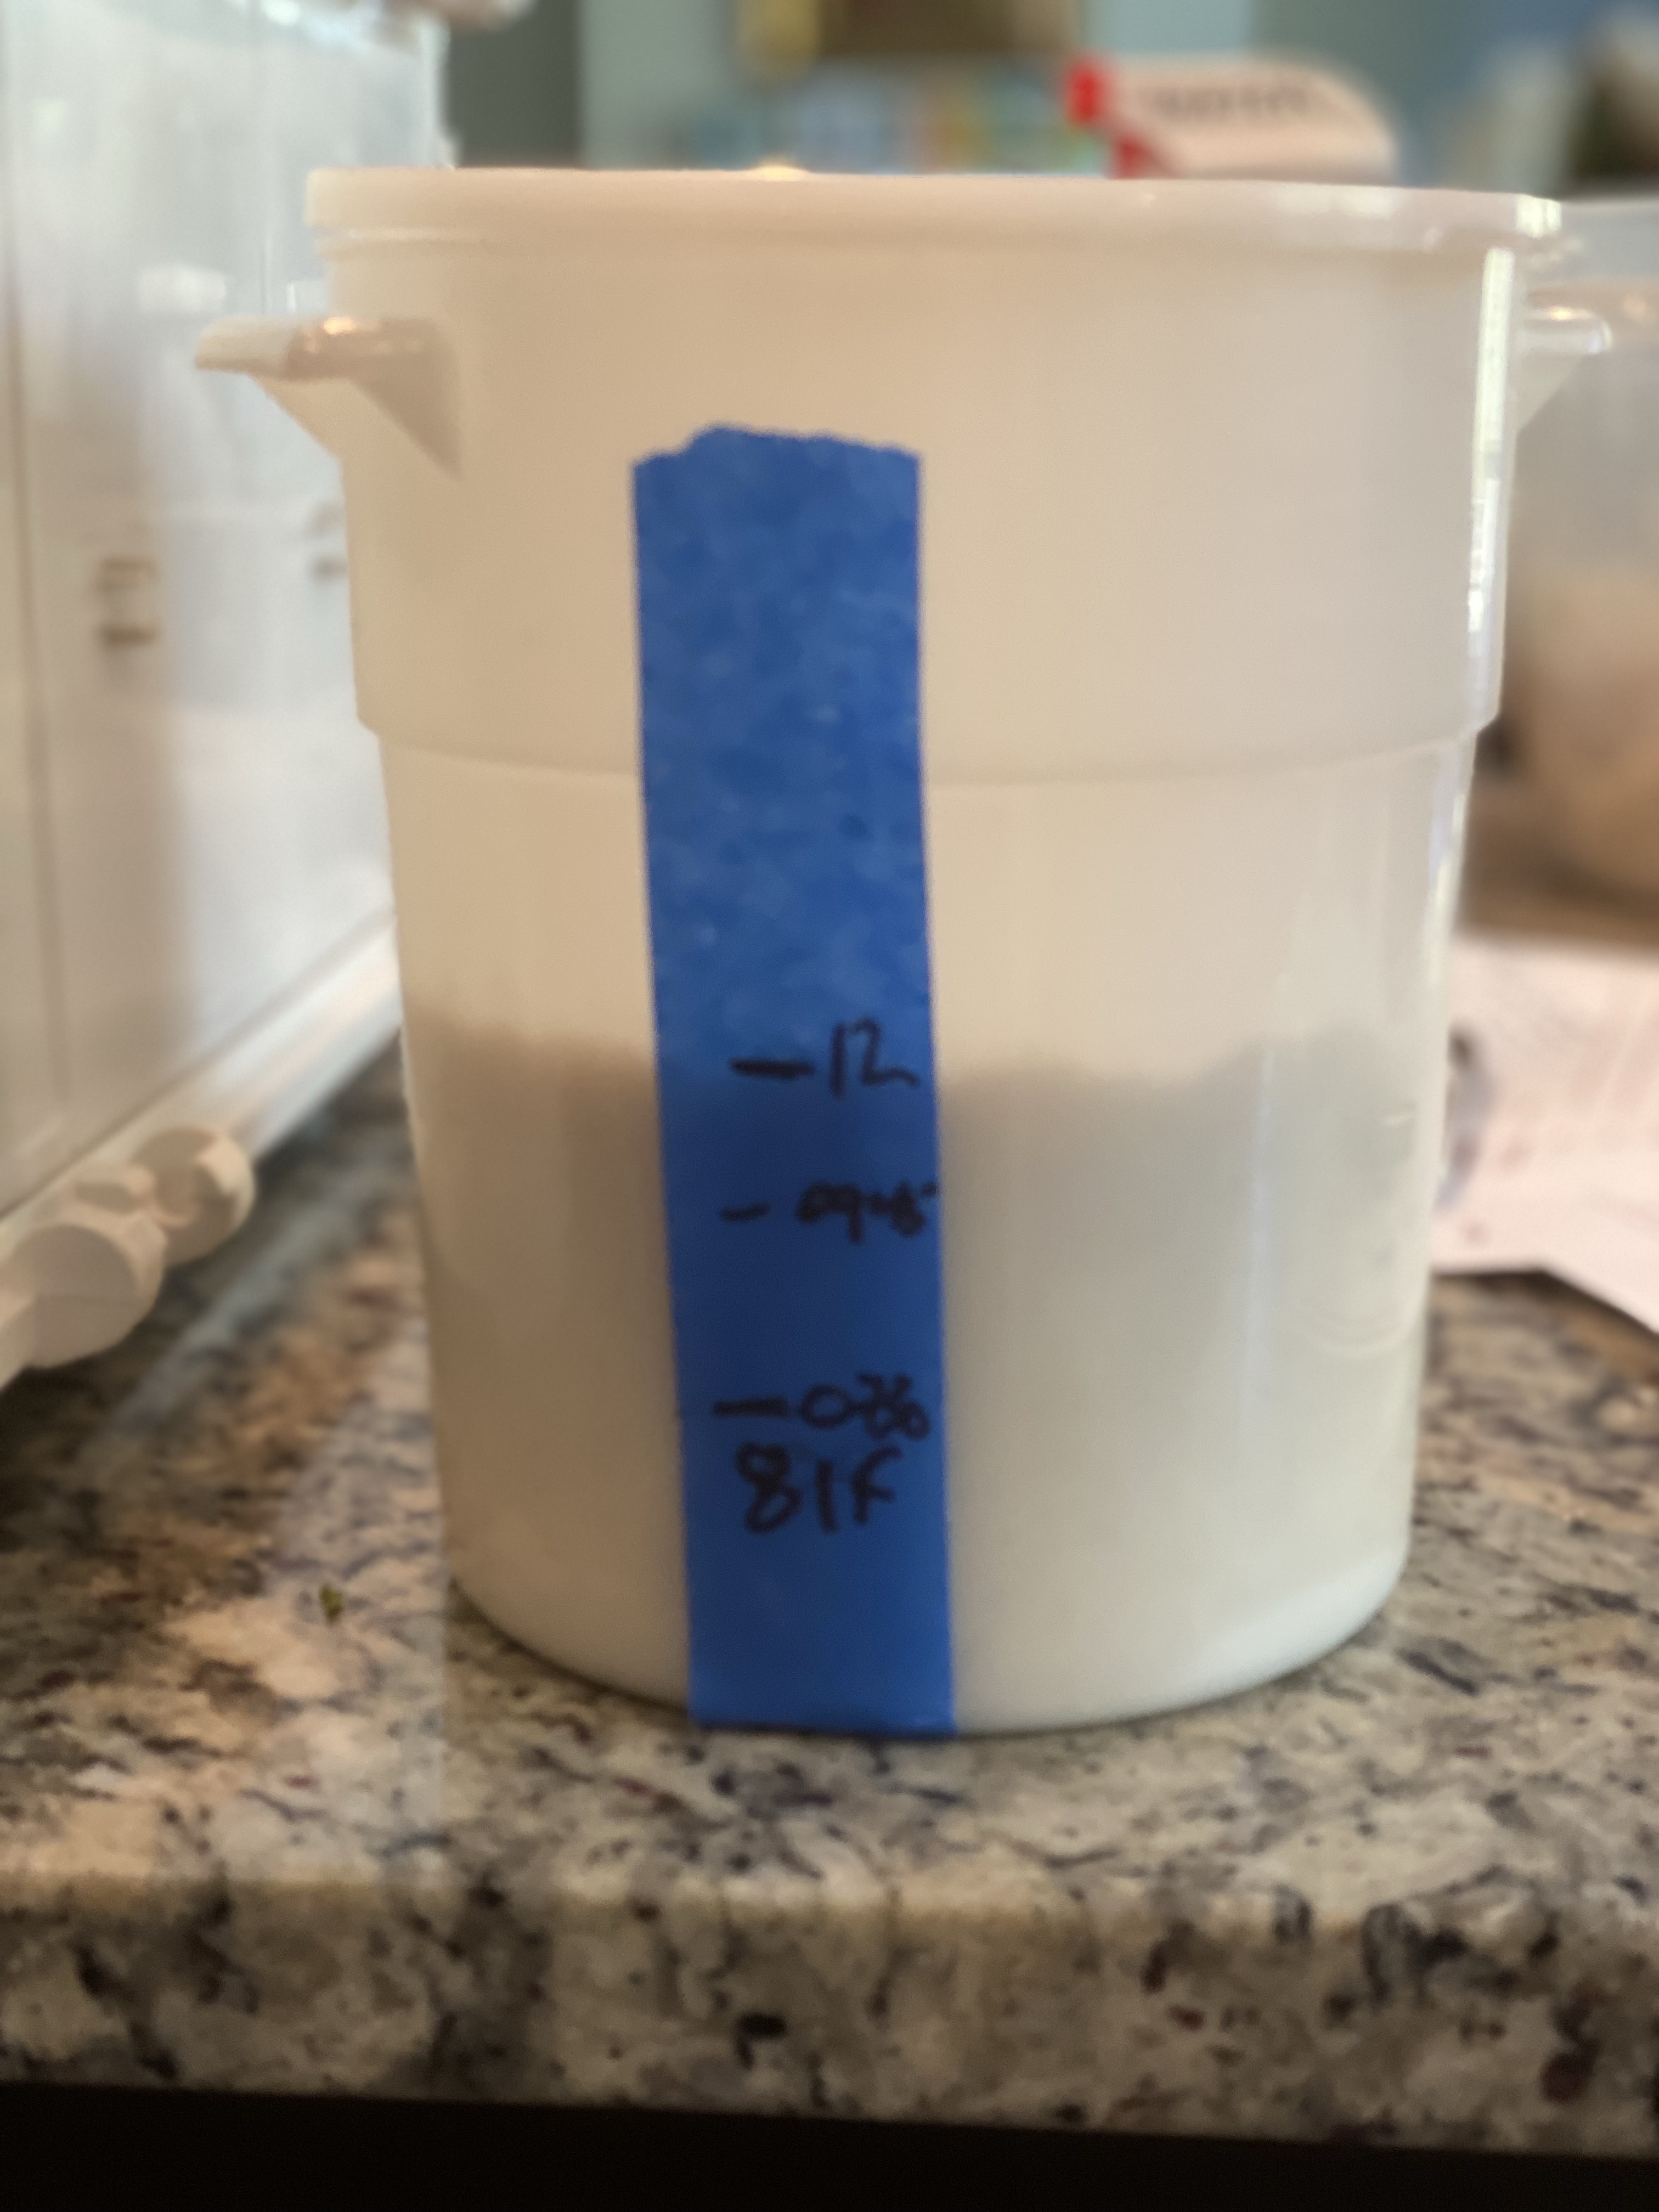
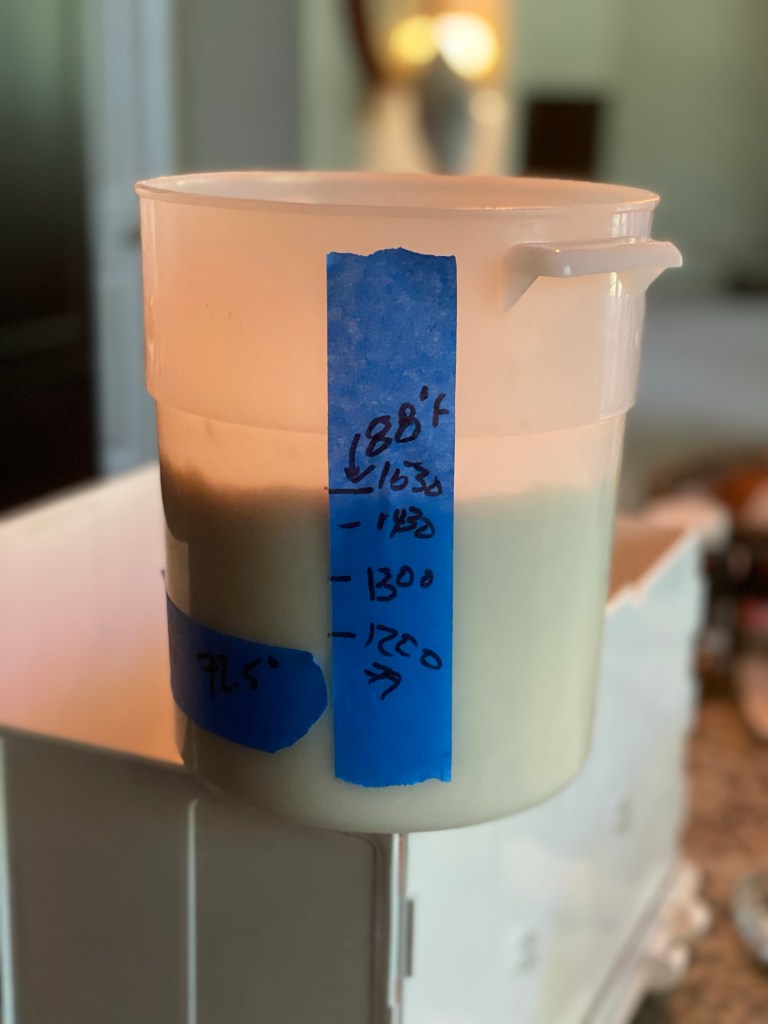
I also decided to also pay close attention to temps since it is now cooler in my home now that it is fall. The first thing was to put my leaven into the proving box set to 82°F. I added tape to monitor growth by time and temp.
A couple of hours into the process I began my autolyse. My flour temp was 72°F so I aimed at the high 80’s fir my water temp. I microwaved my water to bring it to 89°F and, once mixed my dough read 81°F.
Double my normal amount of flour.
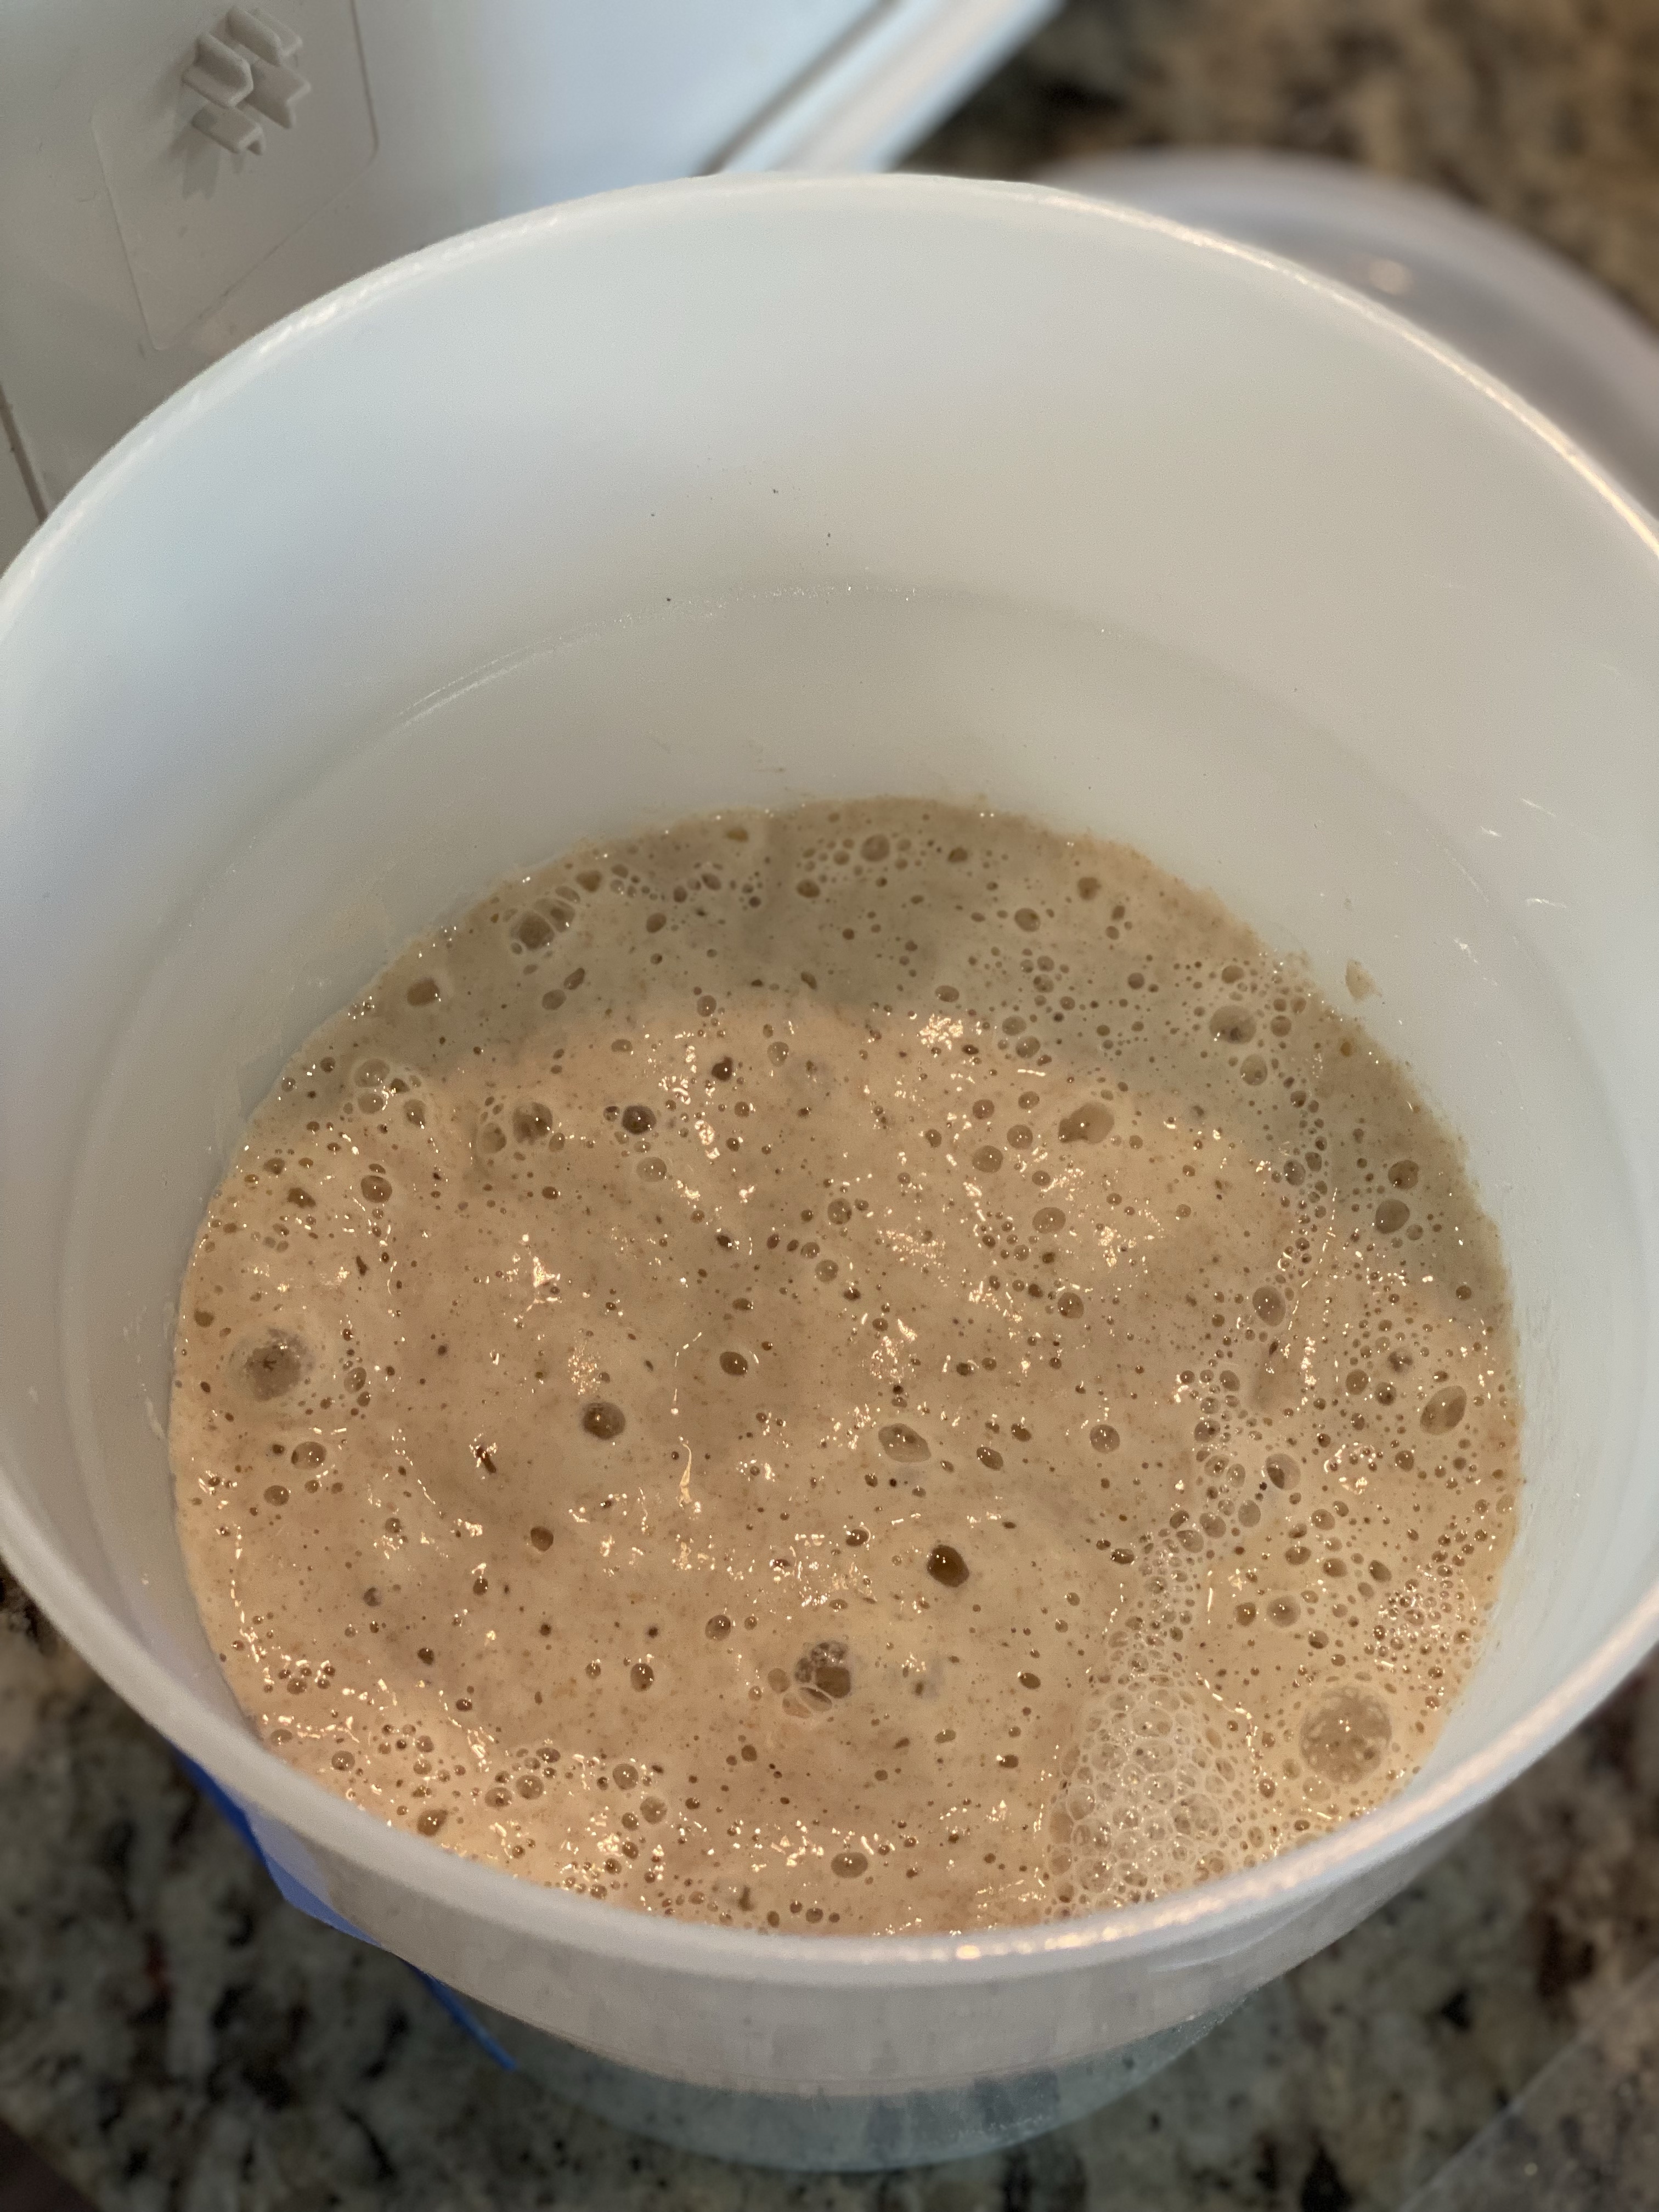
My leaven more than doubled in 5 hours it read 89°F when I took it out of the proving box. The microbes were hungry and working up a sweat!
Doubled in 5 hours
I follow led my normal process of mixing in the leaven, waiting 39 mins then adding my salt. The only change being that I kept the tub in my proving box.
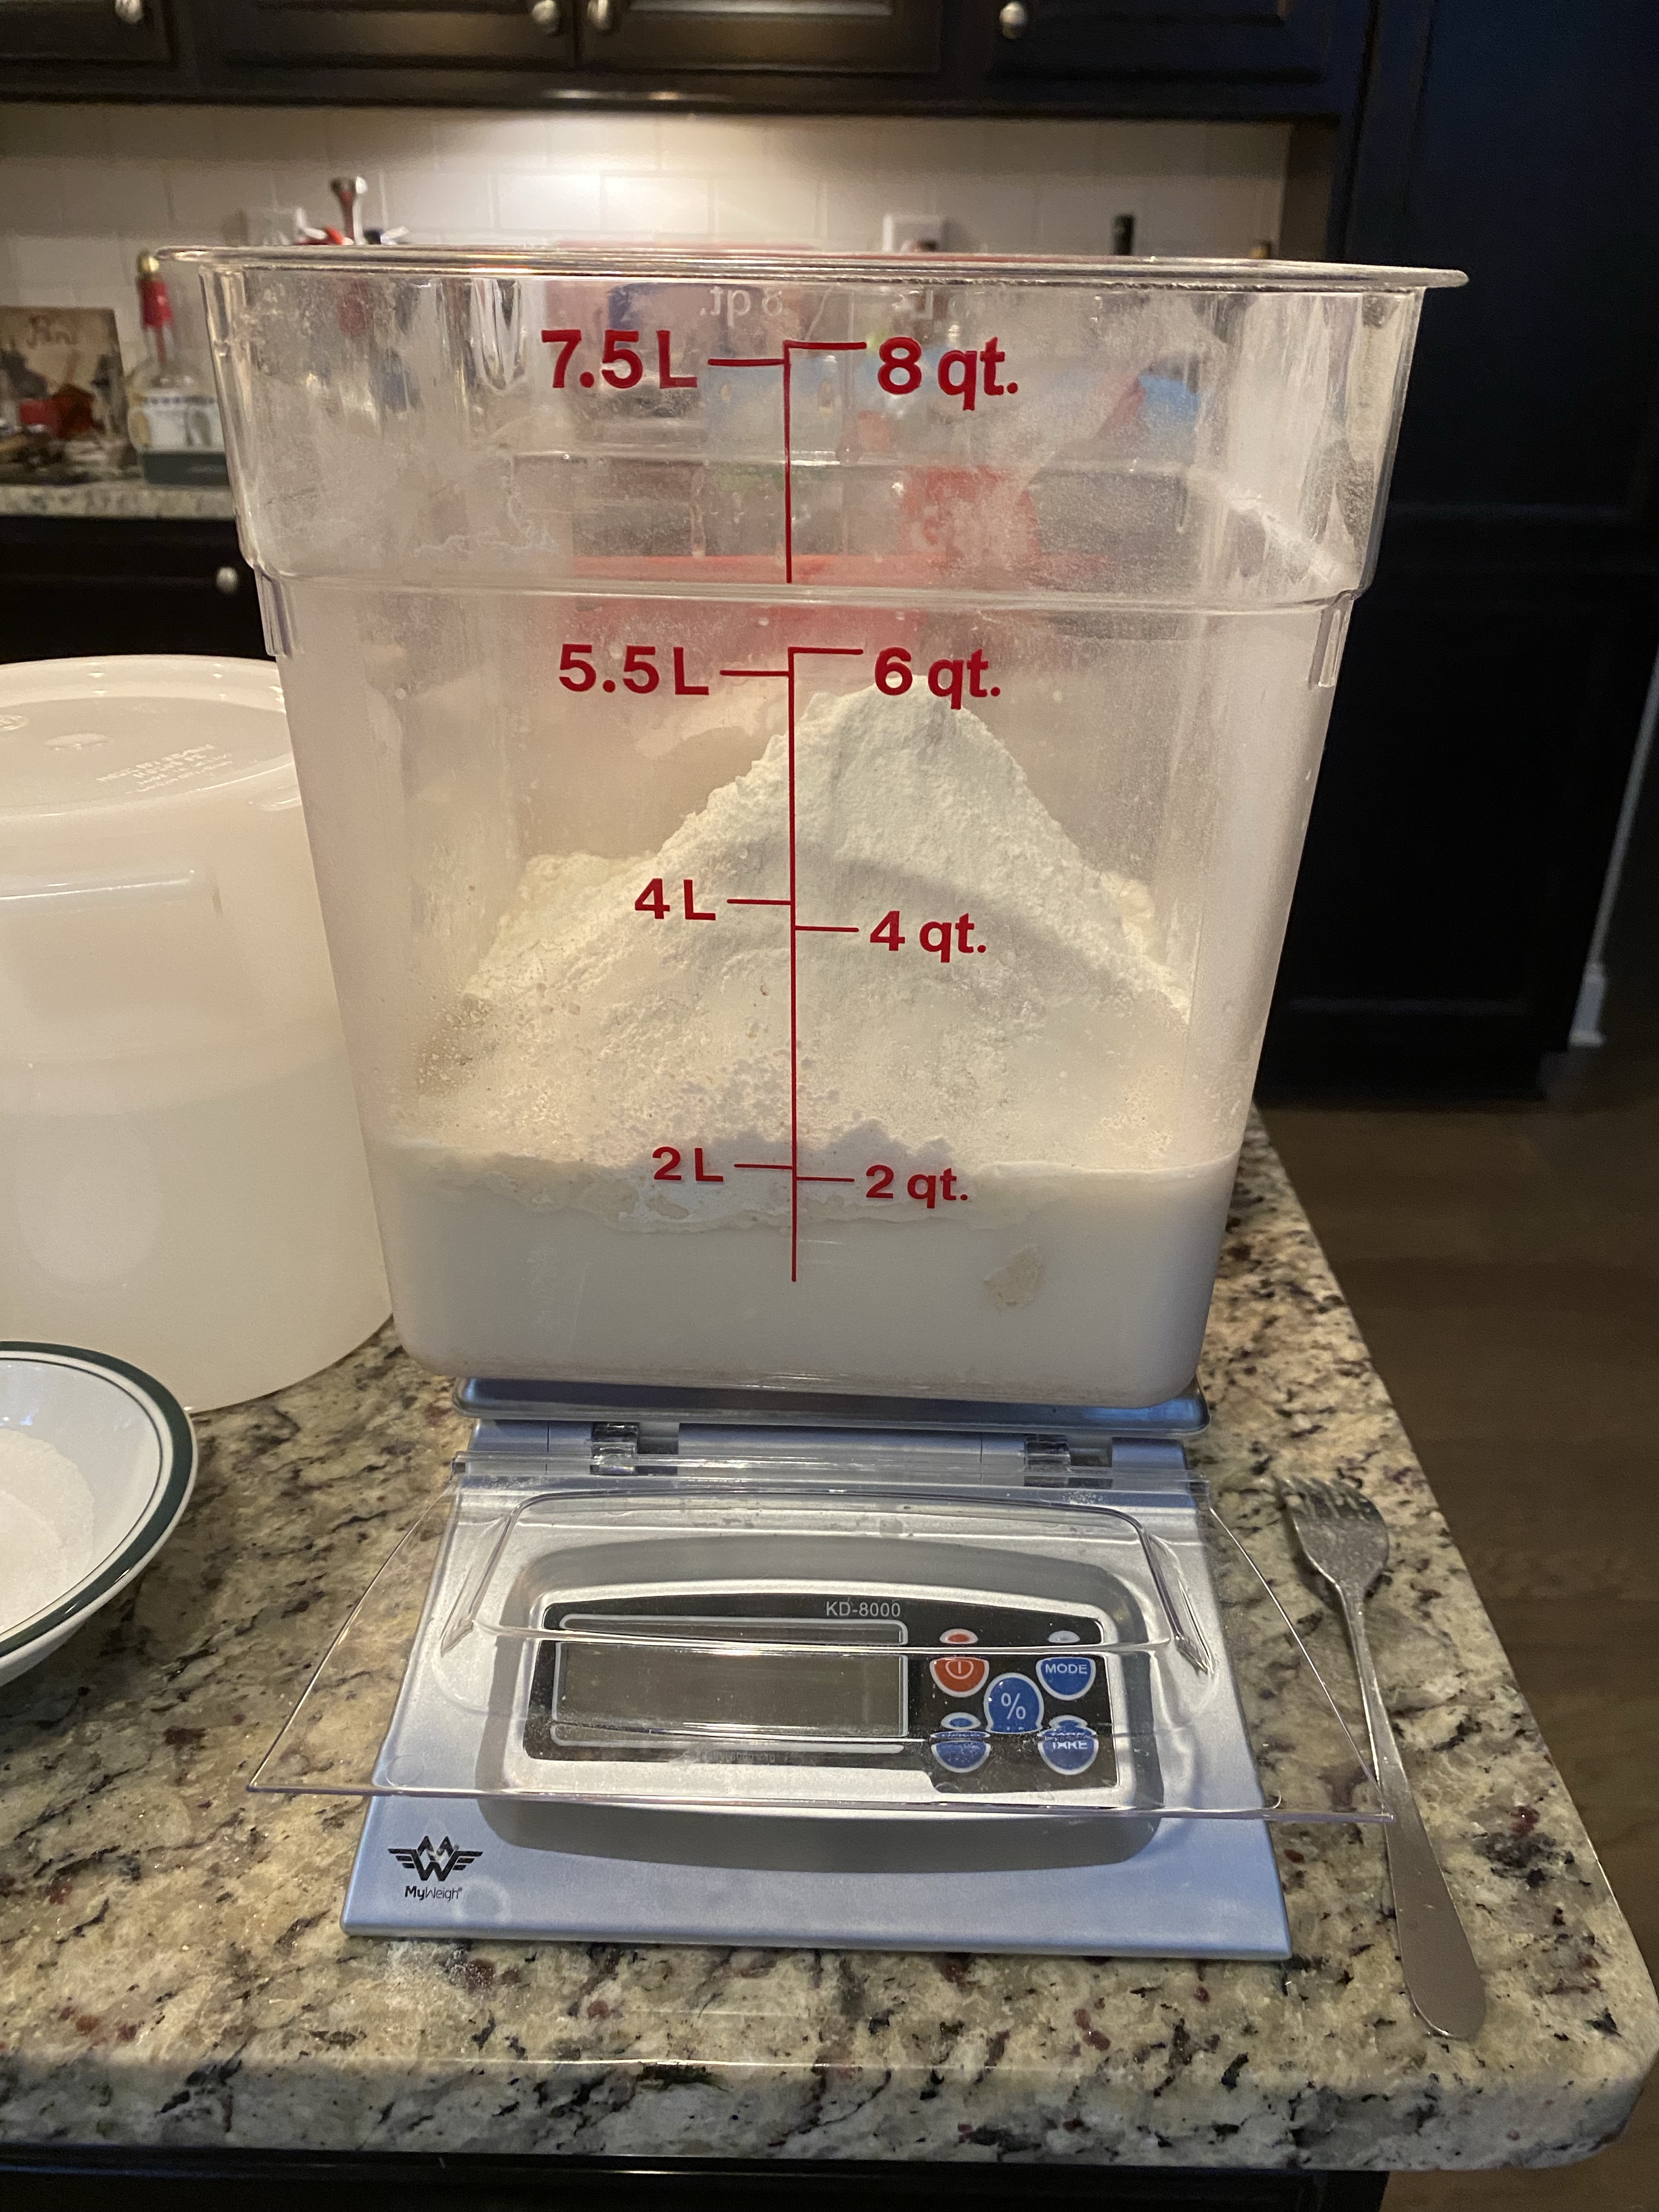
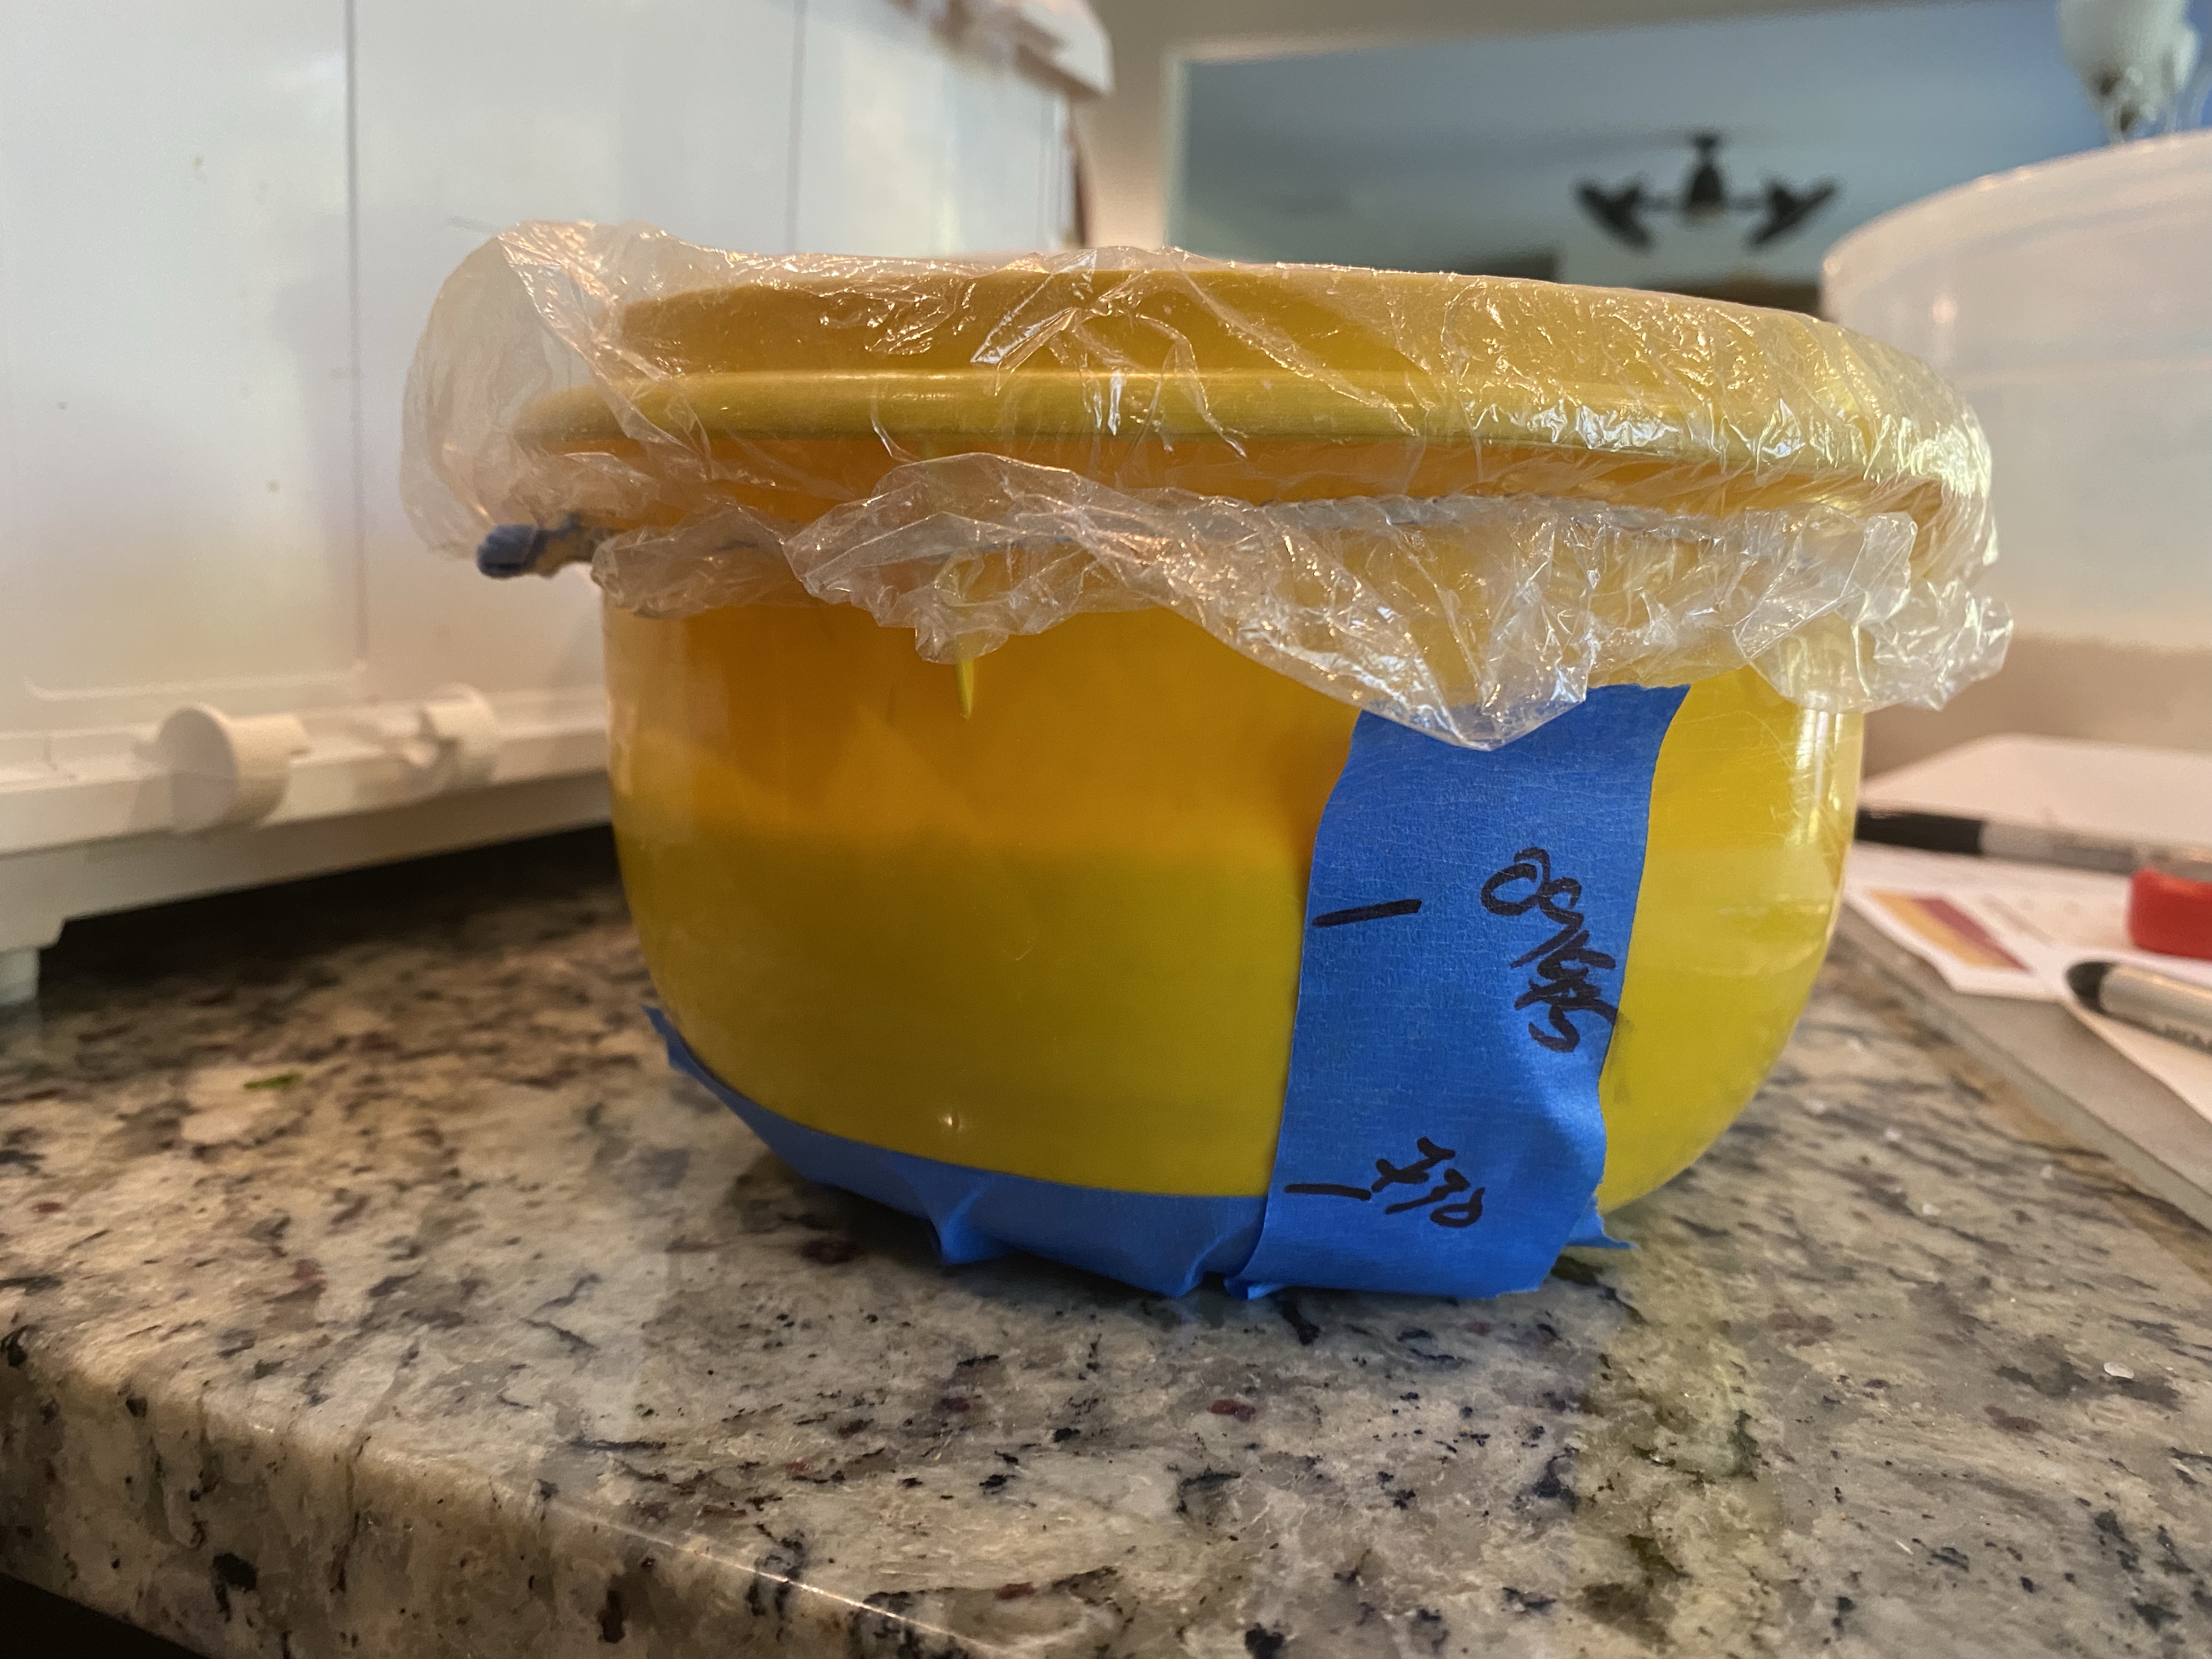
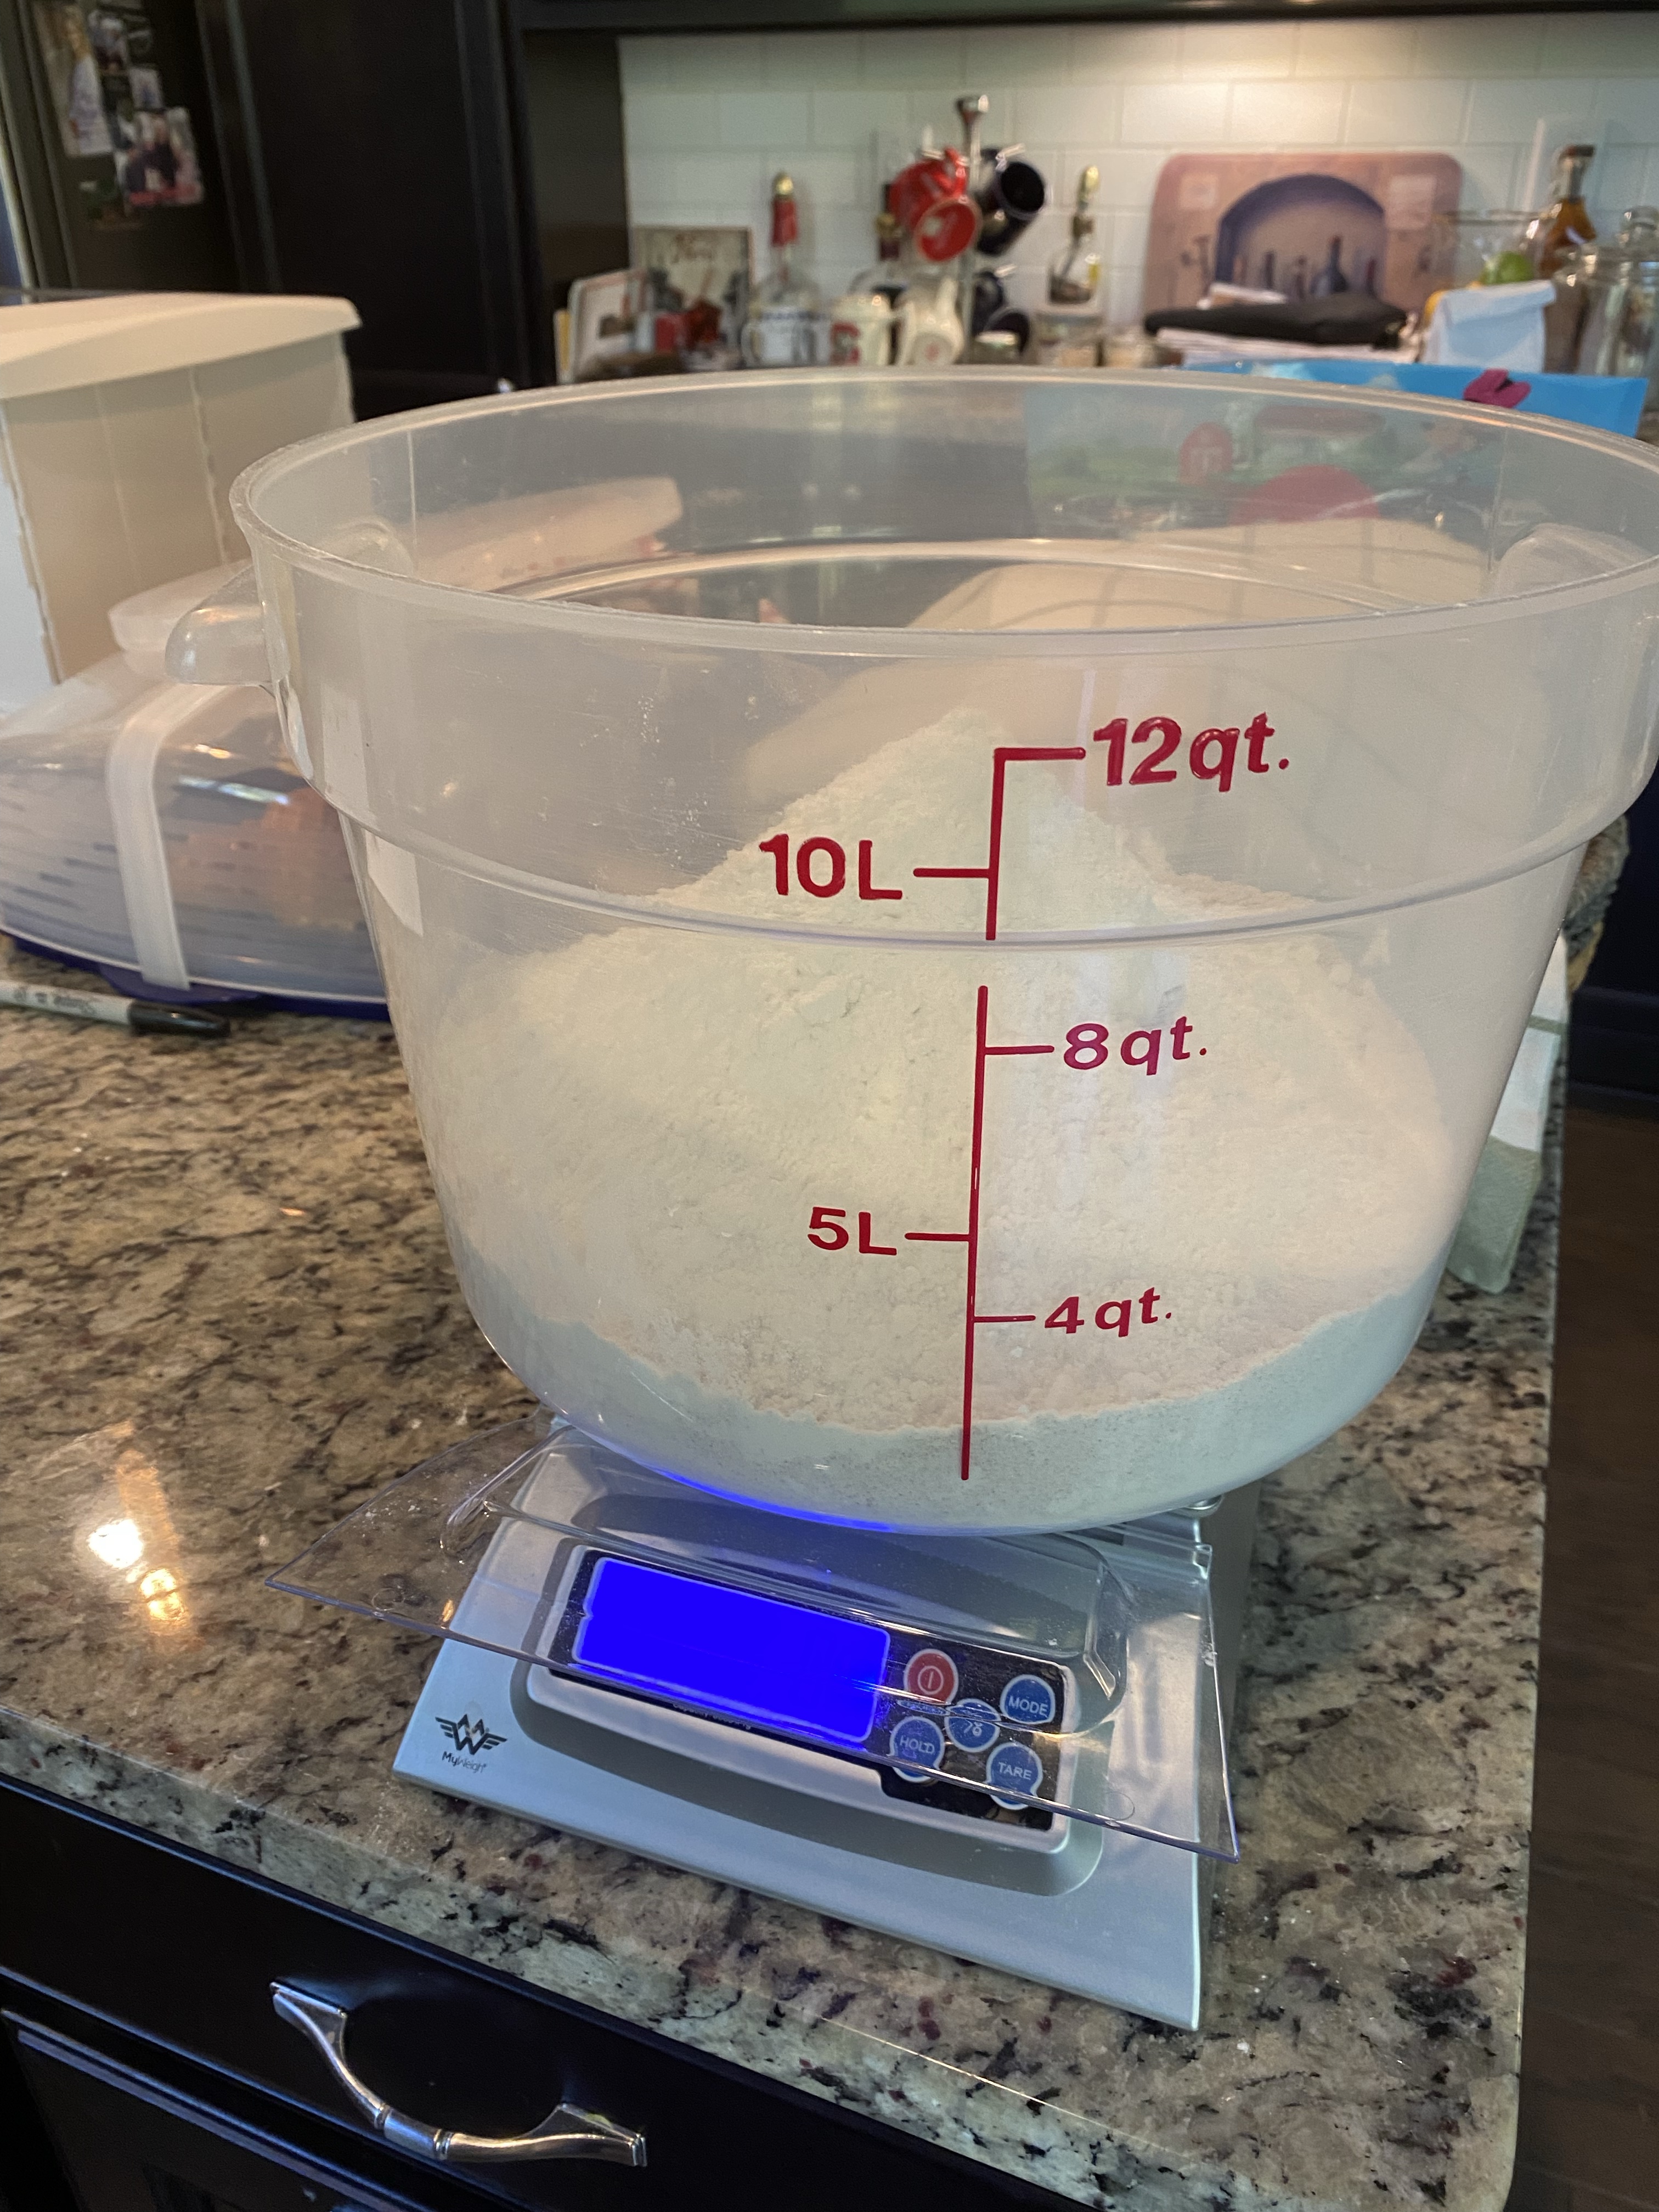
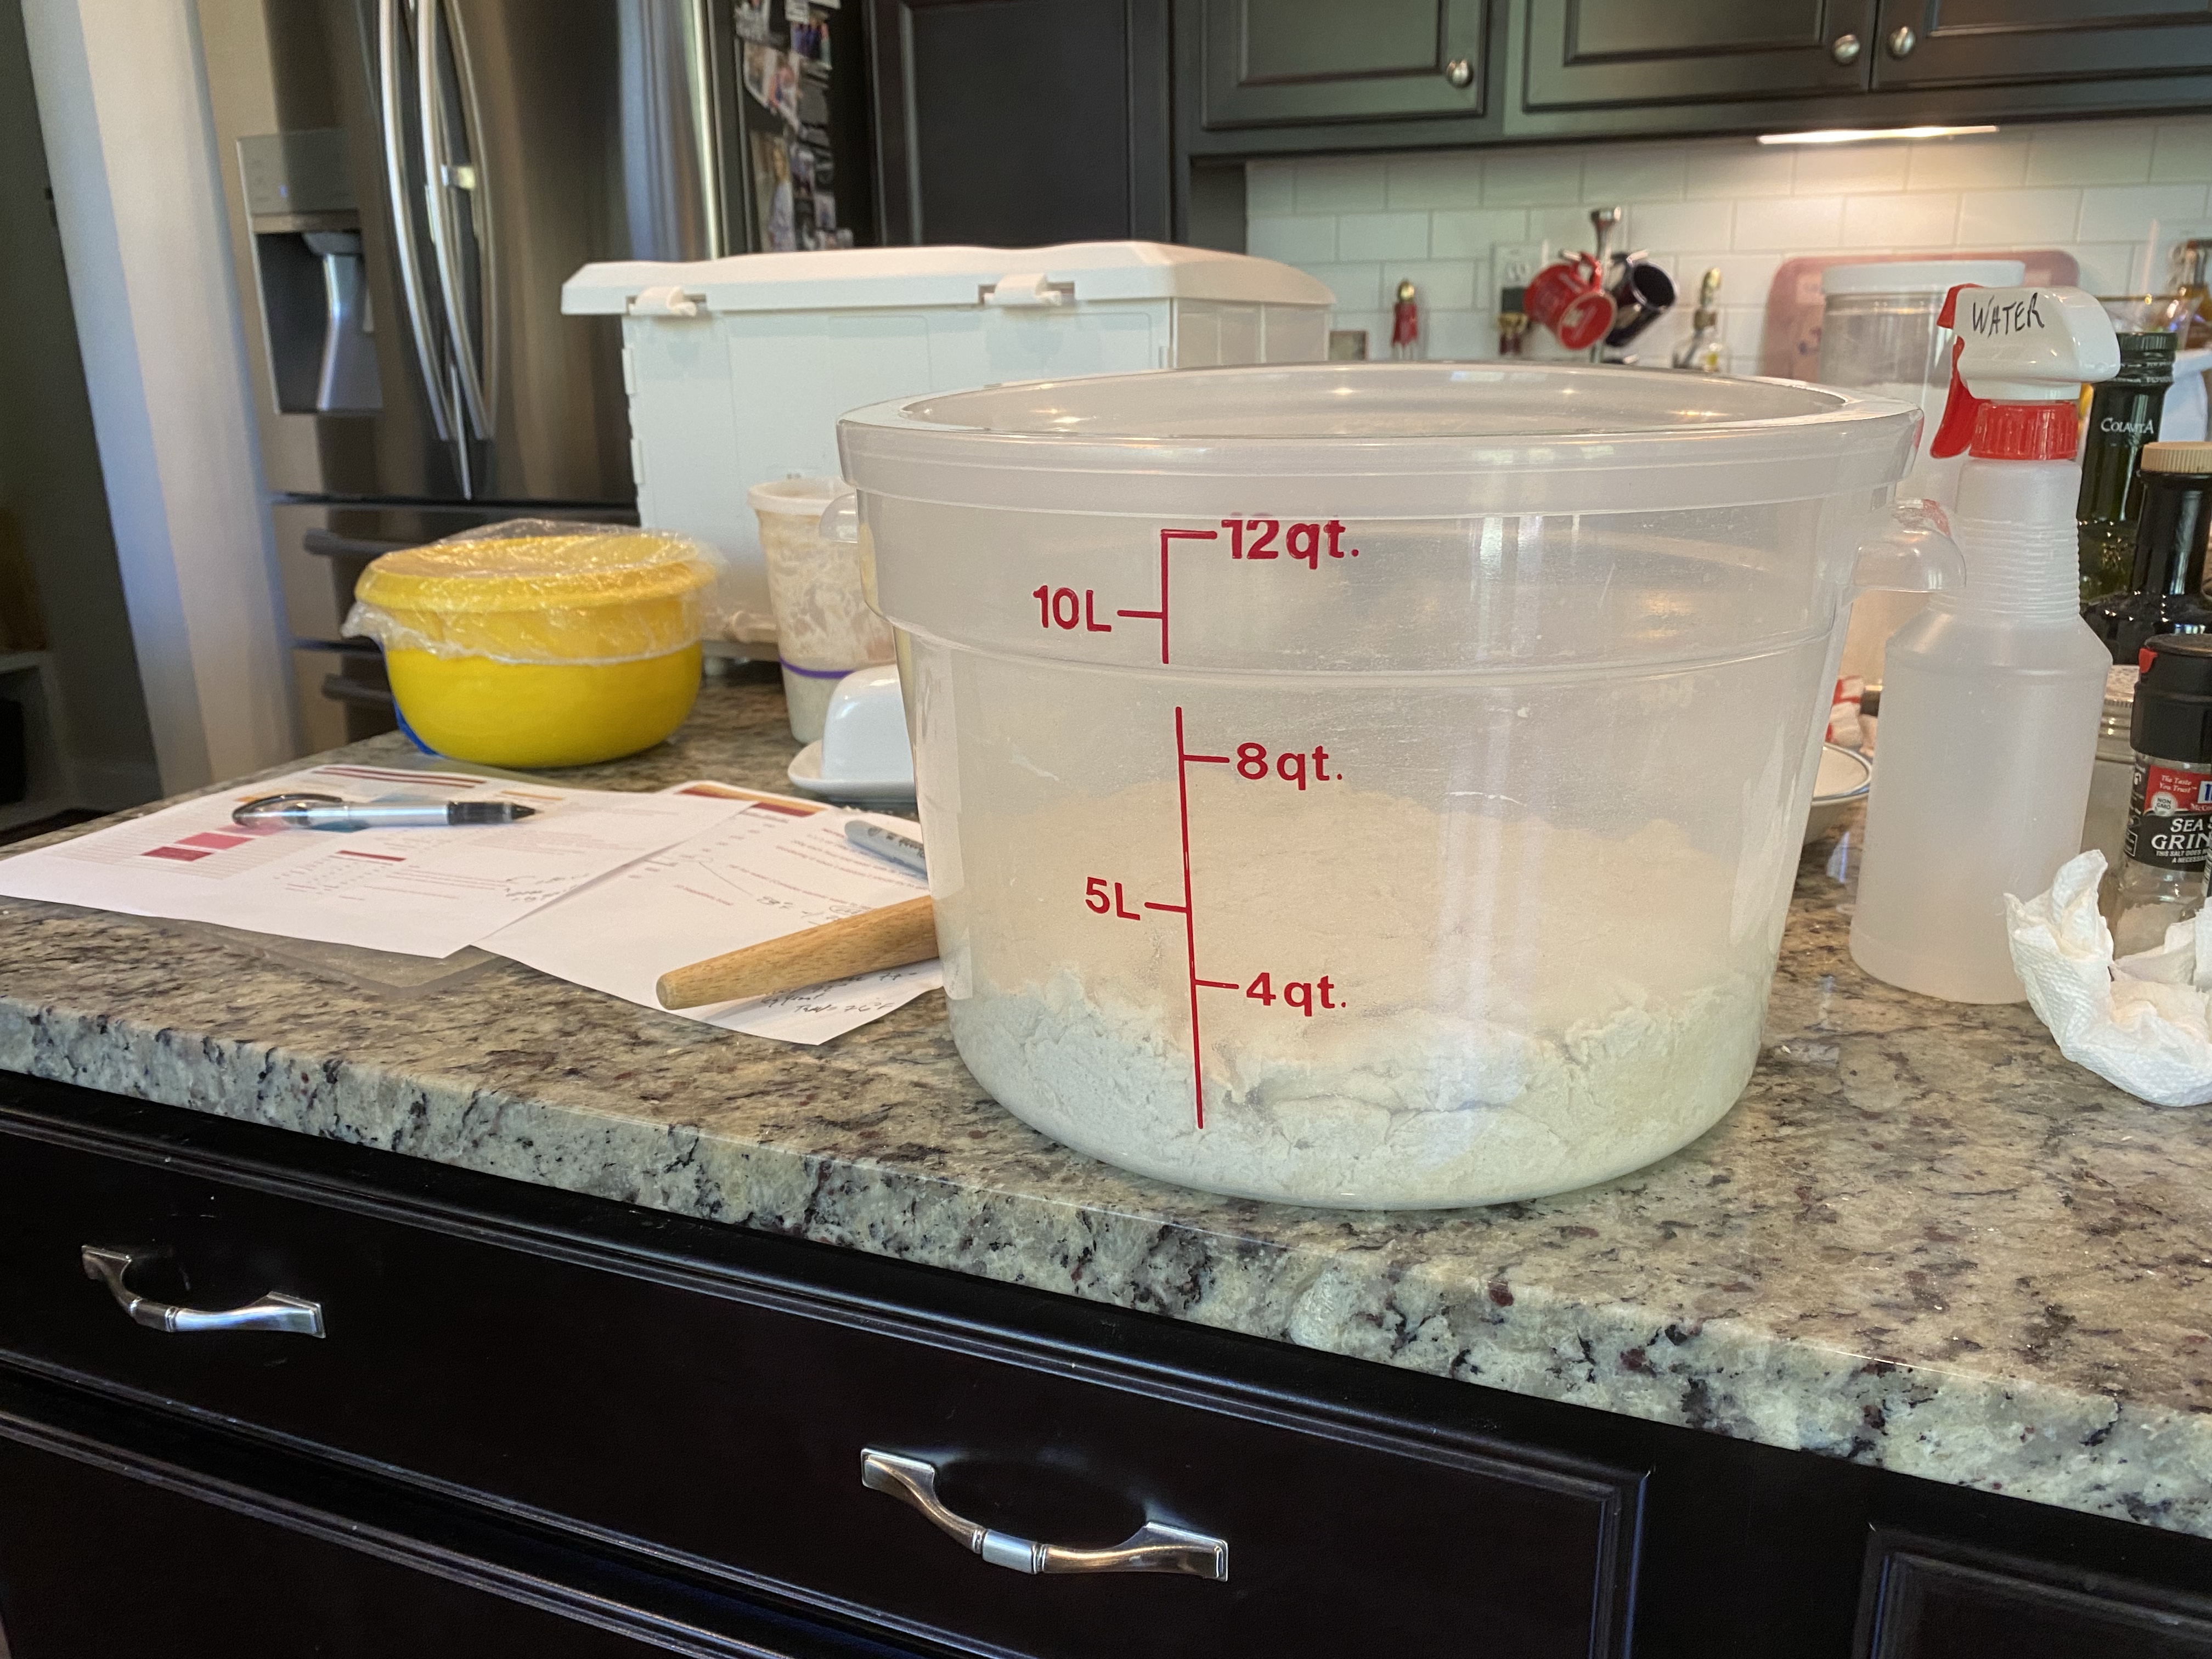
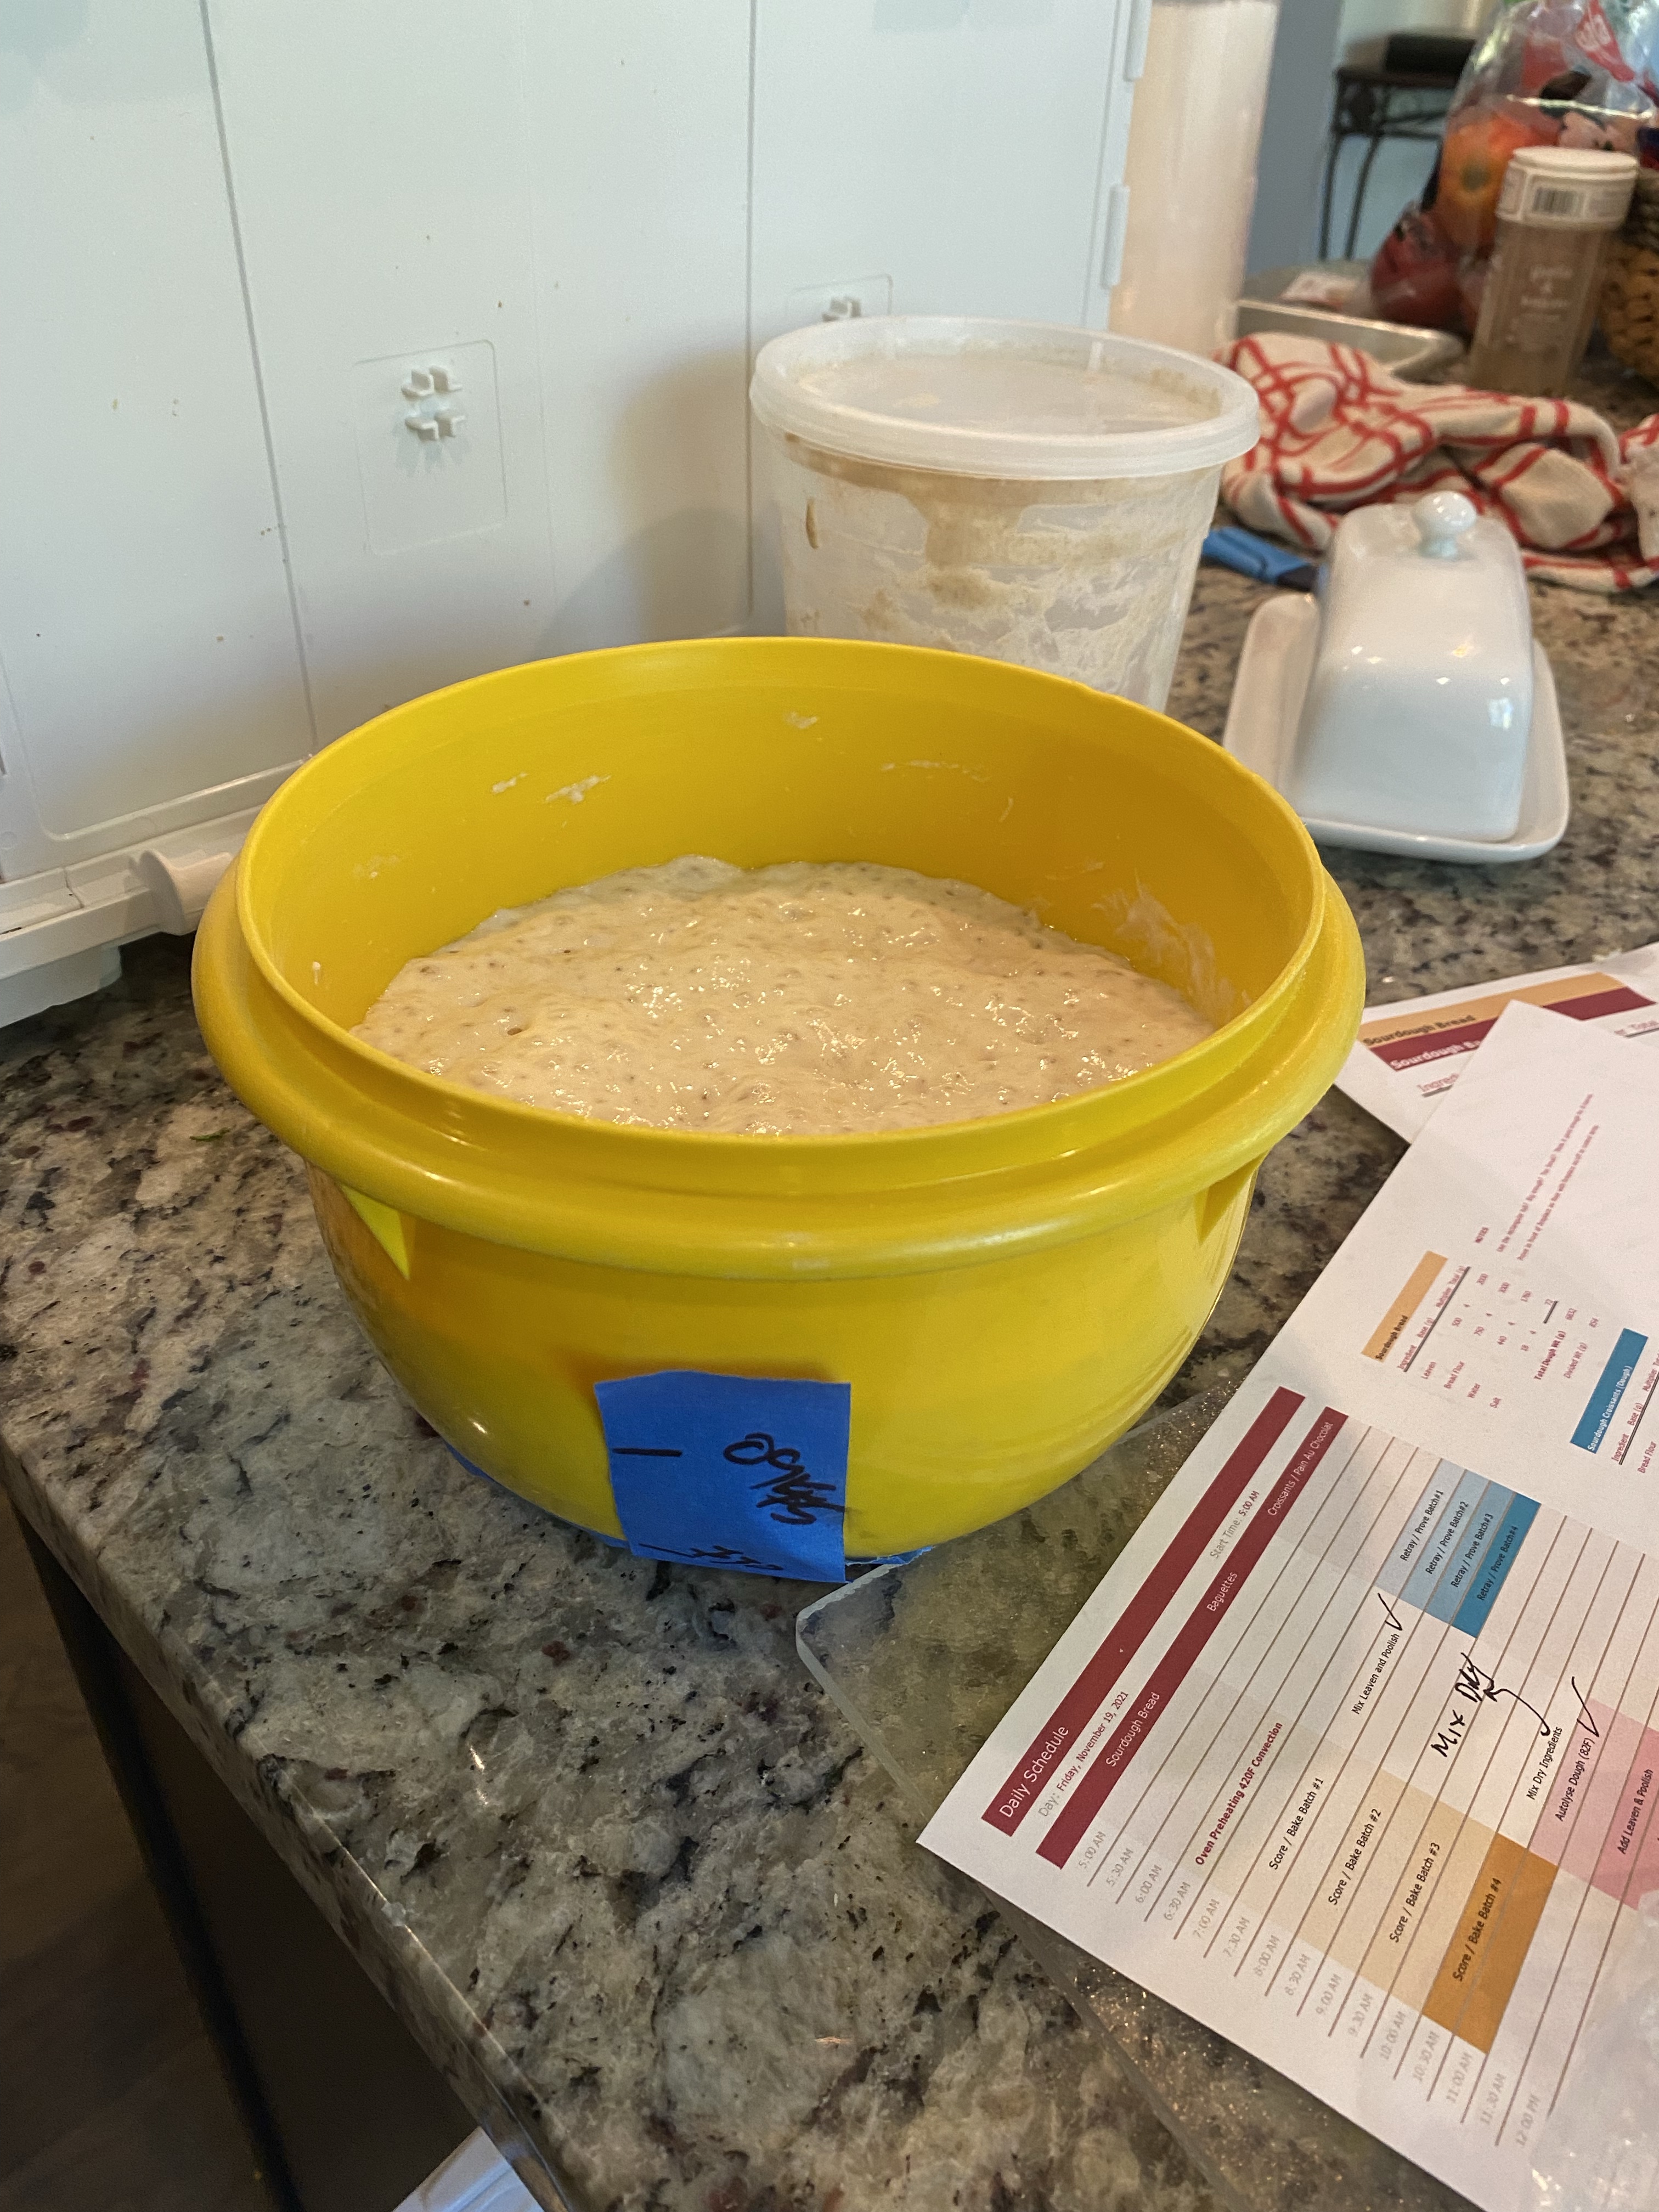
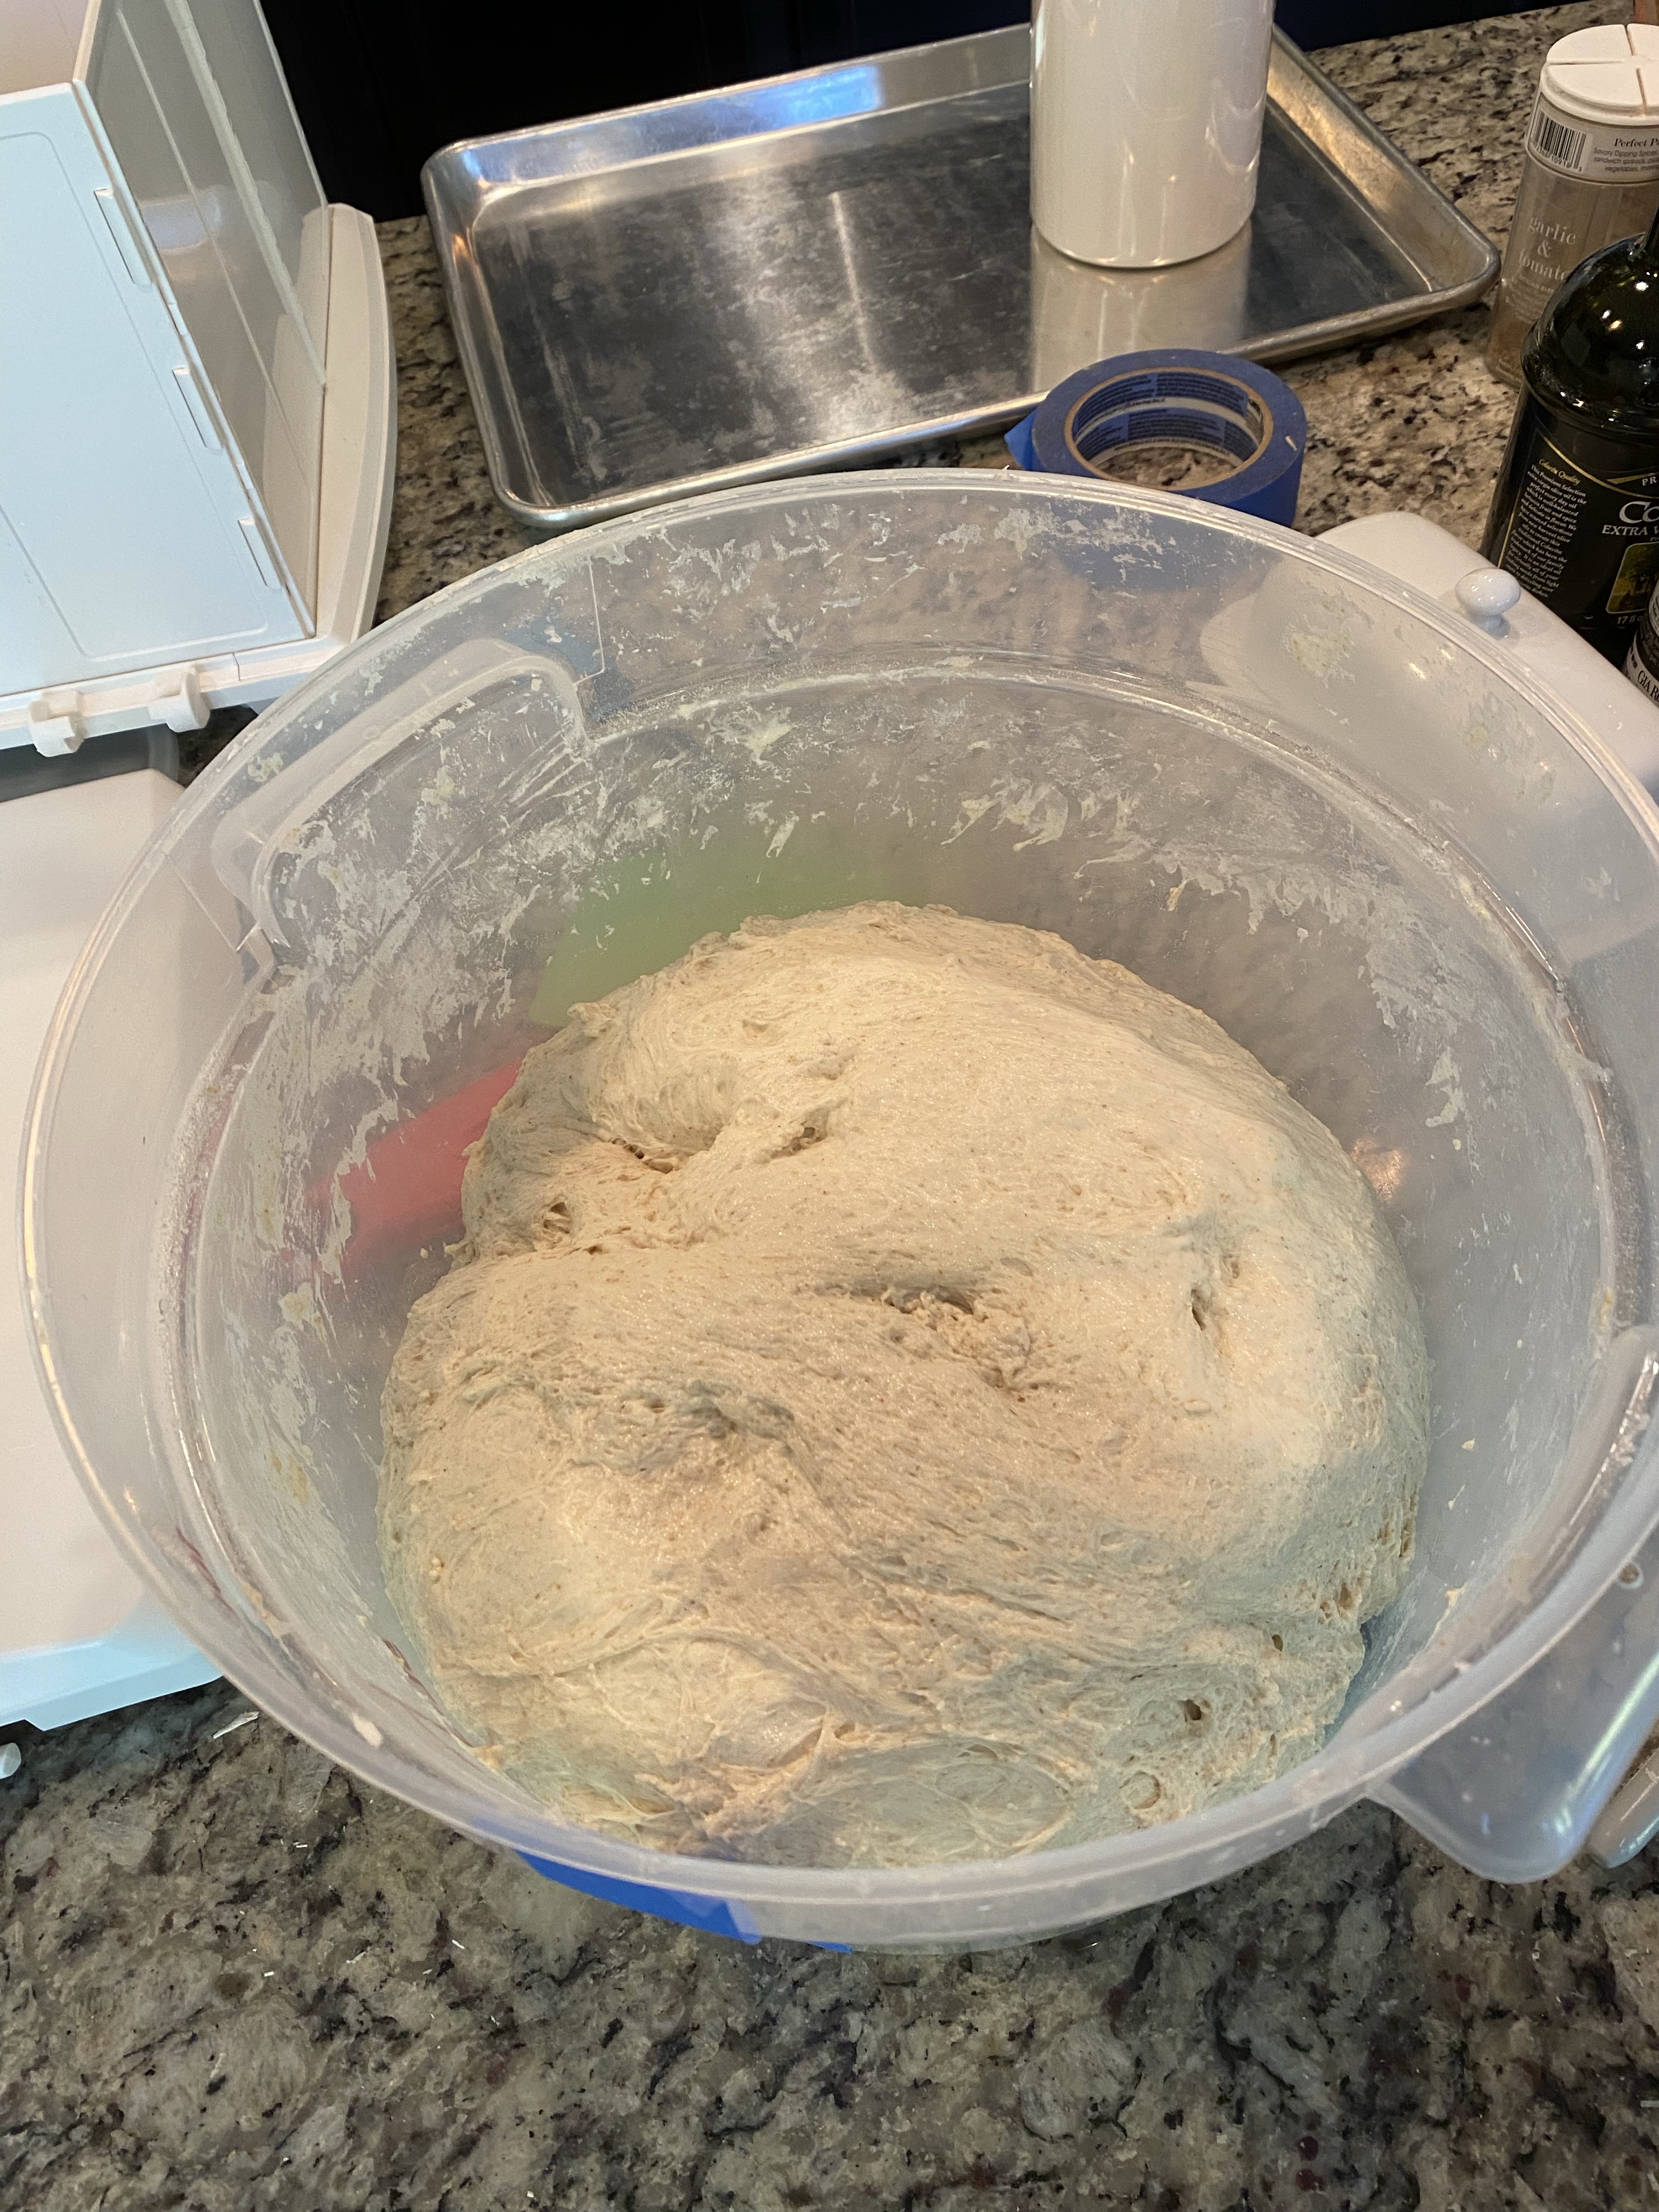
Mixed dough showing 3 qts
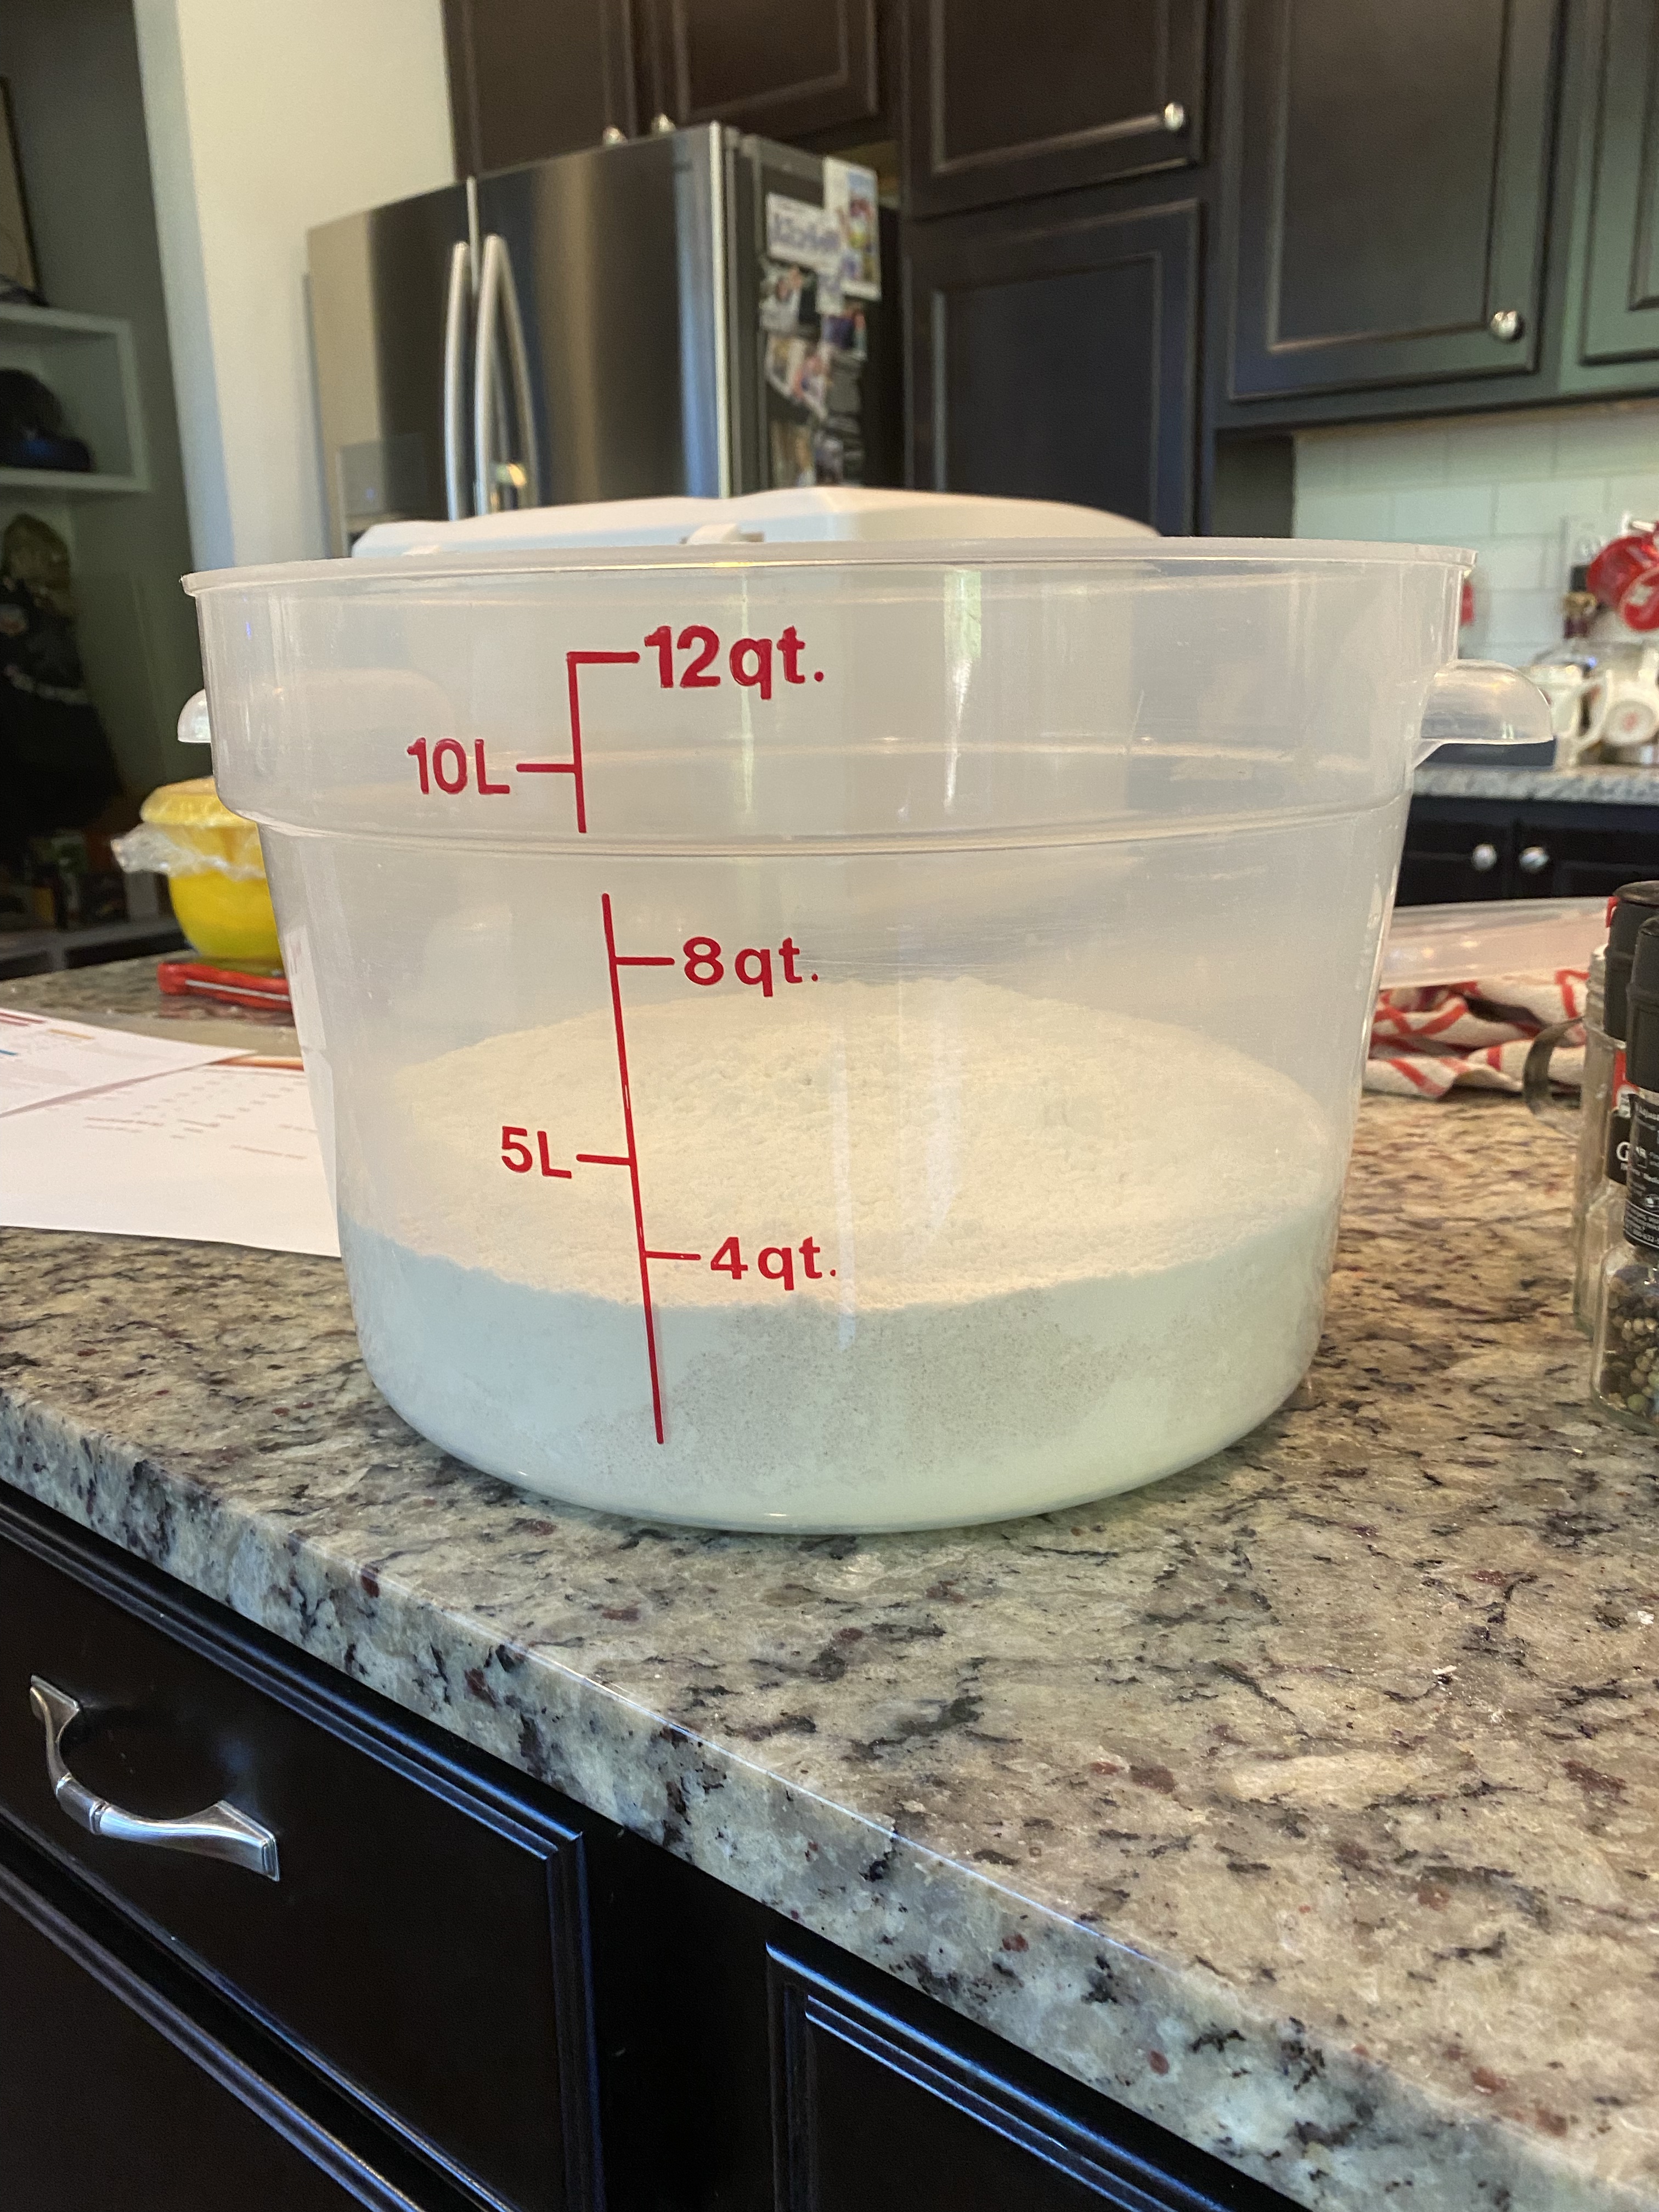
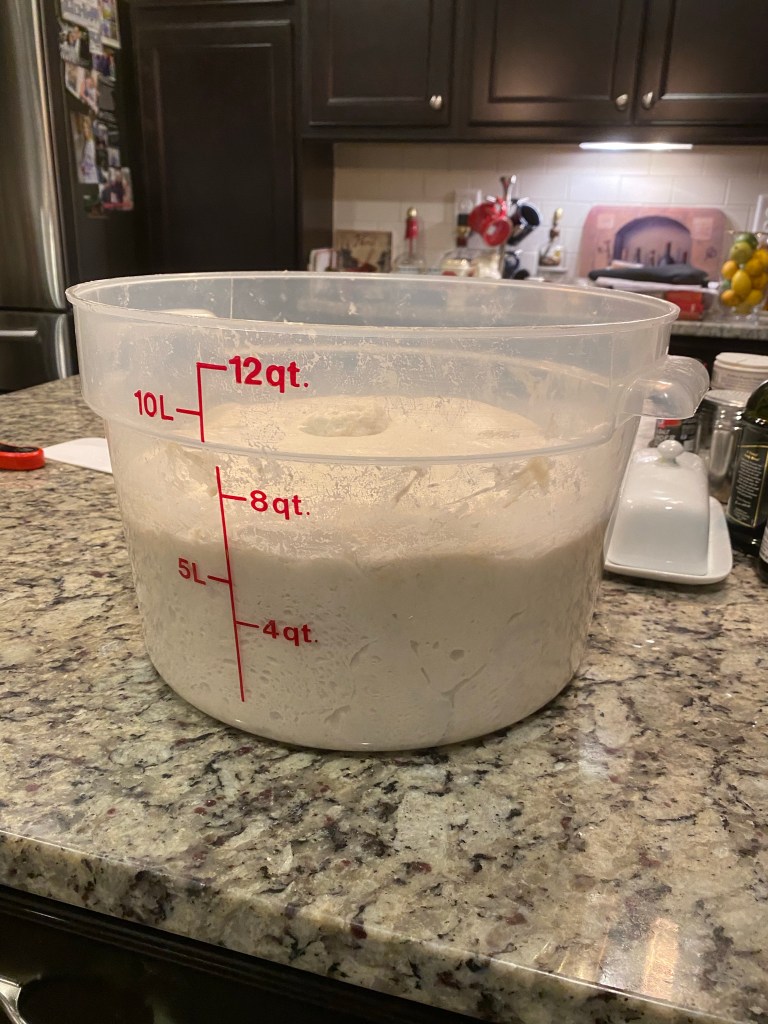
It took longer than I expected to have the dough bulk to double in volume … especially since I kept the temp at 82°F. It would have taken much longer at the ambient temp of my kitchen today.
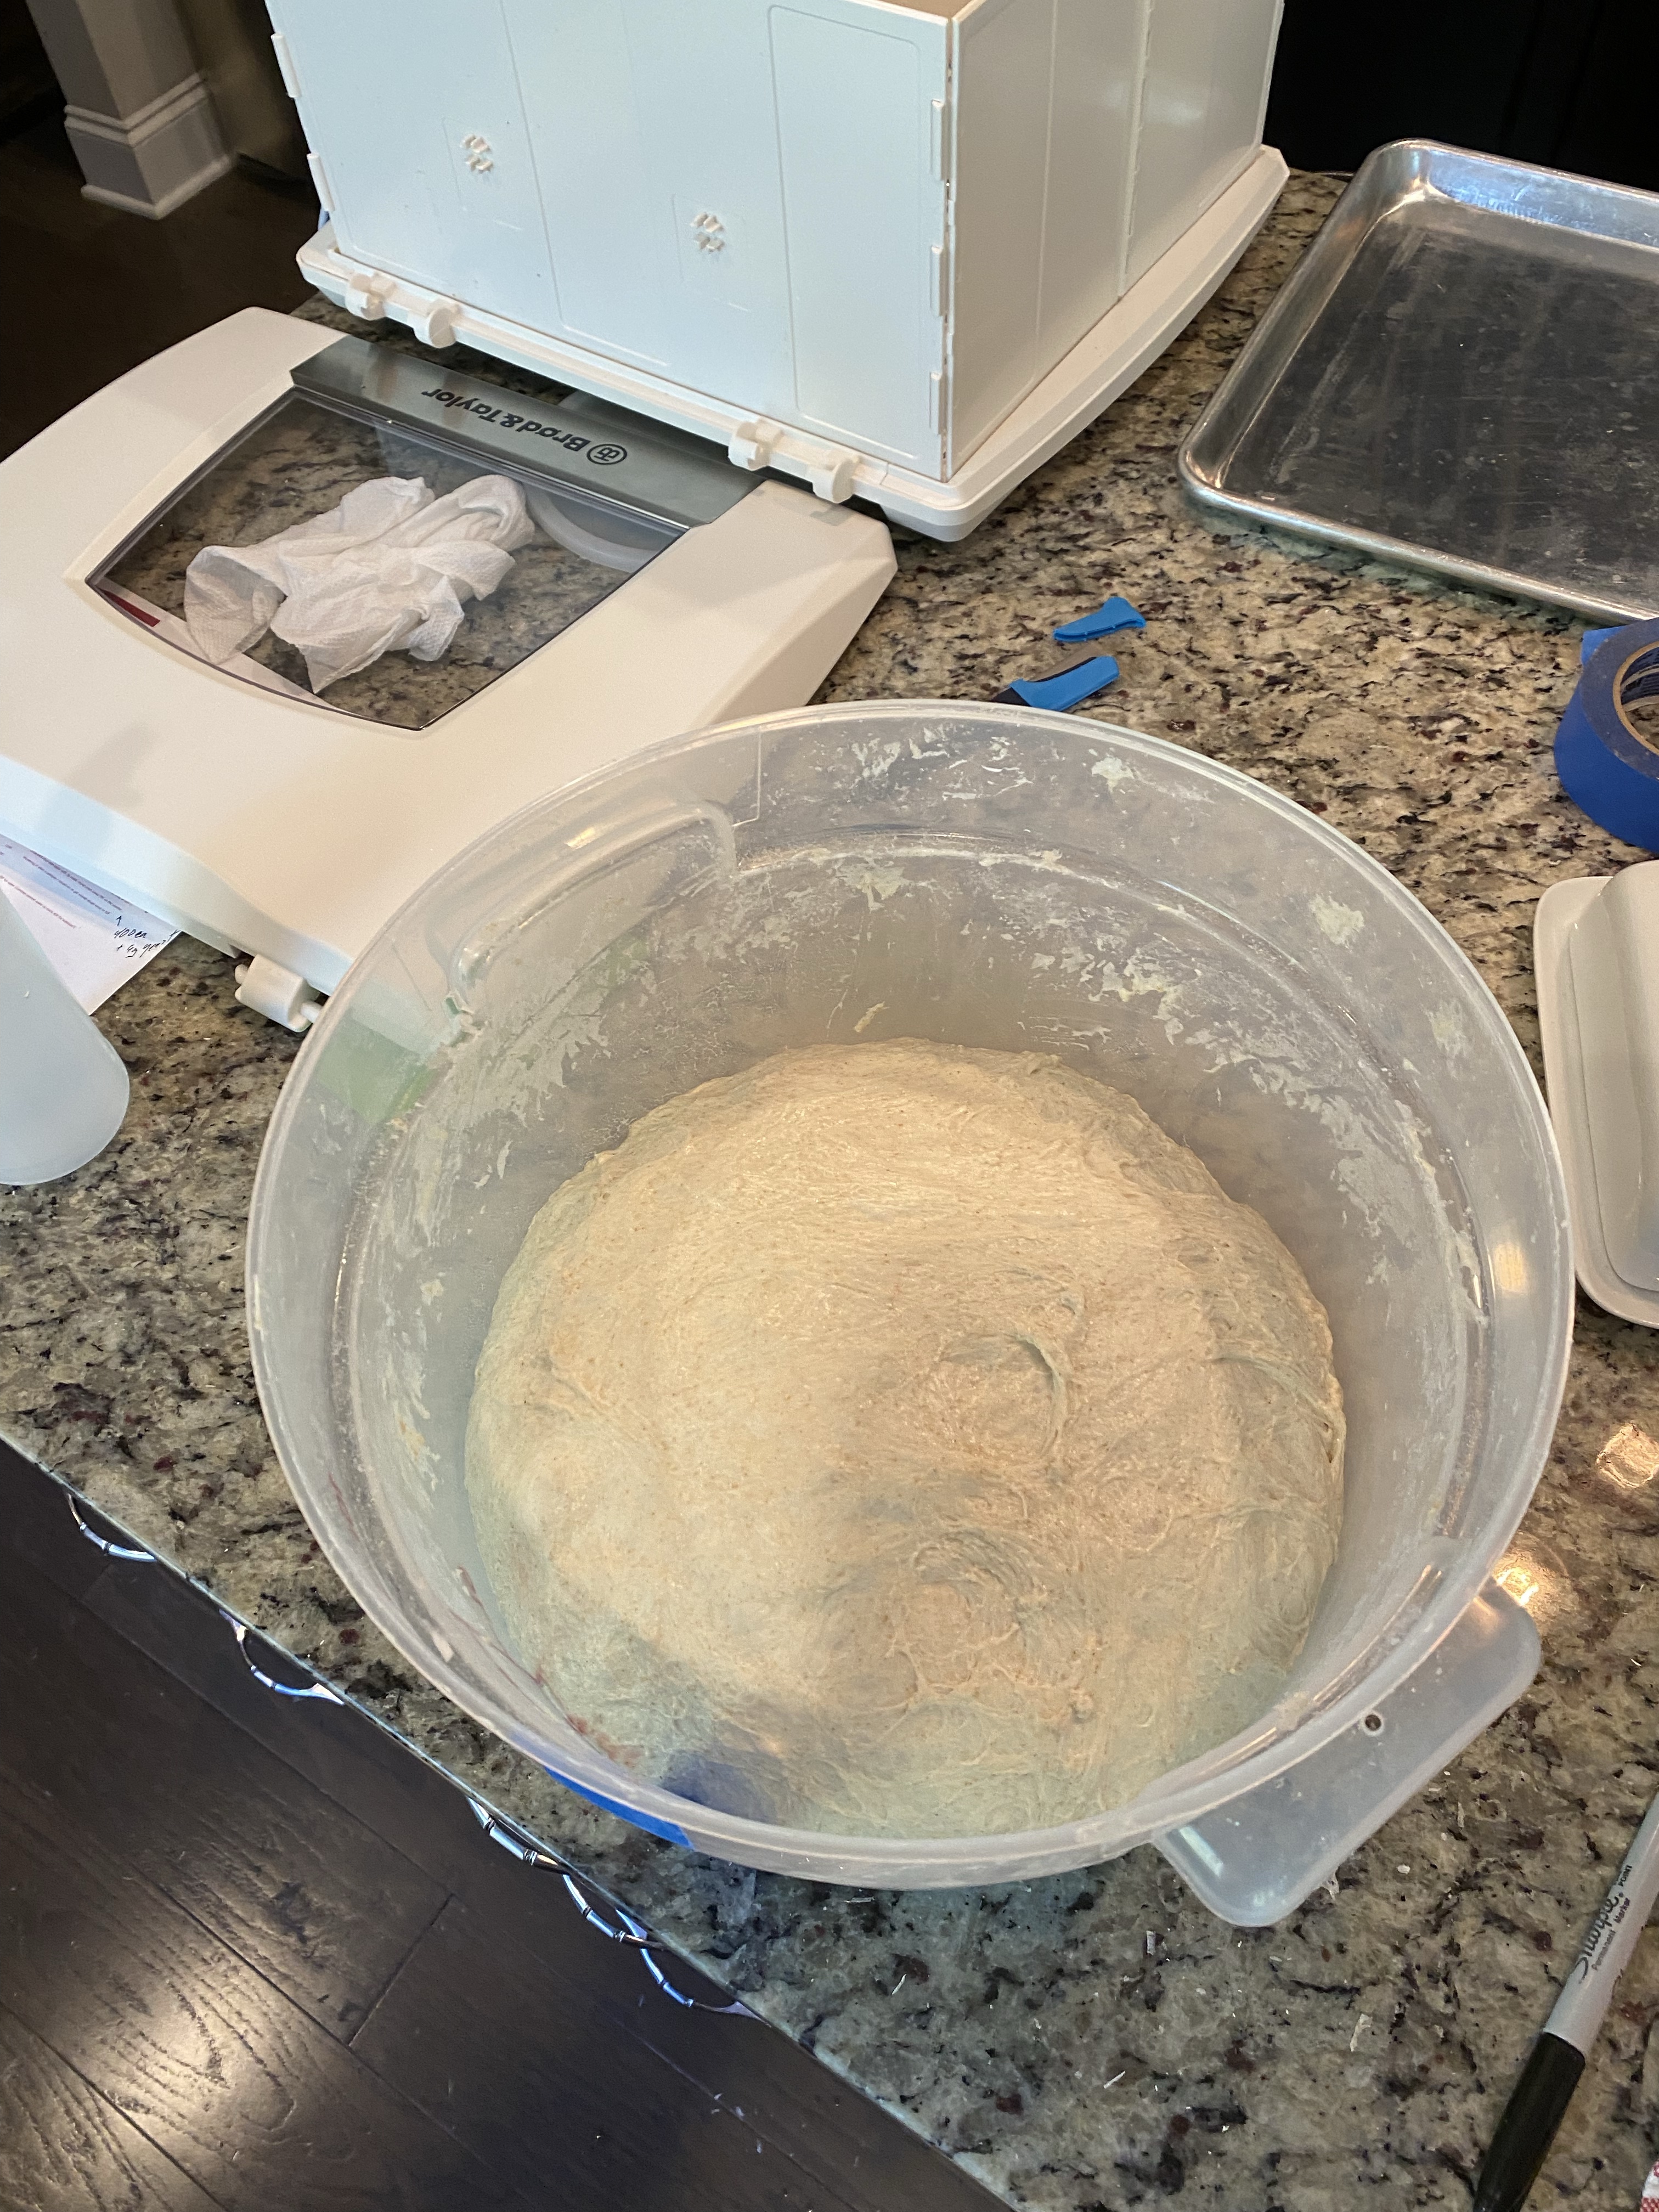
Doubled in volume showy 6 qts
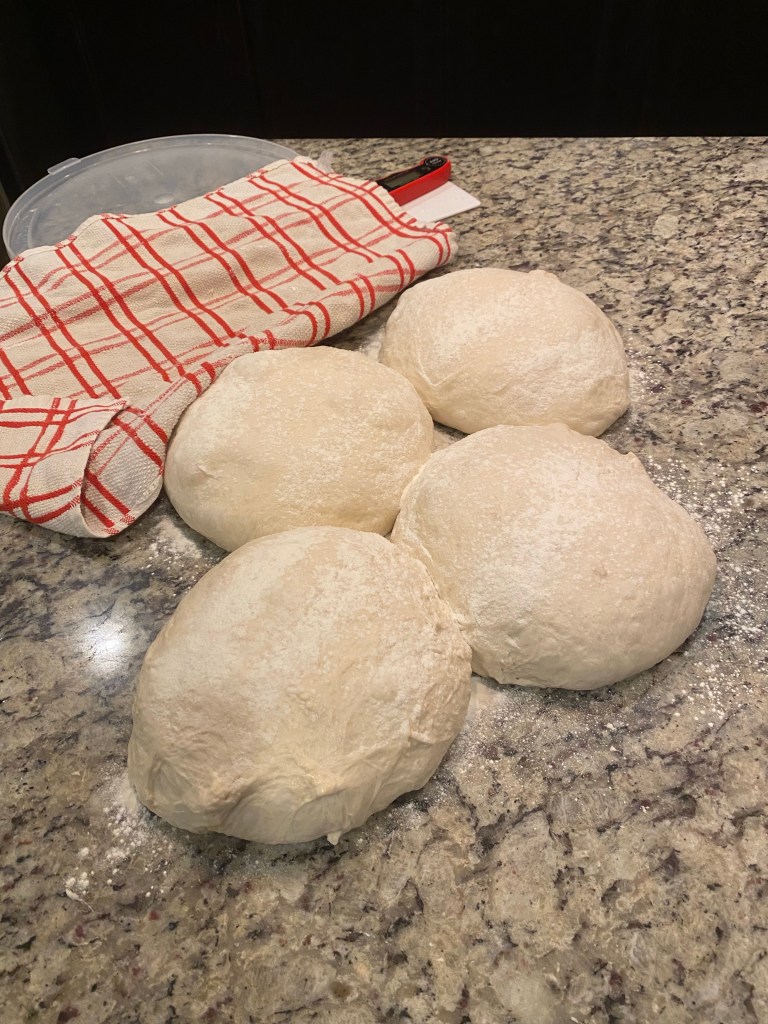
I divided out 4 x 840g pieces of dough and preshaped.
Preshaping into rounds
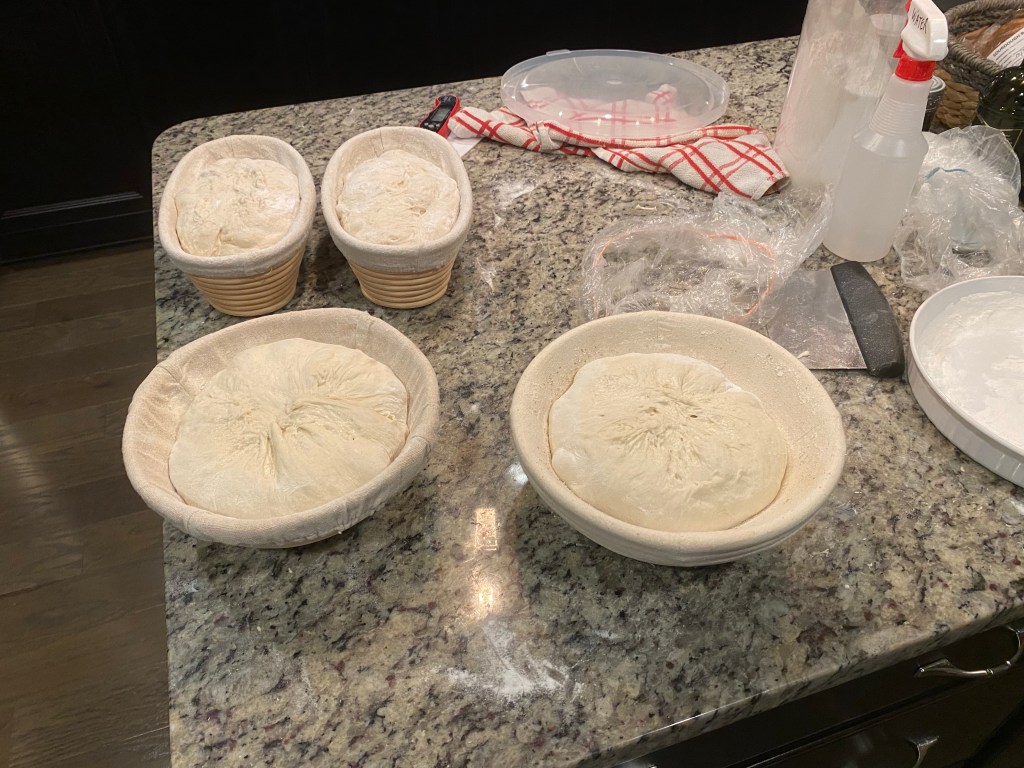
After 15 minutes I did my final shaping, coated in rice flour and put them into their bannetons.
Shaped and in their bannetons
The loaves are in the fridge to rest overnight. My Dutch Ovens are in my stove and set to preheat tomorrow morning.
I’m pretty jazzed by the result. Lots to improve on but a much better outcome than last time!
Baguettes Cooling
They remind me of little tuna fish actually. A little fat. Need to roll them a bit longer. I did as intending to put them on a scalloped holder and was shaping them a bit shorter.
I suspect my scoring or lack of good steam development was the cause of the crust locking. I noticed a bit of tearing along the bottom (note the loaf on the right where I had a bit of a blowout).
Bottom of the loaves showing the seam
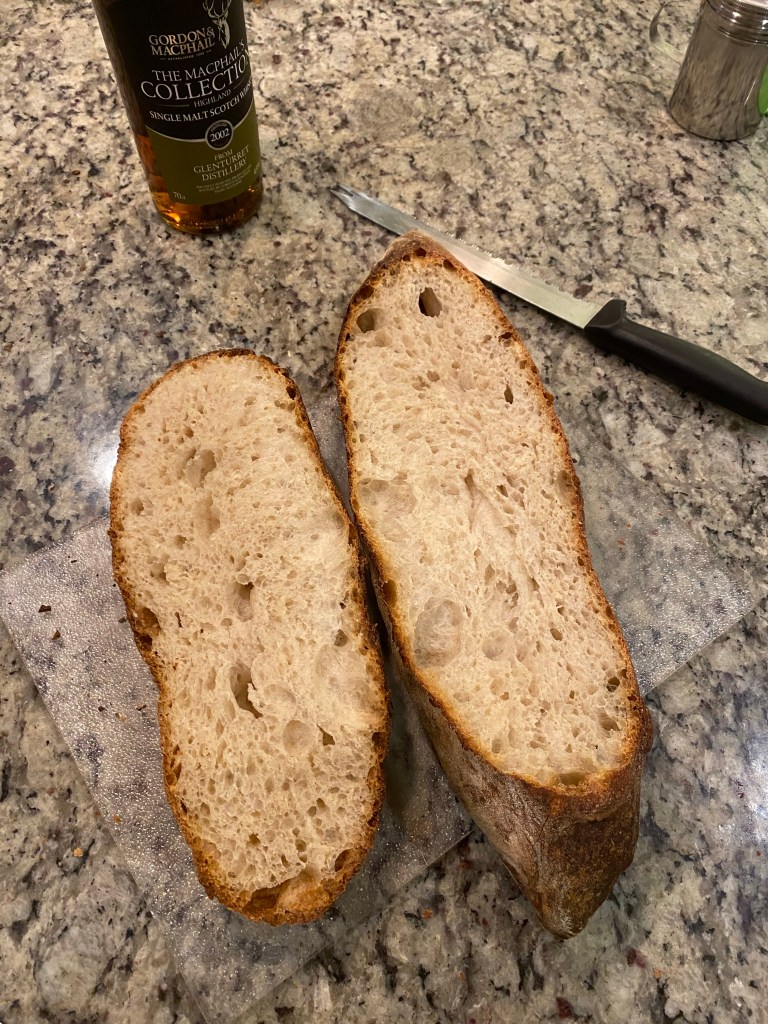
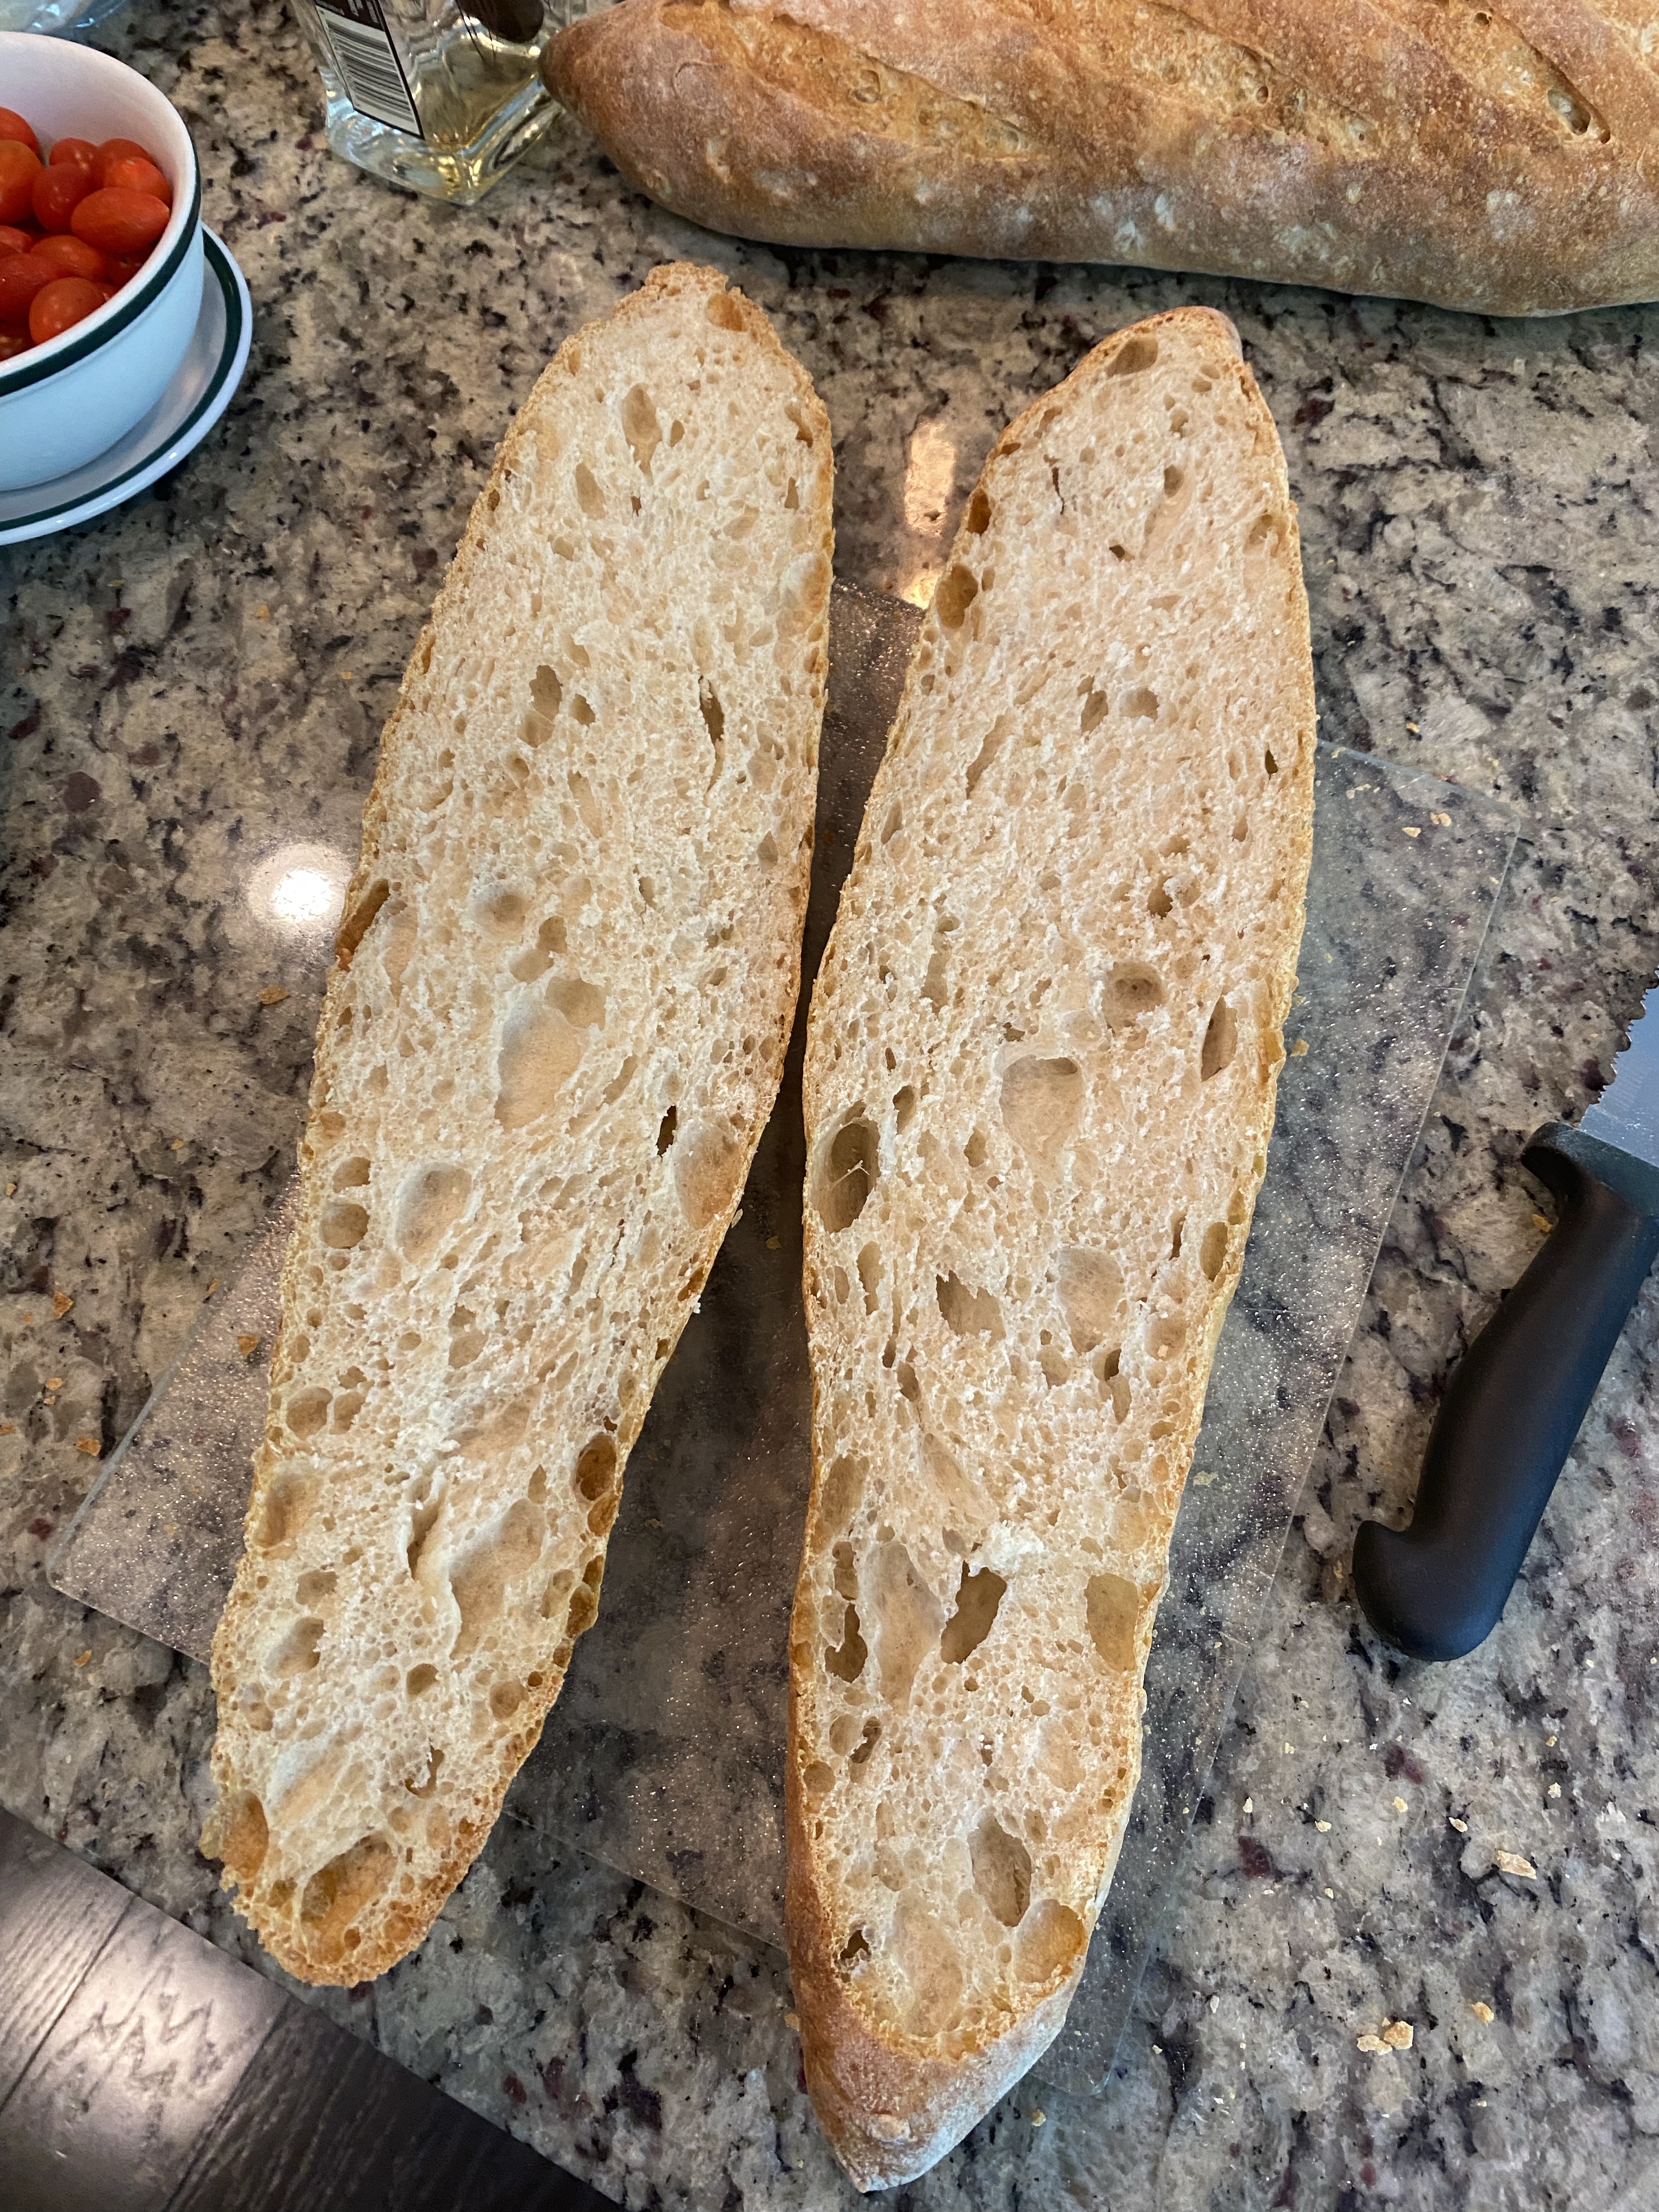
It was really great to hear the loaves “sing” as they cooled and crackled. I waited as long as I could then cut open one to see the crumb.
Crumb Shot
Crumb of #2
Crumb of my baguettes
The larger bubble develodment / more open crumb isn’t what I am looking for; however, it wasn’t bad. Taste is really nice.
As you can imagine I’m multitasking and probably not doing a good job of anything.
Again, this will show me shaping baguettes. I’m new to this. My technique is horrible. I’m trying to record as a way for me to remember what I did.
The dough feels much better than previously. It does have some lumps in it that I suspect is dough that wasn’t fully hydrated. That will be interesting to see after they’re baked.
I do have rice flour top and on the Couche. Last time I didn’t and the loaves stuck to the cloth. Hopefully this won’t happen again.
Here’s the video (raw) of me shaping my baguettes after separating, measuring, preshaping and then bench-resting for 20 minutes.
Shaping Baguettes
NOTE This video only shows me shaping the first baguette.
I shaped the loaves and got them covered in the Couche. The method says to let prove for 2-3.5 hours. Not sure I’ll let them go that long. I’ll poke them and bake maybe 90 or so minutes from now.
I’ll certainly be trying to NOT put out my oven with my steam!
UPDATE
Here is a gallery of photos of the loaves in the Couche and about to be baked.
This is a short post showing me doing a coil fold. I’ve referenced them before but never attempted posting a video.
NOTE: This is ME doing it and I’m not an expert in any way! There are plenty of videos on YouTube made by bakers far more experienced than I.
Coil Folding
Before this I’d snipped off a portion of my dough to put in my Aliquot jar. You can see it to the right side of the video frame with a little black line to indicate where I want it to rise during bulk ferment.
I won’t bore you with any more videos of my coil folding….