Here is the basic recipe and method that I’ve developed to this point. It started out as a derivative of Paul Hollywood’s recipe for Basic Sourdough in his book How To Bake.
INGREDIENTS
- Bread Flour 750g (I use #KingArthurBreadCompany, Sir Lancelot 14.2% Protein)
- Water, Filtered 440ml
- Levain, 500g, 100% Hydration
- Sea Salt, 18g
The above makes two ~840g loaves prior to baking. The pre-baked Baker’s Percentage (Bakers%) of Flour, Water, Salt (including the Levain) is 100/69 /1.8
METHOD
This method will describe the process that I’d follow weekly when I was traveling extensively prior to COVID-19. I would typically arrive home about 9:30pm every Thursday and I would start the process then to be baking sourdough loaves on Sunday.
Day 1 (Evening) – Refresh Starter
I do this typically around 9:45pm to 10:00pm. See my post Feeding Cold Starter for a description of what I do to refresh my starter.
Day 2 (Morning) – Prepare the Levain
The next morning prepare the levain by taking 100g of the newly-refreshed sourdough starter and add to it 200ml/g water and 200g of bread flour (Need 500g levain for this recipe). This preparation is a 1:2:2 ratio of levain/water/flour. Cover and leave to ferment at room temperature (74oF) for 4 – 5 hours.
Day 2 (Mid-Day) – Begin Mixing / Kneading the Dough
Initial Mixing and Autolyse: Sometime mid-day begin mixing the dough. Try to begin mixing the dough an hour before you intend to add the levain. First, weigh out 750g of bread flour, 440ml filtered water and 18g of sea salt. Add a splash of the water to the salt (1-2T). Note: I use a #KitchenAid mixer with a spiral bread hook to mix/knead my dough. Slowly add the water to the flour with the mixer on slow speed (first or second notch). Adding the water slowly allows it to incorporate. After all the water is added bump up the speed another notch or two and continue to mix until a ball is formed and the dough has pulled away from the side of the mixing bowl. Normally this is about 5-6 minutes total time mixing/kneading. Pull out the dough hook. Form the dough into a nice ball at the bottom of the bowl. Cover the bowl and let autolyse for an hour.
Adding the Levain: After an hour add the fermented levain to the autolysed flour. By this time the levain is very active, pillowy and smells awesome! If you watch it you can see the CO2 bubbles popping on the surface. Using a spatula or scraper add the levain to the bowl. It will be very sticky and hard to get out fully. Try wetting your spatula to help you scrape out the levain without it sticking too much. Mix/knead the levain into the dough for another 4-6 minutes. The dough will have a nice consistency and you’ll begin to recognize when it has been mixed enough. Remove the dough hook (use a scraper or spatula to get as much of the sticky dough off as possible). Cover and let rest for another 30 minutes.
Adding the Salt: After 30 minutes add the salt and remaining 1-2T of water to the dough. I typically will swirl the salt in the water and just dump it onto the dough in the bowl. With water-moistened hands hand-knead the salt into the dough opening and closing your fingers with a twisting motion of your hand. It’s similar to grabbing the top of a jar and closing the lid motion. This pulls the dough away from the side of the mixing bowl. Reattach the dough hook and mix again for another 3-4 minutes.
Begin Bulk Proving: Immediately after this transfer the dough to a lightly-oiled tub using a plastic bread scraper. Cover the bowl with a clean, moist dish towel (prevents a skin from forming on the dough) and transfer it to the fridge to sit for 24+ hours.
Day 3 (Typically after dinner) – Weigh/Divide, Pre-Shape, Bench-Rest and Final Shaping
Sometime mid-evening take the dough out of the fridge. It will have grown a little bit depending on the temperature of the fridge. This dough is intended to make two loaves so first weigh it out and split it. NOTE: I have the gram weights of my bowls annotated on their underside using a Sharpie. This allows me to weigh the bowl with the dough inside and, by subtracting the gram weight of the bowl, have the the total gram weight of the dough. Dividing by 2 tells me what weight I need to create loaves that are equal in weight.
Dividing the Dough / Pre-Shaping and Bench Rest: Weigh and divide the dough into two loaves. Shape it into rounds on the counter top using a bench scraper and your hands. Cover with the moist towel for about an hour and let the dough come up in temperature and relax.
Final Shaping and Transferring to Bannetons: After the dough has had a chance to warm and relax do the final shaping of the dough. Transfer your shaped loaves to a well-floured banneton seam-side facing up. Place your bannetons back in the fridge. Cover them with the moist towel to prevent a skin from forming on the underside of the loaves. Leave in the fridge for 12 hours or so. More to come in a later post on how to shape your loaves.
Day 4 – Bake the Bread!
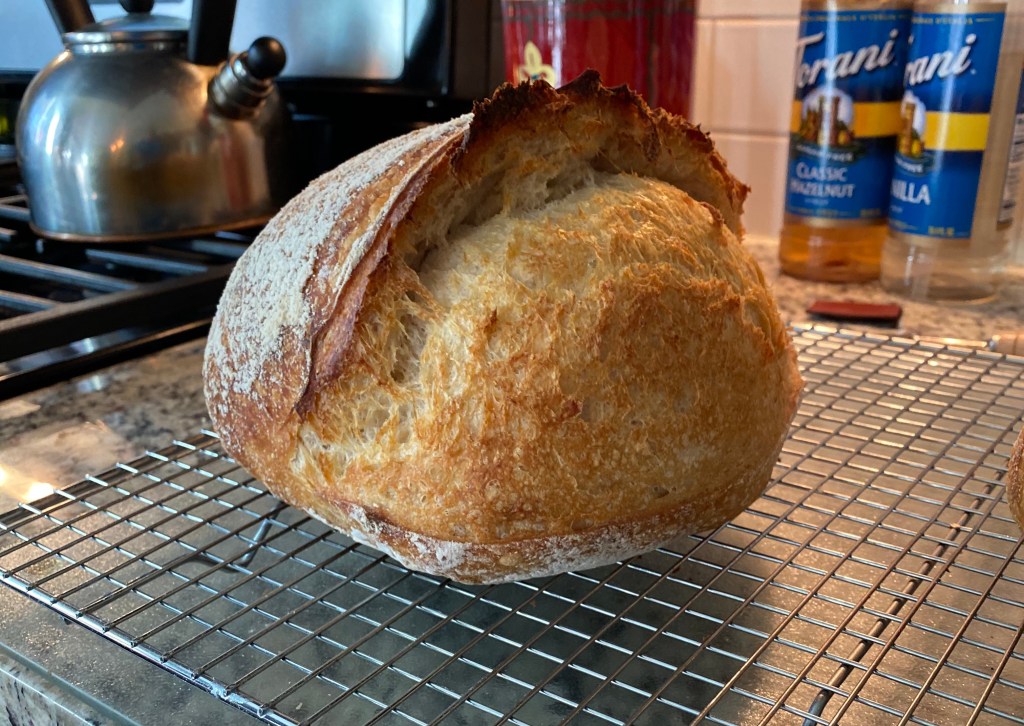
After 12 hours in the fridge the loaves should be ready to bake. An hour or so prior to baking place your Dutch ovens into the oven to preheat at 420oF Convection (around 445oF Conventional). Once the ovens are preheated, remove the loaves from the fridge. Turn out each onto a piece of parchment paper, score with a lame or serrated knife and carefully place into the Dutch Ovens so as not to burn yourself. Cover and return the heated Dutch Ovens to the oven to bake for 35 minutes lids covered. After 35 minutes remove the lids and bake uncovered for an additional 5-10 minutes to your preferred level of crust darkness. Once complete, remove your baked loaves and allow to fully cool on a rack. Internal temperature of your loaves should be >200oF and tapping on the bottom should be “hollow” sounding. If you listen closely you should hear the crust “talking to you” as it crackles while it cools. Enjoy!
NOTE: Before using the remove from the Dutch Oven method I was finding that my loaves were darker on the bottom than I preferred. I’ve now started removing the loaves from the Dutch Ovens once the lid-on baking has completed. I put them on a cold, heavy pizza stone to complete the bake (removing the hot Dutch Ovens at the same time). My heavy pizza stone insulates the very bottom of the loaf and keeps it from getting too dark. I have yet to have this stone crack from putting in the heated oven while cold over the past 6 months.
